Hinterlands: Crossroads

Editor’s note: This is a guest post by rinkworks, originally posted on the forum.

Dominion: Hinterlands

Dominion: Hinterlands

Crossroads is a very interesting, unique card.  Multiples can serve as both halves of a +Actions/+Cards engine, a strange feat accomplished by no other card save Nobles.  But Crossroads is dramatically cheaper than Nobles and therefore much easier to accumulate.  It also has a much better upside:  +3 Actions and unbounded drawing power!  Compensating for these relative strengths, however, is the tricky coordination required to activate them.

To analyze this card properly, I think it’s important to look at two different cases separately.  These cases are (1) when victory cards in hand are always “dead” cards until the end of the game; and (2) when it helps to have victory cards in your hand.  The reason I want to separate these cases is that the mechanics of the card are much easier to understand on an intuitive level if we consider the simple first case first.

When Victory Cards In Hand Are Dead

First, let’s imagine a deck with no victory cards whatsoever.  You’ve trashed your starting Estates and not gained any other victory cards.  What does a Crossroads do for your deck?   Obviously in this case, all you’ll ever get from a Crossroads is +3 Actions.  And if multiple Crossroads collide, you don’t get anything from the duplicates.  How good is a one-time +3 Actions?  I would argue that it’s not very good.  In a 5-card hand, the +3 Actions are only fully useful if 3 of your other 4 cards are terminal actions, or if you have drawing terminals that will pull in other terminals.

Thing is, it’s really tough to use this Village-type effect without also having drawing power.  If you’ve ever tried to build a +Actions/+Cards engine with University, Nobles, Shanty Town, or Native Village, you know how much that +1 Card on the vanilla Village really helps.  Sometimes the lack of draw on Fishing Village even hurts sometimes.  If the draw component of a +Actions/+Cards engine is lacking, getting an extra extra action from Crossroads still leaves you with a draw problem.

Additionally, since Crossroads cards don’t stack, you won’t want to get too many, for fear they’ll collide.  And if you can’t get too many, that means you shouldn’t be buying lots of terminals, and if you’re not buying lots of terminals, you’re probably not going to use the +3 Actions you get.  It’s a vicious circle.

But everything I’ve said so far is probably obvious:  the real power of Crossroads is when you get some drawing power out of it.   So let’s consider the effect of a single Crossroads card in a deck with some percentage of victory cards.

Let’s say your deck consists of 50% victory cards.  Given such a deck, a hand of Crossroads-X-X-Estate-Estate is probably quite likely.   Now we play the Crossroads, which gives us +2 Cards and +3 Actions.  That’s pretty spectacular!  It’s basically the equivalent of a Laboratory and two Villages.  Staggering.   Now, what do we draw?  Remember that our deck consists of 50% victory cards, so if we draw two cards, the average case is that we’ll draw one Victory card and one X.  Now our hand is this:  X-X-X-Estate-Estate-Estate.

But hang on.  Isn’t this an even worse outcome than our earlier example of a deck with no victory cards?  Remember, we’re operating under the assumption that Victory cards in hand are always dead to us, so the useful part of our hand is now X-X-X.  But in the earlier example, we had X-X-X-X after playing the Crossroads.

This is the Crossroads paradox:  you need Victory cards to activate Crossroads, but having Victory cards in your deck weakens your deck more than a single Crossroads strengthens it.  See, the thing is, even in the best case, a single Crossroads only gets you to the point you’d have been if you hadn’t had any Victory cards in your deck at all.  Say your perfect shuffle luck got you a hand consisting of Crossroads-Estate-Estate-Estate-Estate.  You play the Crossroads, and let’s say you draw four non-Victory cards.  Now your hand consists of Estate-Estate-Estate-Estate-X-X-X-X.  Since we’re assuming all Victory cards are dead cards, the useful part of your hand is only X-X-X-X, which is exactly what it would have been if you hadn’t had any Victory cards in your deck in the first place!

So maybe the solution to this paradox is to accrue multiple Crossroads.  Let’s say our hand is Crossroads-Crossroads-X-Estate-Estate, again from a deck of 50% Victory cards.  Playing the first Crossroads gives us 2 cards, 1 Estate and 1 X.  Now our hand is Crossroads-X-X-Estate-Estate-Estate.  Now play the second Crossroads.  Let’s be charitable and assume we draw 2 X’s and 1 Estate.  Our hand now is X-X-X-X-Estate-Estate-Estate-Estate.  Well, we drew a lot of cards, but we still only got up to 4 X’s, no better than having a single Crossroads in hand from a deck with no Victory cards.  Worse, we lost one of our +3 Actions playing the second Crossroads.

Obviously when you have such a deck, some hands will play out better than this, and some worse.  But this is not a spectacular average case.  Moreover, although increasing the number of Victory cards in your deck will further empower these Crossroads cards, that increase will also space out your Crossroads cards more, making them less likely to collide.

Ultimately, Crossroads doesn’t seem very good, does it?  Except as an end-game accelerator:  buying a mid-late game Crossroads might allow us to start greening earlier without clogging as badly.   But that’s a pretty narrow application for a card that seems like it should have better potential.

But to understand the situations where it shines, let’s take a brief second look at what it actually did for us in the above examples:

  • The first Crossroads provides us the +Actions component of an engine, but it doesn’t really provide +Cards so much as a pseudo-Cellar effect.  As observed, even in the best case, the first Crossroads can’t get us more useful cards in hand than we might have gotten with perfect shuffle luck.  And having the Crossroads in hand still uses up a card slot.  So, again, the first Crossroads is really more like a Cellar with extra actions than something like a Level 2 City, which provides both +Actions and +Cards free and clear.
  • Successive Crossroads cards provide terminal drawing power, like Moat or Smithy.  They use up an action to play, but now it’s possible to accrue more useful cards in your hand than you started with.  However, the drawing power of these extra Crossroads cards is somewhat determined by how diluted your deck is.  So even if you get a staggering +4 Cards out of a Crossroads, the fact that you can get +4 Cards probably means the cards you draw won’t all be useful ones.

Now, certainly there are combo possibilities.  If you can play a Scout before playing Crossroads, not only will Scout increase the drawing power of your Crossroads, but it will increase the quality of the cards you draw with the Crossroads, which is pretty cool.  But in the absence of synergy with other action cards, Crossroads is probably pretty bad most of the time.

Unless….

When Victory Cards In Hand Are Useful

First, when might Victory cards in hand be useful?

  • When you have discard-for-benefit actions.  These include Hamlet, Vault, Secret Chamber, Baron, and Tournament.  Having Victory cards in hand means you can discard these for some benefit, rather than having to discard a more useful card for those benefits.
  • When you have mandatory discard actions.  These include Horse Traders, Young Witch, Warehouse, Embassy, and Inn.  These cards require you to discard something as compensation for receiving their other benefits.  If you have Victory cards in hand, you can discard those instead of more useful cards.
  • When you have trash-for-benefit actions.  These include the Remodel family, Apprentice, Bishop, Salvager, and Trader.  Assuming you might want to feed any of your Victory cards to these, Crossroads can help you draw these with those Victory cards.
  • When you have hybrid Victory cards.  This is the obvious and strongest situation.

The first three cases here are very situational.  They only apply when such cards are in your deck, and the benefit you get from comboing them with Crossroads may or may not actually be worth the trouble to try to do so.

But the last case can be overwhelmingly strong.  Crossroads turn all your Great Halls into Laboratories, basically, because when you play Crossroads, you draw a card for each one, then draw another when you play each Great Hall itself.  Having multiple Crossroads compounds that benefit even further.

With Nobles, Crossroads does better than drawing an extra card per Nobles:  it also allows more of those Nobles to be played for +Cards rather than merely for +Actions, which is huge.

With Harem, Crossroads turns each one into an activated Conspirator, sort of, because you get +$2 from the Harem and also get an additional card in your hand for it.

It’s less effective with Island, however, because the best way to use Island is to get it out of your deck as soon as possible, but it may still help you pair up your Islands with good Island targets.

The bottom line is that Crossroads with hybrid Victory cards is probably a no-brainer.  Otherwise, Crossroads is probably a bad bet unless there is a specific combo possibility, OR you have a spare $2 buy after you’ve started greening but before you want to start buying Estates.

Works With:

  • Hybrid Victory cards.
  • Discard-for-benefit cards, including Baron and Tournament.
  • Mandatory discard cards.
  • Trash-for-benefit cards if your Victory cards are good targets for them.
  • Scout.
  • Silk Road (only insofar as it makes accumulating a density of Victory cards more attractive).

Conflicts With:

  • Lack of the above.
  • Availability of less finicky alternatives for +Actions, +Cards, and/or Cellar-like sifting.
Posted in Hinterlands | Tagged | 22 Comments

Guest Article: Comparing the Villages

Editor’s note: This is a guest post by chwhite, taken from the forum thread of the same name. See also Building a +Actions/+Cards Engine.

Here is a list of the Villages, which I’ve grouped into several tiers and attempted to rank:

Tier 1

Fishing Village

Dominion: Seaside

Fishing Village

The obvious best Village; I think it’s safe to say everyone agrees with this one. It’s just such a good value! $1 this turn and next makes it almost as good at giving cash as Silver, and then it gives you two extra actions to boot, which is more than any other card in the game! To give you a sense of just how good it is for its price, take a look at Caravan, which is supposed to be one of the best $4s. Caravan is nothing the turn you play it, and a Lab the next turn. Fishing Village is +$1, +Action, -Card this turn and (as Rinkworks pointed out) a Bazaar the next- and it’s cheaper! Basically, if you’re buying terminals at all (and not going Bank), there’s virtually no reason to buy Silver ahead of this, ever. The one supposed downside to FV is the lack of +Card the turn you play it, which it shares with Festival and University. So Library/Watchtower/Menagerie become more powerful, and +Card in general is necessary for chaining. It’s better than Festival and University in the absence of those enablers, though, because a) it’s cheap and b) the Duration effect mitigates that downside. Another big point in Fishing Village’s favor, one which it only shares with the powerful but expensive Bazaar and Festival, is that it gives cash along with actions, which allows you the crucial ability to bake buying power into your engine, and not muck around as much with inert Treasure cards. This is actually really important when setting up many engines, and FV does it for two less than its competition.

Hamlet

Dominion: Cornucopia

Hamlet

Hamlet and FV are the two Villages which deserve spots on the Top 5 lists (well, maybe NV does just because there are so few $2s); Hamlet is probably the second-best $2. The key to Hamlet’s power is its extreme flexibility and cheapness. It’s not great in trimmed decks where discarding is painful, but usually you can dump your Coppers and Estates easily to get the effects you need, and there’s virtually never a downside to having more Hamlets. And it works wonders with Library/Watchtower/Menagerie, like many of the Villages here in fact.

Tier 2

Like Tier 1, Tier 2 cards are excellent engine cards and are worth buying in most situations. But while the Tier 1 cards are cheap enough to basically always be worth buying even when their effects aren’t super crucial, the three Tier 2 cards are expensive- they’re all $5, and they have to fight against other $5 cards to get bought. So they don’t make any Best Of lists. But they’re usually good to have around, and their power is hard to ignore.

Bazaar

Dominion: Seaside

Bazaar / Festival

I’ve explained why I like Bazaar so much in the post that inspired this thread. Bazaar is probably the best Village for when +Card is scarce, and/or when you have sources of +Buy. Festival (which is my favorite card in the game) is its mirror image: it desperately needs good +Card in order to be anything more than a super-Woodcutter, but it is the best Village at giving +Coin and +Buy. Obviously the Library/Watchtower/Menagerie trio is great, but Festivals play particularly well with Minion and Tactician as well. In Festival/Minion games, I love to spend my first $5 on a Festival, to take advantage of the Buy as fast as I can. This will often pay off in double Minion turns down the line, or lots of extra Lighthouses, or whatnot.


Festival

Dominion

I think Festivals can work as an engine with +3 Card effects, despite the lack of Card- basically, think of them as Worker’s Villages that always draw Silver, not bad. But if there’s no +3 Card, or there’s lots of other Buy, Bazaar is the right choice.

If pressed, I would probably rank Bazaar a hair above Festival, but really it’s too close to call. Bazaar is good in a wider variety of situations, but Festival is more powerful when it’s good, and is at least somewhat useful most of the time as well. In games with both Bazaar and Festival, and not with specific Festival-bait cards, I think the right answer is to buy one or two Festivals (for the Buy and cash) and Bazaars the rest of the way (for the Card).

City

City

Dominion: Prosperity

Unlike Bazaar (always good to have, rarely spectacular), Cities are often quite bad to have, but when they’re good they’re so good. In games where piles are liable to run out, Cities are incredibly strong- having a stack of Level 2 Cities is about as good a deck full of frickin’ Trusty Steeds; in games where the first pile likely to run out is the Provinces, the City trap will just kill you. The best situation for Cities are setups that allow you to gain them while still boosting your buying power (University, Horn of Plenty), or Curse games. Games with spammable stacks are good too. Games with good enablers for fast Big Money strategies (say Vault, Hoard, Masquerade) are good reason to avoid Cities entirely.I am generally much more wary of using Cities to enable most engines than I am of using Bazaars or even plain Villages. However, in setups where piles are likely to run out with a decent amount of game left, the Cities become engines themselves.

Tier 3

There isn’t really any unifying theme to the Tier 3 cards. Most of them fall into the “sorta like vanilla Village but a little better” category, but there’s one exception, a card that’s sometimes much better and sometimes much worse.

Farming Village

Dominion: Cornucopia

Farming Village

Probably the best Village-plus, IMO, since it’s guaranteed to draw a useful card. It’s best in situations where your deck has a lot of junk to sift through, and/or when you can get rid of those Coppers. An incredible (and incredibly obvious) counter to Rabble. Definitely one of the better combo-enablers, especially when paired with weaker +Card effects.


Mining Village

Dominion: Intrigue

Mining Village

Mining Village is the best Village to have when you don’t need Villages, and one of the worst to have when you do need them. The true power of Mining Village is not that it efficiently enables action chains (it’s one of the worst Villages for that), but that you can open with it and trash it quick for a Turn 3 Gold. It’ll chain if it has to (and if it does, its endgame potential for “cashing in” can’t be ignored), but the reason it’s this high is that it’s one of the very few Villages worth buying even if you don’t want to chain actions.


University

University

Dominion: Alchemy

This is obviously the one Tier 3 card which isn’t just a Village-plus. Rather, it’s a Festival variant which is potentially much more powerful but at the expense of being harder to get and somewhat inflexible. Similar upside (great w/Library/Watchtower; get lotsa good cards) and similar downside (lack of +Card can hurt). Worth grabbing a few if there are Minions or Torturers or Cities to rush, but it forces you to open Potion and it’s far less useful than Festival once it’s time to go green. Much like City (for which it is one of the best enablers), its upside is tremendous but it gets docked a few ranks due to the fact it is often just an expensive distraction.


Worker’s Village

Worker's Village

Dominion: Prosperity

Is the extra $1 worth just adding a +Buy? Usually. You often will buy a regular Village for $4, and +Buy is important to most engine decks. That’s the big reason I rank Festival so highly. But Worker’s Village is kinda low-ish because it’s actually a fairly poor source of +Buy. Festival gives you guaranteed money to spend on said Buy; WV merely replaces itself and adds an Action and Buy to the queue. (Of course, there are setups where the +Card is better than +2 Coin, but not usually IMO.) It’s excellent for enabling Peddlers, Conspirators, and other cheap cantrips, but unlike the Villages above it, it is merely an enabler.

Tier 4

This is the lowest tier of Villages. I thought about making a Tier 5, but the fact is that none of the Villages we’ve seen so far are actually bad cards; there are no Villages I’d put on any “worst of” lists, not even Walled Village. But these are the worst of the bunch, as they tend to provide few or uncertain benefits beyond their Village effect. If you don’t have a specific engine in mind, these cards are usually skippable.

Village

Dominion

Village

Wheeee. The original! There aren’t many situations where plain Village is the best one for the particular engine, but it’s cheaper than the more expensive variants and sometimes you don’t need their bonuses. Vanilla Village is still an important card, Village Idiots notwithstanding.


Native Village

Native Village

Dominion: Seaside

When I first saw NV, I thought it sucked. Then I realized you could buy a bunch and save up for mega-turns, and I started buying NV all the time. But it’s fallen in my estimation a lot recently, and now I think it doesn’t just “look worse” than Village, but usually it is worse. If you don’t have a lot of NVs, the mat becomes risky; if you have to draw it when there’s only one or two cards on there, or it makes you stow away one of your good cards before you wanted to draw the mat, the NV is providing serious card *dis*advantage. You need to mass buy them for NV to be effective, and there’s a lot of opportunity cost in that.

NV is very strong for certain megaturn strategies, of course. But if you don’t have a specific plan for it, don’t buy it. There are so few $2 cards that I might actually consider it a top 5 $2 card despite its low rank, but I think I agree with guided that it belongs at #6.

Walled Village

Dominion: Promotional

Walled Village

Not the worst! But close to it. WV’s benefit is usually not worth the extra $1- in particular, it plays very poorly with cantrips; it requires a deck that needs *terminals* to actually be worth it. It’s theoretically nice with cards that trash themselves (Island, Embargo, etc.) but I think WV’s best use is with Torturer- it lets you buy fewer villages than would usually be necessary to get the first double-Torturer hit, in fact one is sufficient for much longer than would normally be necessary. In general WV is good in decks with a few strong terminals, and weak in longer chains.


Shanty Town

Shanty Town

Dominion: Intrigue

Bringing up the rear, Shanty Town is the closest a Village comes to deserving a spot on any Worst list, though I don’t think even Shanty Town would quite fit. The problem is that Shanty Town is uniquely horrible at building many engines: if you have Actions, it doesn’t give you Card, and if it gives you Card, that means you’re unlikely to use both Actions. And it is the worst card to rely on multiples of: extreme case, compare a hand of five Shanty Towns to a hand of five Villages. This is not to say Shanty Town is useless! One or two Shanty Towns can often be a good buy early in an Action-light deck, to use as a pseudo-Lab. And it plays well with non-terminals: clear out the non-terminals, and play Shanty Town to draw two. But it is pretty much the worst Village if you have to buy multiples, and it is also the worst Village at enabling the play of multiple terminals, which is the whole point of villages after all.

Posted in Guest Articles, Rankings | 38 Comments

Guest Article: Planning and Playing a New Strategy

This is a guest article by WanderingWinder.

Duke, Ghost Ship, Horn of Plenty, Horse Traders, King’s Court,
Moneylender, Royal Seal, Smithy, Walled Village, and Wishing Well

Cards on Dominion Deck (except Village should be Walled Village)

Think about what you’d do with this set for a while. While you’re thinking I’m going to discuss a little bit about the game in general. One thing you always want to have in playing a dominion game is a game plan. Sometimes your plan will be good, other times it won’t, but in general, the player with a plan will almost always beat the player without a plan who’s just buying cards, even if they’re good cards. This is because one of the defining, great things about dominion is how the relative values of cards really change in value depending on the board or even the game situation. Sea Hag is great as an opener, but by the time there’s only one curse left, it’s really not worth it. Gardens is great with ironworks, weak against bishop or on a board with no gainers. Even colonies are bad on a board with a great Goons engine.

So with the importance of game-planning, one of the big questions becomes how to find the best gameplan for the board (the other big questions deal with watching how your deck and opponents are progressing relative to the board). There are basically two types of gameplans here. You can play one you’ve played before – Envoy/money, Workshop/Gardens, Minion/conspirator/Grand Market/Warehouse ball, etc. You can play one you come up with for the first time on that board. Really you should always do the second option, but your knowledge of more and more decks of the first kind, your experience, will help to inform this process.

With this in mind, let’s look at how I looked at this board. It looked like a pretty weak board to me. King’s Court doesn’t have any great targets. Moneylender can speed the deck up some. Smithy/money looks pretty decent. Horn of Plenty, Horse Traders, Walled Village, and Wishing Well are all pretty slow. Ghost Ship IS a strong attack, but Horse Traders is a quite good counter to it. So option one is Smithy/Money. Option two is GS/Money. But that would lead to option three – HT/Money. Moneylender would fit well with either of these last two options, but not so well in the Smithy deck. However, Smithy is going to be much faster than the Horse Traders deck. Does this lead to some kind of Rock/Paper/Scissors? Then I saw another possibility, probably because I’d just done some analysis of the Horse Traders opening, showing how it leads to $5 with very high frequency. My idea was to use Horse Traders to fuel a duchy/duke strategy.

As it turns out, Horse Traders is one of the very few best enablers of Duchy/Duke, but this game really was what brought the idea to the forefront in my mind, and I think to many of the people on the forums itself. I know theory is planning on writing an article onDuke, so I won’t spoil this too much, but let’s just say it’s more viable than a lot of people think, and with a good enabler, it’s extremely viable.

So let’s see how it turned out. The game log is (spoiler alert!) here. My opponent was a consistently top 10 player, Blooki (aka Triceratops). I knew that I would need to play well to keep up with him, though I was happy that on this board, his first turn advantage would be pretty minimal. Annotations appear in my version of theory’s reduced game notation.

Blooki WanderingWinder
1 3 -> Silver 4 -> Horse Traders (hereafter referred to
as HT)
2 4 -> Moneylender (reshuffle) 3 -> Silver (reshuffle)

Okay, at this point, we can already see that we’re going for different strategies. I read Blooki as going for a more conventional Money to province strategy here, and I had little to no idea as to how the two would match up. Game on!

3 4 -> Walled Village 6-> Duchy (!)

I have to stop here and say that this was a day or two after Walled Village (hereafter WV) was out on Isotropic. I’d already labelled it in my mind as the second or third worst $4 and knew it was going to be pretty darn terrible here. But Blooki likely had “Oooh, shiny” syndrome/wanted to try it out. On my end, I’m really not sure if this was the best thing, or whether it would have been better to buy a gold or second Horse Traders. However, I think this was eminently reasonable and probably best.

4 Moneylender,6-> Gold, (reshuffle) HT, 5 -> Duchy (reshuffle)
5 Moneylender,6-> Duchy HT, 5 -> Duchy
6 WV,4 -> HT (return WV) (reshuffle) 4 -> HT (reshuffle)
7 WV, Monelyender, 8-> Duchy (return WV) 4 -> Silver

Okay, a couple more interesting notes. One is that Blooki slowed down to buy Duchies. I think this was probably not the right decision here, though it’s a tough call. Blocking your opponents’ duchies is a big part of a lot of strategies against duke, but you also have to watch out – they can probably deal with the extra green better than you can, and that’s certainly the case here with Horse Traders. For my part, I probably should have picked up coppers with my extra buys and gotten a third horse traders instead of that last silver. On the other side, Walled Village’s drain can really be seen. Blooki plays it every turn for the rest of the game, always returning it to the top of the deck (I will cease to mention it in my report)- it never does anything for him. So basically, silver would probably have been a good bit better, though it would have lessened moneylender’s effectiveness a little bit.

8 3-> Silver (reshuffle) HT,4 -> HT
9 HT, 6-> Duchy 4 -> Silver (reshuffle)
10 6-> Duchy HT, 5 -> Duchy

This is the last Duchy. Somewhat surprisingly, an even duchy split. However, if you look at the rest of our decks, you’ll see that I’ve got three Horse Traders. He has one. He has a gold, but I have one more silver than him. And also I have three more copper (and he has a moneylender). This is good for me. What? This is good for me. Our decks are full of green, and my target is $5, so coppers are actually good cards, and Horse traders are great – I have a massive advantage already, though the game isn’t over. Also note that the HT help me grab extra coppers and estates, and those estates will be crucial for getting me a few extra VP and, more importantly, ending the game quickly.

11 (reshuffle) Moneylender, 3-> Silver 3-> Silver
12 HT, 5 -> Duke HT, 7-> Duke, Estate (reshuffle)
13 8-> Province</span (reshuffle)

5 -> Duke
14 3-> Silver HT, 7-> Duke, Estate
15 3-> Silver 0-> Copper
16 Moneylender, 5 -> Duke (reshuffle) HT, 6-> Duke, Copper (reshuffle)
17 Moneylender,8-> Province</span HT, 6-> Duke, Copper
18 3-> Silver HT, 5 -> Duke, Copper
19 4 -> Smithy 3-> Estate
20 HT, 5 -> Ghost Ship (reshuffle) HT, 5 -> Estate x 2
21 4 -> HT 3-> Estate (reshuffle)
22 HT, 6-> Gold 4 -> Estate
23 Moneylender
(no copper), 2 -> Estate

And I win, 46-36. Blooki has a 2-0 Province advantage, but I have a 6-2 Duke advantage (with 4 duchies each) and a 10-4 estate advantage. Probably if he would have detoured less for duchies, he would have had a better chance, though if I would have optimized my strategy, it would have sped up commensurately. It turns out that my strategy was a pretty good one, though obviously not a totally dominant one. We can also see that I refined my own strategy a bit as the game went on – buying more horse traders and especially coppers are important for my strategy. One of the great things about the HT/Duchy strategy is that it’s difficult to disrupt – Horse Traders’ reaction-ness really helps out against many attacks. Cursers are often still strong enough, though, and you have to watch out for really quick acceleration. Furthermore, like most duke strategies, its much weaker against colonies, though Horse Traders at least give the option, with the possibility of a quick three pile.

This game added HT/Duke to my bag of tricks, mostly 2-3 card combos I watch out for on every board. As I said at the top, this helps me check the board out when I’m planning at the beginning. Learning this pattern will help you too, but IMO some of the most important (and certainly fun) skills of strong dominion play is to be able to find and evaluate these kinds of things for the first time. This comes up most often when new cards come into being, but it can come any time, especially with more complicated combos, as there are just so many different combinations which exist.

As always, post comments on the comment section of the blog and discuss in the forums. I will try to get back to you as quickly and thoughtfully as I can.

Posted in Uncategorized | 45 Comments

Hiatus II

This blog is going on one more extended hiatus.  In the immediate future is the New York Bar Examination; I’ve attempted to juggle Dominion and bar prep, but the demands of the New York Bar are both medieval and unrelenting.

The bar exam takes place in late July.  Immediately afterwards, I’ll be attending World Boardgaming Championships in Lancaster, PA, a great event that I urge others to attend as well.  And soon after that, I am getting married to a wonderful woman (rrenaud’s sister!) and embarking on a Hawaii honeymoon.  (Somewhat surprisingly, our wedding will not take place in a Chapel.)

So although we’ll occasionally post guest articles and analysis (most likely drawn from our forum), regular updates will be suspended for the next eight weeks, until mid-September. In the meantime, the forum is developing into a bustling community; it’s a great strategic resource, especially if you want someone to critique your game.  And there’s something else to look forward to as well: around the return of the blog should be the release of the next Dominion expansion …

Posted in Uncategorized | 26 Comments

The Five Best $6+ Cards

Disclaimer: Dominion does a really great job of balancing its Kingdom cards. Pretty much every card has some situations where it shines, and some situations where it doesn’t. Nevertheless, some cards just end up being flat-out better than others, either because they are more useful more often, or just ridiculously good when they are useful. Don’t expect this list to be very scientific.

Harem

Dominion: Intrigue

Honorable Mention: Harem

In many ways Harem is similar to Nobles, but Harem is on this list and Nobles on the Worst list because it doesn’t really need any additional support to make it worthwhile.  Without support, Harem is much better than Nobles even if you’re using the Nobles for the +3 Cards: unless you have +Actions, or you’re running a pure Big Money deck, Smithies are generally worse than Silvers!

At the same time, Harem benefits just as much from support as Nobles does: it stacks wonderfully with Hoard and is a great Mint and Mine target.

As noted before, you should start taking Harem over Gold around when you would start taking Province over Gold. It’s a little weaker against attacks than Gold, but especially in games without +Buy and good draw, the coin difference doesn’t make much difference, and the 2VP adds up to quite a bit.

Peddler

Dominion: Prosperity

5. Peddler

This is a bit of a cheat, since you would rarely actually buy Peddler at $6 or more.  And it loses serious points in games without any +Buy, since you’ll rarely want to buy this with $8 in hand, even if it’s free.  It might be useful in very-low-money no-Buy Curse-infested games, where you might actually play two or three Actions but not hit $5-6, but otherwise Peddler is usually not worth spending your whole Buy on.

But it’s a glorious card when you’ve actually got the +Buy: traditional Market-type decks depend on density, and so the usual way to make it work was to trash everything that wasn’t a Market.  Peddler works the opposite way: achieving density by filling you up with so many Peddlers at once that it doesn’t matter that you have junk in your deck.  (Conditioned, of course, on you having enough +Buy to make it worthwhile.)

The real reason Peddler is such an all-star, though, is how it interacts with all the cost-based Actions.  Remake them into Platina, two at a time; Salvage them for +$8; Bishop them for 4VP; Apprentice them for +1 Action and +8 cards.  They’re even great defenses against Swindlers, since if the Peddlers are exhausted your opponent will hesitate to play Swindlers for fear of converting your Peddlers into Provinces.

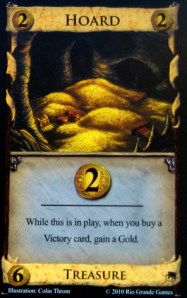
Hoard

Dominion: Prosperity

4. Hoard

On the worst list, yes, but Hoard is also on the best list, primarily because it’s such a strong card in Province games that you can’t ignore it.  It’s one of those rare almost-must-buy cards even without its support: in a vanilla Province game, you can get all the Golds you need just from Hoard.  By the time you should stop buying Hoards with $6, you should probably be buying Duchies instead.

Plus, it has all sorts of hidden synergies that you might not immediately expect.  Salvager / Hoard is a great way to deal with the Duchies and Estates you accumulate with Hoard, and gives you the +Buy to extract maximum benefit out of the Hoard; Apprentice lets you use your Duchies for the +Cards needed to draw all your Golds; even the lowly Trade Route synergizes with Hoard, since all those Victory card buys free up Trade Route tokens and send it to +$3.

And I haven’t even mentioned its delicious interaction with Kingdom Victory cards.

Goons

Dominion: Prosperity

3. Goons

Goons needs no introduction.  Its appeal is immediate and obvious: no one really forgets that first game they got crushed by Goons.  Before Goons, it was inconceivable to score over 60 or so in a 2-player game; but with a big Goons stack, scoring hundreds of points is almost trivial.  Because you’re not interested in buying green cards, there’s simply no way that someone rushing for Provinces or Colonies can beat your Goons stack, since every purchase they make slows their engine, while every purchase you make only further accelerates your engine.

But Goons falls to #3 on this list because it is heavily dependent on a supporting engine.  Big Money + Goons is hardly any better than Big Money + Militia; in order to really deploy the Goons stack, you need enough +Actions to play all your Goons, you need +Cards to draw all your Goons, and you need to be able to do this consistently on a 3-card hand because your opponent will probably be Gooning you just as much.

With the right setup, Goons is an unstoppable juggernaut.  Without that support, Goons is a nice kicker at best.

Grand Market

Dominion: Prosperity

2. Grand Market

The mark of a good Kingdom card is when you’d take it over Gold.  The mark of a truly obscene Kingdom card is when you’d seriously consider taking it over Platinum. Grand Market falls into the latter category: the +$2 instead of Market’s +$1 is an insane boost over Market.  It makes it even easier to get more Grand Markets, and it makes it probably the single best target for a Throne Room or King’s Court, since Grand Market literally gives you everything: Actions, Cards, Coin, and Buys.

Grand Market just edges ahead of Goons because it’s a worthy addition to every deck, even if it can’t score quite as obscenely.  Grand Market doesn’t need any support: it’s just a free +$2 and buy on every turn.  No deck is ever hurt by the addition of a few Grand Markets: it is one of the few exceptions to the general rule that you should avoid delaying Province or Colony buys for Kingdom cards. I am happy to go second in the Colony race if it means I get an extra two Grand Markets in my deck.

King's Court

Dominion: Prosperity

1. King’s Court

Raise your hand if you accurately predicted that the difference between Throne Room and King’s Court would be this staggering.  Then put it back down, because you didn’t.  In playtesting, the card was originally priced at $5, which might have seemed intuitive at the time but in retrospect “did not turn out to be [a] good guess[]“.

Throne Room makes for merely cute plays; King’s Court leads to truly obscene plays.  You can make your Coppers worth $10 each; you can grind your opponent down to a 0-card deck every turn. The fact that King’s Court works so much better on itself than Throne Room does is the icing on the cake; there’s nothing quite as thrilling (or ominous, or groan-inducing, depending on your viewpoint) as watching someone announce a King’s Court on another King’s Court. Virtually every single ridiculously lopsided game in Dominion involves this card in one way or another.  Much as Menagerie is a defining card of Cornucopia, so too is King’s Court the defining card of Prosperity.

Posted in Rankings | 47 Comments

The Five Worst $6+ Cards

Disclaimer: Dominion does a really great job of balancing its Kingdom cards. Pretty much every card has some situations where it shines, and some situations where it doesn’t. Nevertheless, some cards just end up being flat-out better than others, either because they are more useful more often, or just ridiculously good when they are useful. Don’t expect this list to be very scientific.

This is a strange category, since it’s really hard to call any of the $6+ cards “bad”.  Even the worst are only situational, and none are as situational as the worst $5 cards.  On the other hand, that just makes the disparity between these and the truly dominant $6+ cards all the more staggering.

Hoard

Dominion: Prosperity

5. Hoard

This is ordinarily a great $6 buy, since in Province games you can get all the Gold you need just from Hoard.  But its problem is twofold:

1) If you can’t get through your deck, then you’re essentially getting $1.5 per card.  Unless the Victory cards you’re buying are making a meaningful difference on the score, you’re building a deck whose buying power is even worse than pure Silver.  This is especially problematic in Colony games, where without a card like Warehouse or Salvager, you’re probably better off using Gold to directly jump to Platinum.

2) If you’re running a complex Action chain, the Golds and Victory cards are going to gum up your engine and make it difficult for you to draw all the components together.  This is why Hoard works much better with Harem than with Nobles.

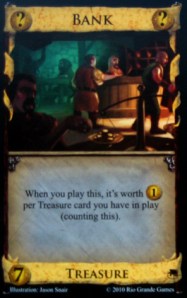
Bank

Dominion: Prosperity

4. Bank

True, Bank is usually worth as much a Gold, and often much more.  But without +Buy, you almost never really need that much cash, making it a needless risk when Golds are perfectly adequate.  They’re especially comical in Province games, where you’ll see someone play them for +$6, having $20 in total, and buying a single Province, and then playing them for +$2 the next turn to buy an Estate.

Of course, like all $7 cards in Province games, if you actually draw $7 in the mid-to-late game, you’re likely to punch a hole in something, what with the $8 card being so much more important.  That’s what you get for taking Fishing Village instead of Silver.

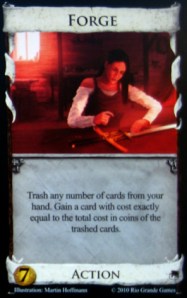
Forge

Dominion: Prosperity

3. Forge

Forge is the best all-around trasher in the game, since it’s basically a Chapel with benefits.  The problem is that it tends to come too late.  Chapel is as powerful as it is because you’re guaranteed to be able to get it on Turn 1; Forge usually won’t come into your deck until you’ve already got an engine set up.  You can’t really rely on it as a trasher in the same way as any of the $3’s or $4’s, and worse yet, it depends heavily on drawing the right trashable cards.  Against multiplayer Militias, for instance, Forge can barely get off the ground.

It’s a nice midgame trasher if there’s no other way to trash, but it’s so slow that unless you’re drawing large hands and/or good combinations of cards to trash, it’s often outrun by someone who spent their $7’s on King’s Courts instead.

Forge gets some bonus demerits for the analysis paralysis it induces, since calculating optimal trashing is technically an NP-complete problem.

Nobles

Dominion: Intrigue

2. Nobles

Nobles is probably one of the most overrated cards in the game.  Building an +Actions/+Cards chain with just Nobles is an exercise in futility, since two such Nobles only works out to a single Laboratory.  It’s a nice supplement on top of a pre-existing +Actions/+Cards engine, where Nobles can substitute for Smithies rather than for Villages, but without any support, the Nobles will usually just end up as dead cards.  Even a Great Hall is often superior, since at least it’s useful by itself in a hand.

In Province games, they’re at least important to fight over, since if you’re on the wrong side of a 5-3 Nobles split you need a Duchy + Estate to equalize, but in Colony games they’re just a pretty distraction from Golds and Platinums.

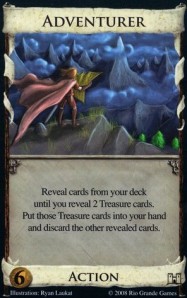
Adventurer

Dominion

1. Adventurer

One of my favorite cards in the game, but it’s been badly outmoded by Venture.  It has a few advantages over Venture, but the fact that it can’t pick up other Adventurers is a huge mark against it by making it an essentially un-spammable card.  Unlike Venture, buying more Adventurers doesn’t actually increase your overall buying power, and unlike Venture, drawing more than one in your hand does you very little good.

Because it draws the Treasures into hand rather than playing them immediately, it has limited combo potential (e.g., Village/Adventurer/Mine), but 90% of the time it’s just not worth it compared to a Venture stack.

Posted in Rankings | 81 Comments

Guest Article: Deck Control

The following article was originally written by shark_bait in the forums.

One very important aspect of Dominion is deck control.  This involves knowing what cards you have in your deck, how many of them are left in your deck and where they located in your deck.

I know exactly what some people are going to be saying right now, so I’ll address it immediately: “The deck is shuffled, how do I know where my cards are?”  I’ll answer by stating the contrapositive.  You know where cards are located in your deck by knowing where they aren’t (i.e., your discard pile).  So following this logic, as you get closer and closer to the reshuffle, you gain more and more control over your deck.  That is, assuming you have been keeping track of your deck.  This leads to my first big bullet point regarding deck control.

Know What Cards are Left in Your Deck

It is important that you always know what cards are in your deck at all times.  One thing that helps me keep track of my deck is by playing meticulously.  When  I play my cards, I make sure that I recognize which cards have been added to the discard pile and which are left in my deck.  If you can’t keep track of them all, then start by taking baby steps.  Have you seen your 5-cost action yet?  Out of your 3 Golds, how many have you played?  Keeping track of your big-ticket cards is the first step to controlling your deck.

Knowing your draw deck composition is important when playing cards that draw other cards.  If there are 5 cards left in your draw pile and you haven’t seen your Mountebank yet, please don’t play your Smithy.  There are two things that are fundamentally wrong by playing that Smithy.  First, you could draw your Mountebank this turn and be unable to play it due having no actions remaining.  The second fundamental flaw leads me to my second big (and very much related) bullet point.

Know When You Reshuffle

The reshuffle is a fundamental (albeit rather annoying when playing with the physical cards) aspect of dominion.  This aspect is displayed most prominantly through the chanceller by giving the option for triggering a reshuffle immediately.  This card provides one of the easiest ways to control your deck and it is important to use it correctly.  To use it correctly you must…. Know What Cards are Left in Your Deck (I told you these two points were related).  This allows you to have the best possible deck control.

There is one other way to trigger a reshuffle and this is what I will focus on.  You trigger a reshuffle by emptying your draw pile.  Manipulating when you reshuffle can be a game changing event if used correctly.  Consider the following two hypothetical hands in which 2 cards are left in the draw pile.

Hand 1 – Smithy, 3X Estate, Copper
Hand 2 – Smithy, 2X Gold, 2X Silver

In hand 1, you most certainly don’t want those Estates and Coppers back in your draw deck (even at the cost of losing your Smithy), so you play the Smithy to trigger the reshuffle before those cards are returned to the discard pile.  In hand 2, you want those cards back in your deck, so you don’t play the Smithy.  (You also don’t need to.)

Let’s look back at the Smithy/Mountebank example.  Let’s assume that you don’t draw your montebank with the smithy.  At the end of your clean up phase, you will draw the Mountebank, your Mountebank will miss the reshuffle because you need to reshuffle in order to draw the final 3 cards of your hand.

In either situation described above, you will play your Mountebank only once as opposed to twice if you chose not to play smithy.  With a card as powerful as Mountebank, playing it one more time could determine the outcome of the game.  In this case, you must think “one turn” ahead of the reshuffle in order to manipulate it to your advantage.  But to think “one turn” ahead, you must Know What Cards are Left in Your Deck in order to take advantage of this.

Realistically, you’ll face tradeoffs.  If you’re stuck at $7, you may need to trigger a reshuffle to discard all your good cards in order to draw that extra $1 to buy a Province.  What’s important is that you realize you’re making this tradeoff, and are consciously choosing to discard your good cards rather than simply reflexively playing your Actions.

Sample Game

Consider this example from a recent Isotropic game.  On my 3rd turn, I opt not to play my Warehouse because my deck would reshuffle before I could purchase my Familiar.  Additionally, my Potion is also in my draw deck again, which gives me another chance to purchase a Familiar.

Conclusions

I hope this helped you think about Dominion in a new way and I hope that the connection between knowing what cards are left in your deck and reshuffling was made clear.  Here are a few final bullet points to highlight the key points.

  • Always keep track of the cards left in both draw and discard pile
  • Any card that has a card drawing aspect can be used to manipulate a reshuffle.
  • These include cards that don’t necessarily put them in your hand (Navigator, Scout, etc.)
  • When possible, manipulate the reshuffle to play your “good” cards as much as possible and your “bad” cards as little as possible
Posted in Articles, Guest Articles | 7 Comments

Geronimoo’s Dominion Simulator

After countless hours of brain storming, coding and testing, the first user friendly Dominion Simulator is available for all of you to enjoy.

You could be simulating your first 1000 games of Dominion in under a minute! Download it here.

Most of the Annotated Games and card combos from this site have been programmed, so you can simulate those yourself and even adjust the strategies and share them with friends.

Have fun with it!  Discuss the simulator in the comments below or in the forum topic.

Posted in Dominion Stats | 9 Comments

Opening Probabilities, Part II

Last time we examined some basic opening probabilities for Silver/Silver openings and Chapel.  Today we’ll take a closer look at how you can use your opening two buys on Turns 1 and 2 to get to $5 on Turns 3 and 4, so you can play your critical $5 Action before the Turn 5 reshuffle.

Note: these probabilities are all calculated for Turns 3 and 4 together and assume no opponent interference (e.g. Militia or Masquerade).  They also assume you opened with Silver/___; if you opened with some other terminal Action instead of the Silver, you should take into account the 30.3% chance of your opening buys colliding.

Moneylender

We’ll start with Moneylender, to illustrate the probabilities for a generic Silver/Silver or Silver/[Silver equivalent].  It should be clear that the Moneylender probabilities are identical to that of Silver, since it always nets you $2.  Of course, it is better than Silver because it helps trash your Coppers, but it won’t help your buying power any.

At least one $6 or better 42.4%
Not drawing $5 on either turn 8.8%
Drawing $5 or better twice 14.9%

Baron

Baron significantly improves your odds of getting the $6 or $7 (you can even get an $8 with it), but it comes at a cost: a slightly greater chance of not drawing $5 on either turn, when compared to Silver/Silver.  Somewhat paradoxically, it does give better odds of drawing $5 or better twice.

At least one $6 or better 67.7%
Not drawing $5 on either turn 12.6%
Drawing $5 or better twice 27.7%

Feast

Feast is an unusual case in that you are basically guaranteed a $5 card so long as it doesn’t fall in the last two cards of your shuffle.  Moreover, even if it does, you can still often get $5 from your Treasure alone.  Naturally, it greatly reduces the chance you draw $6.

At least one $6 8.8%
Not drawing $5 on either turn 5.0%
Drawing $5 or better twice 29.0%

Quarry

Quarry’s probabilities turn out almost identical to Feast: a slightly lower chance of drawing two $5’s, but you don’t have to trash the Quarry.  Of course, you won’t be able to use a Quarry $5 to gain a non-Action card, but that can be safely ignored.

At least one pure $6 8.8%
Not drawing $5 (for an Action) on either turn 5.0%
Drawing $5 (for an Action) or better twice 27.2%

Horse Traders

As calculated by WanderingWinder in the forum here.  As it turns out, it is very close to Quarry and Feast, but Horse Traders does much better at getting to $6.  Of course, it becomes less effective in the midgame compared to Quarry, when you are discarding better cards.  It is marginally more effective than Silver at getting at least one $5, slightly worse at getting at least one $6, but considerably better at getting multiple $5’s.

At least one $6 or better 38.7%
Not drawing $5 on either turn 5.1%
Drawing $5 or better twice 27.2%

Sea Hag

Sea Hag’s probabilities start off a lot like Feast, except without the free $5, which basically kills your buying power.  In exchange for your monster attack, you get greatly worsened probabilities.

At least one $6 or better 8.8%
Not drawing $5 on either turn 50.6%
Drawing $5 or better twice 0%

Bishop

As far as buying power goes, Bishop is like a Baron that only earns $1.  This puts it well worse than Silver/Silver, but moderately better than Sea Hag.

At least one $6 8.8%
Not drawing $5 on either turn 35.4%
Drawing $5 or better twice 0.8%

Conclusion

Feel free to produce more data for other common openings.  The most glaring omission is Mining Village; my primitive Excel-based simulations are unable to simulate the Mining Village card draw, but I would suspect it would perform as well as Horse Traders in getting to $5 and $6.  Certainly it is strictly superior to Silver.

Bonus Treasure Map Section

We have an excellent writeup of the probabilities of activating your Treasure Maps in the forum by david707.  The summary is: given n cards in your deck, and t Treasure Maps total, the probability of activating them is:

Treasure Map activation probability formula

Put in a more accessible way, this graph illustrates the probabilities as the deck size and number of Treasure Maps increase.  The x-axis represents the number of cards in deck; the y-axis represents probability of activation; and each individual line represents the number of Treasure Maps in deck.

Treasure Map activation probability graph

Posted in Articles, Dominion Stats | 29 Comments

Guide to the Dominion Base Game

This is an article intended for those who only own the Dominion base game and want an overall strategic overview of the game.  It is assumed that you have played enough games of Dominion to have a general understanding of how to play the game: the guide is intended for those who are new to the game but have an idea about what all the cards do.

It is comprehensive but not complete; although the core principles of the game are found here, there is no substitute for actually playing the game and getting a feel for how the cards interact with each other.  This guide will outline the general principles of Dominion strategy, and it is up to you to play them and adapt them to your unique situation.

Other good articles for those new to Dominion include Your Guide to Beating Attacks, by the game’s designer, and Building the First Game Engine, an analysis of the “First Game” recommended set.

People often ask, “Should I buy Dominion or Intrigue if I’m just starting out?”  I always recommend starting with the base game.  The core principles of Dominion are all found here, and in their purest form: the Cursing attack (Witch), the trasher (Chapel), the +Actions (Village), the trash-for-benefit (Moneylender, Mine), the big deck strategy (Gardens), the handsize-decreasing attack (Militia), and the deck inspection attack (Spy, Thief).

This guide is divided into three sections: Set Analysis, Deck-Building and Playing the Game.

Set Analysis

The three most important cards to look for in a given set of Kingdom cards are Gardens (with Workshop), Chapel, and Witch.  The presence of any of them greatly alters the dynamics of the game.  Of those three, Workshop/Gardens is a strategy unto itself; the other two are essential components of just about every deck.

Of course, as you get better, there are more things to look for: for instance, in multiplayer, Thief can be a threat to those who trash heavily, and Remodel significantly changes endgame play.  But if you’re just starting out, it’s enough to keep in mind the Big Three, and learn what else to look for as you get more experienced.

Gardens and Workshop

Gardens

Dominion

This is described more fully in the Gardens article.  Any game with both Gardens and Workshop (sometimes Gardens and Woodcutter) is basically a Gardening race, and there’s rarely going to be an alternative strategy fast enough to compete.  You needn’t consider Chapeling or deck-building, though Witching will be of some help.

Without Workshop, Gardens are much less of a threat, and more of a last-minute desperation gambit if you are too far behind on Provinces and Duchies but have a fat deck.  Naturally, they are near-worthless in Chapel games (see below).

Chapel

Chapel

Dominion

Chapel is the best card in the game, and according to Donald X., probably the most powerful card for its cost that will ever be printed.  No matter what you’re playing (except for Gardens games and Smithy-Big-Money, described at the bottom), a Chapel will speed up your deck by clearing the chaff.  It’s easy to play with Chapel: trash as many Coppers, Estates, and Curses as you possibly can, at every opportunity.  The effect on your deck is miraculous.

The only other true trasher in base Dominion is Moneylender, which is much slower than Chapel.  It’s still an important card, but not nearly as game-changing as Chapel.

Witch

Witch

Dominion

No matter what kind of deck you’re playing, you will benefit from buying a Witch and playing it as often as possible.  Moat and Chapel are simply not sufficient defenses against the onslaught of Curses.  Cursing attacks are the strongest attacks in all of Dominion, and no matter how many expansions you are playing with, or how experienced you are, it is imperative to grab them as soon as you can.

You can occasionally incorporate the Witch and its +2 Cards into a +Actions/+Cards engine (as described below), but the attack is sufficiently strong that even if you have no Villages or Festivals, it’s worth risking drawing Actions dead in order to play the Witch.

Deck-Building

There are three main kinds of decks in base Dominion.  You can mix and match the first two, but Big Money tends to stand alone.

Non-terminal Engine

Laboratory

Dominion

This generally means a deck built around Laboratory.  In later expansions, other cards are also viable to build a non-terminal engine around, but in the base game, Laboratory chains are the best route to a big hand, because they do not suffer from the harms of +Actions/+Cards engines described below.  In a particularly dense (i.e., thinned out with Chapel) deck, you can make do with a Market chain if Laboratories aren’t available.  But Laboratories are generally preferable, since 1 card is generally worth more than $1 and a buy.

Assuming your primary engine card is Laboratory, you have room for a single terminal Action if you draw your whole deck every time.  This slot is best reserved for Militia or Witch; otherwise, Remodel, or possibly Woodcutter if you need +Buy, are good options.  If you want multiple terminal Actions, you can mix in a few Villages or Festivals (or Throne a Laboratory), but you need to keep up on buying the Laboratories, which are the key to getting this deck running.  Cellars are also vital, since they save you if you find yourself drawing into a sea of Green.

The biggest drawback to a Laboratory chain is that it doesn’t actually net you any money, it only draws you cards.  So you’ll have to mix your Laboratory purchases with something that gives you money: preferably Markets or Gold.  Since you’ll (hopefully) be drawing so well, you should make sure to grab a source of +Buy, because if you balance your Gold and Laboratory purchases, you can easily hit $13 (enough for Province + Laboratory, which keeps your engine rolling even as you buy Provinces and clog your deck) or $16 (for a double Province).

+Actions/+Cards Engine

Village

Dominion

Building these engines is described in great detail here.  In the base game, your +Actions are going to come from Village or Festival, and your +Cards are going to come from Smithy, Library, or Council Room.  Festival/Library works quite well, but takes longer to set up and relies more heavily on trashing.  Village/Smithy is simpler, but doesn’t have any source of money or +Buy.  Council Room’s drawback seems like a big deal, but it usually isn’t, and in any event you can use a Militia as a “kicker” to negate the benefit you provide to your opponents.

Like the Laboratory chain, you’ll want to make sure you can get a source of +Buy, because there’s no point in building an elaborate engine that draws $20 every turn only to buy Provinces one at a time.  And like the Laboratory chain, a Cellar is critical to help reduce the chance of a nightmare draw.  These are generally more difficult to put together than Laboratory chain, because the order in which you draw your cards matter, and so it is more vulnerable to your opponents’ Cursing attacks.

Big Money / Smithy Big Money

SilverI hesitate even to describe this as a strategy; it’s more of an algorithm.  Buy Province with $8, buy Gold with $6-$7, and buy Silver with $5 or lower.  If Smithy is available, buy a single Smithy as soon as possible, and then switch to pure Treasure.  (You can fine-tune it by buying Duchies at $5 once there are 5 Provinces left.)

This is sort of the baseline for advanced play, and represents the core difference between an expert’s deck and a novice’s deck.  Good decks have no difficulty beating Big Money and Smithy Big Money; most beginners cannot.  Later expansions have further weakened this “strategy”; see Beyond Silver.  In any event, you should use it as a guide for how you’re doing; in a game with no attacks, Big Money averages 4 Provinces by Turn 17, and Smithy Big Money by Turn 14.  If your deck can’t do better than that in the absence of attacks, you should rethink your deck.

Playing the Game

Opening

So how do you start?  First, check if there are Gardens and Workshop on the board.  If not, and if you started with a $4/$3, then if Witch is available, then you should buy a Feast (if available) to get the Witch ASAP.  Likewise, you also want a Chapel if possible (even if it means overpaying for it on one of your first two buys); if neither Witch nor Chapel is available, then Moneylender, Militia, and Silver are all fine cards to open with.

If you had the good fortune to open $5/$2, prioritize Witch and Laboratory.  If those aren’t available, any of the other $5’s are OK, though Council Room and Library are probably only going to be good if you plan to build your deck around them later.

Building Your Engine

You should hopefully have an idea of what kind of deck you’re going for.  Stick to your plan: don’t branch off and get random Actions because they look cool.  Remember that with few exceptions (Market, Festival), you need to be buying Treasure for your engine to be drawing: the best Laboratory chain in the world only draws you cards, and you need money in those cards to make it worthwhile.

Ending

ProvinceWhen do you start buying Provinces?  Generally, as soon as possible.  There are exceptions: if your Lab engine is set up and you’re drawing $10 with multiple buys every turn, you might want to take a second to get a Gold, so that you can be drawing $13 every turn, which is far more helpful because then you can go Province/Lab every turn.  Alternatively, maybe you want to push for $16 and gun for a double Province turn or two.  It all depends on how fast your opponent’s deck is going: watch his tempo, and don’t get caught with your pants down and too few Provinces remaining.

When do you start buying Duchies?  Again, it depends on your deck: if you have Cellars or maybe Spies, then you can buy them earlier than usual.  But generally, I start buying them in a 2-player game when there are around 4 Provinces left.  A good rule of thumb is to always buy green cards before you think you need to.

Posted in Articles, Dominion | 22 Comments