Dominion: Gardens

Gardens

Dominion

The standard “Gardens strategy” is to grab Gardens, bloat your deck, and simultaneously run out two other piles (one of which is typically Estates) to end the game as fast as possible, before your opponents can begin to buy Provinces or Colonies.

On most boards, this isn’t feasible.  It’s just too slow to empty all three piles, and your deck won’t be big enough to make your Gardens worth all that much.  But in the presence of certain cards, Gardens are nearly unbeatable.

The easiest and most straightforward way to execute this strategy to open with double Workshop.  If you’re unfortunate enough to start with a 5/2, you can still go for a (slightly delayed) Gardens strategy with cards like Festival/Market/Pawn.  Otherwise you are probably best off countering your opponents’ Gardens rather than competing for them.

Assuming you opened double Workshop, on your first reshuffle, you want to pick up at least two more Workshops; although this increases the chance that you’ll draw two Workshops in one hand (without an extra +Action to play them), it is much much worse to draw a hand with no Workshops whatsoever.

After that, you should focus on grabbing as many Gardens as you can with your Workshops while spending Coppers on piles that you plan on running out.  This typically means Gardens, Estates, and a $2 or $3 Action (possibly Workshops themselves).  Great Halls are great for a Gardens pile, since they’re a cheap source of VP that your opponents will help you run out.  Villages are also a popular choice, and Haven can keep your Workshops from conflicting with each other.  At the very least, you should always buy at least a Copper each turn.

Ironworks can be basically be substituted for Workshop in the above strategy without any significant changes.  Woodcutter can as well: although it doesn’t guarantee you the Gardens, it’s close enough, and it lets you grab a Duchy every once in a while.  Baron works pretty well, but in practice the cost jump from $3 to $4 is too great for the Gardens player to overcome, and you won’t be able to empty them out as easily as Workshops.

Trade Route or Talisman can also work, but are more dependent on the other cards available, and therefore not as scripted as Workshop/Gardens.  Trade Route depends on the fact that as you empty Gardens/Estates, your Trade Route guarantees you at least +$2, and possibly +$3 or +$4 if Great Halls are present, or your opponents panic and start buying Duchies to counter your Gardens.  However, because Trade Route forces you to trash a card along with the +Buy, it is a more hybrid Gardens strategy that depends on Duchy assistance.   Talisman Gardens strategies have no problem emptying piles, but you need to be emptying Actions (preferably non-terminal) that can get you to Gardens.

(See the comments for an excellent discussion of “hybrid” Gardens strategies.)

If none of these cards are present, Gardens are usually ignored.  They can be helpful in the late game when you have $4 to spend and need a Victory card; in most late-game decks, they will be a cheaper Duchy.  Alternatively, if you are getting brutalized by Ambassadors and Mountebanks, and a couple piles are already gone (perhaps due to a City player), you can try to rush the Gardens to end the game prematurely.

If you’re fighting another Gardens player in a multiplayer game, you should realize that although both of you are going for the same goal (emptying three piles as quickly as possible), you should let him empty the “third” pile while you go for the Gardens and Estates.  In other words, if the two of you are emptying Gardens, Estates, and Villages, it may be in your best interest to spend your $3’s on Estates rather than Villages so that you have an advantage over your co-Gardener.

If you’re going Gardens alone, you usually must do whatever it takes to end the game as quickly as you can.  There are many cards that you could buy that would work great with a Gardens strategy (some are listed below), but if your opponent isn’t going for Gardens, you need to end the game before his engine kicks into high gear.  Certain strategies can ramp up very quickly (e.g., Tactician), and if your opponent can snag a couple Provinces the game is all but over for you.

Countering a Gardens player is tricky.  Don’t bother building elaborate Grand Market chains; instead, look to grab VP as quickly as possible.  Remodel your Golds into Provinces as soon as you can, grab some of the Estates so the Gardener can’t get them, and try to establish a VP advantage.  Your goal is to get enough points such that the Gardener is forced to slow down and fatten his deck rather than end the game; at this point, you can choose to either rebuild and get the last Provinces, or empty the last piles before the Gardens appreciate in value.  Don’t hesitate to take Gardens yourself: the average Garden is worth 3–4VP for your opponent, and maybe 2–3VP for you. Buying the Garden is therefore a 5–7VP swing, which just so happens to be around the neighborhood of a Province buy (assuming your opponent buys no Provinces and you won’t be running them out).  So you should definitely grab some Gardens, though not too many since you have a smaller deck than the Gardener.  Bishop in particular is a fantastic counter to Gardeners, since you can buy the Gardens and then chew them up for 3VP.  If you do plan on splitting the Gardens, then be sure to take a couple of Duchies before the game ends in order to make up the difference in deck size.

Gardens decks are very resistant to attacks.  Ambassador is a great card for Gardeners, since they generally welcome the influx of Copper and Estates.  Possession is basically useless, and Militia/Goons do virtually nothing, since so much of your deck is Victory cards anyway.  Witch and Sea Hag are somewhat offset by the fact that the Curses count for your Gardens, particularly if they push your deck to the next 10-card level.  (See, for instance, this Talisman/Great Hall/Trade Route game where I Embargo my last Gardens buy so I can get to 40 cards in my deck.)  Probably the most brutal attacks against Gardeners are Ghost Ship and Bureaucrat, by slowing down an already-slow deck.

Works with:

  • Workshop/Ironworks/Woodcutter
  • Trade Route/Talisman (sample game)
  • Baron (somewhat)
  • Great Halls
  • Opponent’s Curse-giving attacks (somewhat)
  • Opponents’ Ambassadors
  • There are many cards that work well with Gardens, but you usually can’t afford to buy them and/or they would distract from your goal of ending the game as quickly as possible.  Some include: Hoard, Festival, Bureaucrat, Counting House, Outpost, Warehouse, Scout, Remodel, Baron.

Conflicts with:

  • Trashing cards
  • Strategies that ramp up very quickly (e.g., Tactician, Treasure Map)
  • Opponents’ Bureaucrats and Ghost Ships
  • Bishop counters Gardens pretty heavily
Posted in Dominion | Tagged | 45 Comments

Combo of the Day #20: Caravan/Vault

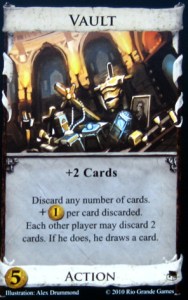
Vault does best with big handsizes, and Caravan is just about the cheapest non-terminal route to big hands.  Of course, Laboratory, Village/Council Room, and Tactician (among others) are also great ways to increase your hand size, but they’re much more expensive and therefore less viable in poor decks.  In order for this to work, you have to really spam the Caravans, which is not too difficult since it’s relatively easy for a deck to consistently hit $4.

Haven can substitute for the Caravan, but it’s less readily spammable than Caravan because each Haven you play lowers your hand size.  It can, however, move your Vault from a small hand to a bigger one.

Sample game

I won this game for two reasons: first, my Caravans were more effective than his Caravans, because drawing even a Curse meant another +$1 for the Vault; two, his Worker’s Village/Rabble combo was slow in the beginning with Curses and slow at the end with Victory cards, while Vault can keep on churning even when the deck is clogged with Curses and Victory cards.

Posted in Combo of the Day | Tagged , , | 5 Comments

Guest Article: Be Patient

This article is written by Curses.  He placed first in the BoardGameGeek Dominion League overall standings in Rounds 8 and 9.

Last article, I discussed the importance of pausing to assess the board and plan your deck.  This article will expand on that concept in a fundamental manner.  The next step is implementing your plan until the end of the game!  The advice is basic, but I have lost many games because I have ignored the basics.

There are diverse options when creating a deck in Dominion.  Some board have an obvious path to victory, and players may race each other for a key card or combination.  Other boards have multiple options, and players may use divergent paths.  In either circumstance, creating a plan and following it to completion will increase your chances of victory.  Even if your opponent begins buying Victory cards faster than you anticipated, stick with your original plan.  Don’t panic when you get a few bad draws: remember that a winning player often gets bogged down with Victory cards, and that this can buy you enough time for your plan to come to fruition.

Some decks simply take time to gain momentum by getting the necessary cards into your hand.  Other decks need a critical mass of certain cards to explode.  Even the the gradual accumulation of victory points via Harems, Islands, or VP tokens takes a steady pace.  I know I have lost many games by starting a strategy and then trying to switch in the middle of the game. Everyone has a game in their memory of when they switched plans and won, but these are the vast minority.  An honest assessment would reveal the plethora of games that ended very badly!

There is a difference between making adjustments mid-game and totally reversing your strategy.  Grabbing a few +$ cards to augment an action-heavy deck is different than going Big Money with the same deck if your opponent buys the first Province.  The first example is fine-tuning your engine, but the second example is like trying to rebuild your engine while driving.  You want to adapt your deck to maximize its performance; the more you discipline yourself to follow the plan you created, the more you will put yourself in a position to win.

Sample Game 1:  I stuck with my plan to make an action heavy deck that cycled itself, even after he bought the first two provinces.

Sample Game 2:  I lost this game, but following my plan gave me the best chance of winning.  When I committed to a Mine in Turn 7, I kept making Harems.  I did make many mistakes in this game, but a few better draws and I could have stole a game I deserved to lose.

Posted in Guest Articles | 3 Comments

Combo of the Day #19: Talisman/Watchtower/Treasure Map

One of those brutal openings if everything lines up just right.  You only need to play this combo once; activating it twice will probably decide the game.  It’s so strong, in fact, that absent any must-buy $3’s or $4’s, you should probably open Talisman/Watchtower just to maximize your chances of getting this to work.  Bide your time until you draw $4 with the Talisman and Watchtower in hand, then buy a Treasure Map, gain a copy, and place both on your deck.

This also works well with Royal Seal in place of the Watchtower, but on average, that happens quite a bit later in the game.

Sample game

The best case scenario, as juff activates it on Turn 3 to overcome an otherwise disadvantageous start.

Posted in Combo of the Day | Tagged , , , | 15 Comments

Dominion: Moneylender

Moneylender

Dominion

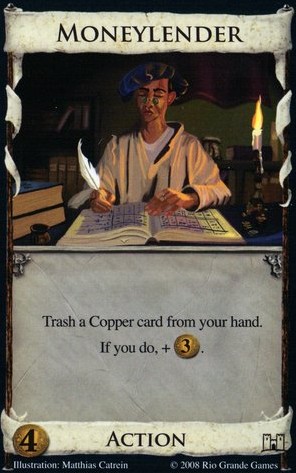
One of the best opening $4’s.  There’s very few occasions where I wouldn’t open with Moneylender; it’s more useful than Baron early on because it trashes (rather than discards) and works with Coppers (which are more plentiful than Estates).  Moneylender even works with Chapel: Moneylender can bootstrap Chapel decks into $5’s and Golds as quickly than a Silver while thinning the deck faster, and if there are no worthwhile $2’s, then drawing Silver/Chapel is just as useless as drawing Moneylender/Chapel.

Unfortunately, there’s not much use for Moneylender outside the early game.  Look for a way to get rid of it, even before it trashes all 7 Coppers; you’re just not as likely to draw it with your Coppers after three or four trashings.  In the midgame, if you can draw your entire deck, then Moneylender can be a decent defense against Mountebank and Ambassador.  And if you feel especially daring, it might be worthwhile to spend some extra Buys on Coppers if you have excess card-drawing capacity.  More often, though, the Moneylender just ends up getting fed to the Salvager, Forge, or even the Chapel.

Works with:

Conflicts with:

  • Mine
  • Loan
  • Coppersmith, Counting House, Gardens, other Copper-dependent strategies (???)
  • Chapel, sometimes
  • Multi-card trashers, like Steward or Trading Post
Posted in Dominion | Tagged | 12 Comments

Dominion: Woodcutter

Woodcutter

Dominion

Woodcutter is the most niche card in the base set.  Its +Buy can be critical if (and this is a big if) you can make use of it and no superior alternatives exist.  But with one major exception, Woodcutter almost always ends up being the least-bought Action on the table.

The value of +Buy is often underrated; in evenly-matched 2-player games, having an extra Buy gives you an important tactical edge.  Even if you can’t afford to double-Province, the ability to buy the last Province with an additional Estate forces your opponent to hesitate before buying the penultimate Province; your ability to squeeze in an extra Victory card can mean the difference in an otherwise symmetrical game.  Alternatively, extra Buys are important to soak up free Peddlers if they are available, or to make use of Hoard‘s Gold-gaining ability.  (Note that Goons and Bridge strategies do not want Woodcutters, since more terminal Actions just means fewer Goons or Bridges getting played.)

The problem is that Woodcutter is pretty much the worst card possible for getting this Buy. By the time you’re in a position to need extra Buys, you almost certainly have the money to afford one of the far superior sources of +Buy: Festival, Goons, Market, Salvager, Wharf.  Even Baron, Contraband, and Trade Route at least serve useful early game purposes; unlike all the other sources of +Buy, Woodcutter is just never worthwhile outside of its +Buy.  Accordingly, Woodcutter is strictly a last resort, a source of +Buy if nothing better is available.  (If you do conclude that you’ll need its Buy, then it’s probably better to buy it earlier rather than later, so you don’t have to look foolish spending $8 on a Woodcutter.)

This is assuming, of course, that extra Buys are useful enough to justify spending an Action on.  If they aren’t (for instance, in low-quality or Action-poor decks), then buying Woodcutter is simply a mistake.  Although there are certain decks that make use of money-providing Actions (e.g., a double Tactician deck that King’s Courts Actions for money before discarding for Tactician every turn, or a deck crammed with Villages and defending against Pirate Ships), Woodcutter is (again) usually the least helpful of the cheap Actions that give +$2 (e.g., Swindler, Chancellor, Steward, Militia).

However, there is one situation where Woodcutter absolutely shines: when Gardens are available.  Along with Workshop, Woodcutter is one of the two trigger cards for a Gardens strategy; although it doesn’t guarantee a Gardens like Workshop does, it allows you to grab Duchies to compensate.  In a head-to-head battle, Workshop-Gardens is probably slightly superior to Woodcutter-Gardens, but either of them dominates “normal” decks by ending the game on piles before the opponent can get his engine humming.

Works with:

  • Gardens
  • Peddler, Hoard, and other decks that call for +Buy if there are no better alternatives
  • Decks that need money-providing Actions and the lack of any other alternatives

Conflicts with:

  • Any other source of +Buy
  • A lack of need for +Buy
Posted in Dominion | Tagged | 10 Comments

Prosperity: City

City

Dominion: Prosperity

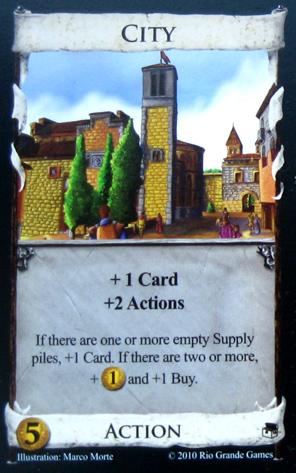
Can I start by noting how well-designed this card is, thematically?  It’s one of the few Dominion cards that makes perfect thematic sense: Cities start as Villages, but slowly grow and develop …

City is one of those cards very susceptible to groupthink.  The first time anyone gets spanked by the Unstoppable City Stack (“UCS”), they vow that next game they will buy up the Cities themselves.  This leads to a City race, which, of course, further powers up the Cities.  Maxxed-out Cities are absolute juggernauts, easily drawing your deck with bonus money and Buys to boot.

But before committing to blowing all your $5’s on Cities, it’s important to identify the situations under which Cities are likely to become anything more than Villages.  Piles run out most frequently in multiplayer games; similarly, Cities will level up quickly when popular cheap cards are available, like Fishing Village, Caravan, or Peddler.  (Great Hall and Island, too, for although they are not technically super-popular, they are fewer in number in 2-player games, and a great pile to run out as the City player.)  This is especially true if your opponents are buying Bridges, Talismans, and other Buy multipliers—though you should also beware them ending the game on piles before you have the chance to deploy the UCS.  Curse-giving attacks are another reason to invest in Cities, by guaranteeing another pile that will inevitably be exhausted.

Of course, there’s the other question of what to do with all those extra Actions.  It makes a lot of sense to accumulate Cities when there are uses for the extra Actions, i.e., worthwhile terminal Actions to pair with it (Bridge, terminal attacks, trash-for-benefits, or +Cards like Smithy/Courtyard), and Villages are not available.  It also makes sense in Colony games, where you should have enough time to build up the UCS and pummel opponents with it.

So when are Cities bad?  When the opposite of the above apply.  When it doesn’t look like piles are going to be running out, and there aren’t any worthwhile terminals, a player that buys Cities is just spending a ton of money on Villages that become little more than Laboratories when you buy 10 of them.  Meanwhile, your opponent can be buying actual Laboratories instead, pummeling you before your Cities can get anywhere.  As mentioned several times before, $5 is an elite tier of Actions.  Blowing your money on Cities is just not worth it if your opponents, by buying other powerful $5 Actions, can buy up the Victory cards before your Cities upgrade into something better than a Village.

There’s a caveat to this rule: it’s easy enough to resist the allure of City if there’s only one opponent buying Cities.  But if you’re in a multiplayer game and two players are racing for Cities, you may have little choice other than to get Cities yourself, even if it means contributing to the emptying of the pile.  Otherwise they will empty the pile and then hold a huge advantage over you.

Likewise, if you’re in a City race with your opponent, and the Cities are split somewhat evenly, it is absolutely critical not to be the one to empty the first pile (unless it is the City pile itself), as it gives your opponent first crack at a mega-turn.  The difference between drawing 1 and 2 cards is huge. Ideally, you’d like to use Ironworks, Remodel, or Upgrade to empty a pile during your turn so you can be the first to make use of the UCS.

Ironically, when your Cities finally do hit maximum level, you might want to consider winning on piles rather than glamorous Colonies.  After all, two piles will already have been emptied; the plethora of Buys your UCS provides might give you the win just by emptying the Estates (or another pile), if your opponents haven’t yet built up a significant lead.

Works with:

  • Popular Kingdom cards (usually non-terminal; e.g., Fishing Village, Caravan, Peddler)
  • Mixed Kingdom/Victory cards (Great Hall, Island, Nobles, Harem)
  • The existence of worthwhile terminal Actions (especially +Cards)
  • Curse-giving attacks
  • Talisman (to a lesser extent, Bridge)
  • Strategies that focus on pile-emptying

Conflicts with:

  • Unpopular Kingdom piles that aren’t going to empty
  • Embargo (sample game)
  • Ambassador (theoretically, though I’ve never seen anyone stop Cities by returning cards to the supply …)
Posted in Prosperity | Tagged | 7 Comments

Combo of the Day #18: Venture/Bank

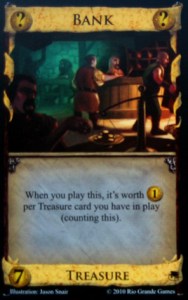
In high-quality Treasure decks, Bank is ordinarily not that useful, since you don’t have enough Golds and Platinums to make Bank worth very much.  But Venture, which does best in high-quality Treasure decks, provides Bank with the quantity it needs to improve its value.  If you have Bank and Venture in hand, each Venture is worth at least $2 + ($1 + value of card drawn), as opposed to Gold, which is capped at $4 with the Bank.  So even if the Venture hits a Copper, Bank + Venture is always equivalent to or better than Bank + Gold, and is much more affordable.

Better yet, if you have a sufficient concentration of Ventures in your deck, Ventures can often draw three or four Treasures.  With Bank in hand, each Venture is worth $2 + at least $2 per drawn Treasure with the Bank; a Venture that hits another Venture is therefore just as valuable with the Bank as a Platinum.

Adventurer can be substituted for the Venture, but it doesn’t work quite as well.  Although it always draws two Treasures, it isn’t a Treasure itself, so it only does better than Venture if Venture doesn’t chain into other Ventures.  In addition to not chaining, Adventurer also costs an Action to play (which incidentally means you can’t play it on the Black Market) and it costs $6 (which is both harder to get to and in direct competition with Gold).  Adventurer does have one other advantage over Venture: instead of playing the Treasures, it places them into your hand.  This can be helpful if you are looking to avoid playing Loan or Venture, or if you have Mine or Mint.

Counting House instead of Venture works on a similar principle, though Counting House is a strategy all to itself.  It’s more risky, since it depends on when it’s drawn, and it only gets you Coppers.  But it is certainly capable of drawing in more Treasures than Venture or Adventurer.

Sample game

This is an example of a game where Venture / Bank produces massive amounts of money even when the only way to trash Coppers is if your opponent Swindles them into Curses.  It also highlights the weakness of Adventurer relative to Venture for the purposes of Bank.

Posted in Combo of the Day | Tagged , , , | 1 Comment

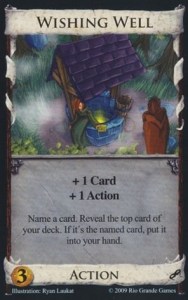
Intrigue: Wishing Well

Wishing Well

Dominion: Intrigue

Wishing Well isn’t the best card at $3, but it isn’t quite the worst either.  Ideally, you’d like to play it with knowledge of what card you’re wishing for.  Outside of being an obsessive-compulsive deck-tracker, there’s not many ways to do this reliably past the early game.  Cards that you view with Spy get drawn by the Wishing Well instead of being wished for.  Scout or Apothecary is theoretically the best solution, but it’s often too difficult to pull off.  Apothecary works a little better than Scout: because you have to make up the hand size slot lost to Scout, Scout + Wishing Well + Wishing Well is basically having played a Laboratory, making it just too expensive and slow to get running.  Navigator + Wishing Well is even worse, since it requires a +2 Actions card.

Stashes are another obvious solution, but in practice it’s too hard to align the Wishing Well with the Stashes.  More rarely, if you top-decked multiple cards during the turn—for instance, playing two Ironworks to gain two cards, using Watchtower to place them both on top of your deck—then Wishing Well can work.  And once in a great while, if you have exactly three cards left in your draw deck, then you can play Pearl Diver to draw the top card and inspect the bottom card.  Leave it on the bottom; the Wishing Well will then draw the second card, and you can wish for the last card.

Interestingly, Wishing Well is often able to wish successfully when responding to an opponent’s attack.  Secret Chamber’s reaction is beautifully suited for Wishing Well; if your opponent plays an attack that you can respond to with Secret Chamber, then you gain knowledge of the top two cards of your deck.  Wishing Well draws the first and wishes for the second.  Alternatively, Wishing Well itself is a perfect counter to Ghost Ship (and more rarely, multiple Bureaucrats played against you).

In general, though, you should usually play the Wishing Well aspirationally, by wishing for the cards you want that will make a meaningful difference in your hand.  This is usually the only way you can justify taking the Wishing Well over the Silver.  For example: trying to execute Black Market / Tactician, but didn’t draw another Tactician in your Tactician hand?  Wish for the Tactician, even if it’s a low probability of success.  Of course, you should back these aspirations with some knowledge of your draw deck, but it’s usually much more important to draw one particular card rather than the card most likely to be drawn.  (The exception is when you have Vault/Secret Chamber, and your goal is to make your hand as big as possible.  Then you should generally wish for the most likely candidate.)

Accordingly, Wishing Well is most powerful in the early game: it’s easy to track what is in your deck, and it helps alleviate the problems of bad opening draws.  If you draw 3 Estates with your Wishing Well, wish for your Steward or Ambassador.  If you draw Baron and 3 Coppers, wish for the Estate.  If you have a spare Action this turn and you know you have two terminal actions left in your 5-card deck, wish for one of them so that they hopefully don’t conflict with each other.

Some decks are particularly dependent on drawing certain cards, to the point where a Silver may actually hurt rather than help the combo.  The aforementioned Black Market/Tactician is one; Minion is another, because Minion decks rely heavily on drawing other Minions, whereas Silvers would just be discarded anyway.  With Treasure Map, it goes without saying that if you draw one you should wish for the other.  Repeatedly wishing for Conspirators is also one of the most effective ways to run a Conspirator chain.  And if you open Coppersmith, then Wishing Well is far superior to a Silver because it can help you gain extra Coppers early.

Finally, some cards work best with failed Wishing Well wishes.  Pawn is probably the most useful; by previewing the card you draw, you can decide whether it’s worth drawing, and if so, whether you need the +1 Action.  Native Village‘s draw becomes more informed, saving you from accidentally forcing your Platinum to go native.  You can also mitigate the risk of Upgrade and Lookout by seeing if the card on top of your deck is one you want to trash.  Knowing the top card of your deck is also helpful if you plan to Cellar exactly one card, or if you’re hesitant about Warehousing.  And the mid-game Steward choice between +2 Cards and +$2 becomes a little easier if you know the top card of your deck; likewise, you are ever-so-slightly more informed about whether to play a blind card-drawing Action like Smithy without +Actions.

All in all, there are ways to exploit Wishing Well’s ability to make it somewhat more like a Laboratory.  But spending too much effort is probably not worth it; when there are important $4’s and $5’s, I’ll usually take the Silver instead.

Works with:

  • Cards that help identify the top cards of your deck for the Wishing Well (Scout, Apothecary, Watchtower, Pearl Diver, Stash, Secret Chamber as a Reaction)
  • Vault
  • Action chains that depend heavily on drawing a particular card (e.g., Black Market/Tactician, Minion, Treasure Map, Coppersmith)
  • Opponents’ Ghost Ships (or more rarely, multiple Bureaucrats)
  • Actions where seeing the top card of your deck is helpful (Pawn, Native Village, Upgrade, Lookout, Cellar, Warehouse, Steward, +Cards without +Actions)
  • Conspirator / Peddler (sample game where Great Halls, Wishing Wells, and Goons combine for Peddlers)

Conflicts with:

  • Silver, which is usually superior
Posted in Intrigue | Tagged | 16 Comments

Counter of the Day #6: Wishing Well/Scout v. Ghost Ship

Ghost Ship makes you place two cards back on deck.  With a Wishing Well in your hand, you can draw back the first card and then successfully wish for the second.  You’re still hurt by the attack, but it basically leaves you with your original hand minus the Wishing Well—a small price to pay against an otherwise crippling attack.

Scout similarly counters Ghost Ship, because you can place your Victory cards back on your deck and vacuum them back into your hand with the Scout.

In theory, Wishing Well and Scout would also be a counter to multiple Bureaucrats  played against you.  But in practice, Bureaucrats are usually weak enough that you can just ignore them rather than buying Wishing Well or Scout to counter it.

Posted in Counter of the Day | Tagged , , , | 6 Comments