Prosperity: Counting House

This is a revised version of an article by axlemn, originally posted on the forum, and incorporating analysis from jomini.

Counting House

Dominion: Prosperity

Counting House is not a great card.  In fact, it’s not even a good card, when you factor in its price: because it’s $5, every Counting House buy means you’re passing up another $5, and $5 Actions are some of the best Actions in the game.  It depends on a bad card (Copper) and is cripplingly awful when you draw it at the start of the reshuffle.

But here’s a bold statement: Counting House is underused.

Since it’s a 5-cost, it makes sense that Counting House is not a good buy most of the time since other 5-costs are just so good.  Strategies that revolve around Counting House, however, always seem to be discounted immediately.  It’s almost never used in a serious game.  That seemed suboptimal.

So why do people ignore Counting House so often?  Because if you use it the most obvious way — if you’re just using Counting House for the occasional very high +coins — you see it will fail in nearly every common decktype.

With Big Money, almost any decent, Smithy-style enabler will do better.
With an Engine, you’re better off trashing those coppers.
With Big Draw, it does absolutely nothing.
If you’re trying to use it in a game while also trying to rush for duchies, it will fail.

There are some extremely rare exceptions to these principles, which are mentioned later.

So how can we ever use Counting House?

There are essentially two ways to use Counting House.  The first is a gimmick: towards the end of a game, you might find yourself nearing the reshuffle with some top-decking or deck-rigging potential.  (For example: Royal Seal, Watchtower, Develop, Inn.)  If you only have $5 to spend this turn, you can just grab the Duchy and move on, but you can also top-deck a Counting House and guarantee a big turn next turn (in exchange for possibly lousier future turns.)  Similarly, Golem-Counting House or Chancellor-Counting House are equally gimmicky ways to make use of it.

The second is to make it the centerpiece of your deck.

http://dominion.isotropic.org/gamelog/201205/19/game-20120519-074816-fc6e07f4.html

With the 4 best enablers for Counting House, you can somewhat consistently grab 4 Colonies by turn 14-16, and often 8 by turn 19.  In long games, with Worker’s Village or Pawn support, you can sometimes double-Colony to make up for early round dead turns.

Here’s a real-game example.  This deck is a deck type all on its own.  And like Outpost, it can be a card that can win you the game if you recognize when to use it.

Playing the House – The Enablers

You’ll either need to spend turns buying Coppers, get +buys, or gain them.

A Counting House-centric deck functions best by utilizing early-round +buys to get Coppers (or more Houses) as often as possible.  The reason for this is that if you draw 2-3 +Buy cards in the first turns of a round, that is, before you draw most of your Counting Houses, you’ve increased the value of every Counting House in the rest of the round by 3-4, assuming you used your regular Buy on copper as well.  Sacrificing one turn and gaining Coppers for an entire improved round?  That’s like a beefed-up Tactician.

With a deck large enough to prevent you from having to reshuffle again, you can then buy a Colony, or sometimes even two, for every Counting House that remains in your deck.

Hamlet, Worker’s Village, and Pawn are the best sources of +Buy if all you care about is getting more +Buy.  You really don’t care about boosting your average money when playing the House.  You care more about boosting your decksize to reduce reshuffles, and increasing the average number of buys you’ll get before drawing your Houses.  And you care a lot about making double-colony turns possible.

The first few rounds you’ll want to obtain as many +Buy cards as is possible.

The problem with Gardens-type cards like Woodcutter and Bridge is that they are almost all terminals.  They look helpful—and they are—but not late-game.  When you get them early on in a round, you can’t get more than one +buy from it.  This means you will never be able to get a +buy on a Counting House turn if they are your only source of +buy, which means no double-colony.

Double-Colony not only feels good, but often it’s necessary to lock down a game.  You almost need a double colony turn at least once, or at least a colony-province turn, to make up for the fact that on some turns, potentially even your second-to-last turn, your buys might just be a handful of Copper.

However, while Woodcutter and the like shouldn’t be massed, they remedy the hardest part of using Counting House with something like Hamlet: reliably reaching 5.  In an absolute worst case scenario, you can buy a single silver and wait, or if you’re really gutsy, you can just buy coppers and enablers for 4-5 rounds.  With enough coppers and careful enough reshuffling, you’re mathematically guaranteed to hit 5 after about 6(?) such turns.  Also note that because hitting 6 is completely unhelpful, any number of turns spent buying silvers instead of an enabler should probably hurt more than help.

Other helper cards

Sifters are a good addition to Counting House decks because they allow you to move through your deck quickly.  It doesn’t matter whether your Coppers are in the discard or in hand, and so you can freely discard Coppers to Cellars and Warehouses so you get to your Counting Houses.  Cellar has the added benefit of allowing you to precisely time your reshuffles, and being slightly cheaper and easier to pick up on a +Buy with the Counting House.  (Havens accomplish something similar.)

Cache both adds Coppers and gives you cheap Golds so that even on non-CH turns you can hit 5 (early on this can mean more CH or Caches, late this is good for Duchies). If you can follow your deck well, you can add Cache buys to add +2 coin to a CH coming up next turn.

Learning to Count

The other major problem with Counting House is figuring out how to use it.  Counting House has a lot of variability, and if you aren’t careful about when you trigger your reshuffles and or don’t track the number of houses you have left in your deck, you can lose valuable turns when your coppers are high-powered by triggering reshuffles too early.  (One reason why Cellar is better than Warehouse for this kind of deck.)  Will playing that worker’s village for the extra copper this round will mean you’ll miss the colony next hand?

Be sure to keep track of how many 5-card hands you will end up drawing before the reshuffle.

Scheme

This is the second most useful card to use with Counting House (after Copper).

Scheme:

  • allows you to never have bad shuffle luck and have all of your houses in the first turn of a round
  • reduces the number of houses you need to buy to 2
  • is relatively inexpensive, and you don’t want silvers anyway
  • enables the House in province play because of how consistent the House becomes

A game versus RomaNorgy. Provinces are out by turn 14, even though neither of us were playing even near perfectly.  RomaNorgy thanked me after for the new strategy (which I got from O, so here’s passing on the thanks).

Attacks

After dismissing the idea of a ‘Counting House + Coppersmith combo’, the second thing people notice about Counting House is that it seems like it shouldn’t be hurt much by certain attacks.

Here are games with Ambassador, Sea Hag, Sea Hag, and Mountebank respectively.  If you’re careful enough, the House will be able to face off against the cards we imagine it should.  It doesn’t have a 100% winrate (see game 4), but it does hold advantage.

If there’s nothing else going on or the only attack on the board is Militia, Goons, Sea Hag, or Mountebank, Counting House might be a good choice.  The House benefits from slow environments where the number of good turns matters more than the average of turns.  It can pick up 4’s, since otherwise it’ll just be getting more +buy cards.  Many attacks don’t hurt counting house nearly as much as they hurt Smithy-BM type decks.  Notably, Ghost Ship will actually help a player going Counting House-Scheme.

When you’re playing Counting House, you are also going to have a lot of turns where you’ll have 4, and this means that you can use things like Militia and Cutpurse with essentially no drawback.  They will help you hit the 5s you so desperately need, and avoid the 6 that temps you into buying golds.  Unfortunately, I don’t have solid statistics, and if anyone would like to run some, I would use them to revise this discussion.

Multiplayer

Counting House is much, much better in multiplayer games.  The reason is that you are giving up less.

Consider CH vs Witch in 2p: you forego attacking the other guy and have a 10-0 split in the Curses. The loss of punishment for your opponent is a very high opportunity cost. CH vs Witch vs Witch means that you end up with a 9:6:5 curse split and you can spend your terminal 5 on a card that gives you a Duchy or Province most of the time you play it in the late game. The opportunity cost is now only 4 curses, not 10.

Likewise if everyone else in 4p goes for Ghost Ship, you can count on them all playing 3 card hands (most of which will spend an action on +2 Cards) and you can go for CH as you don’t care about hand size. Opportunity cost here is even lower.  And of course, attacks that are countered by Counting House (Noble Brigand, Mountebank, Jester) means the opportunity cost of Counting House is much lower.

Summary:
Counting House is situational, but when the situation fits, it’s amazing.  Looking to make it work every turn without Scheme in a 2p game isn’t very likely, but an enabled Counting House is a card well worth considering.

Works well with:

  • Scheme
  • Multiplayer (especially attack games)
  • Pawn / Hamlet / Worker’s Village
  • Sifters
  • Cache
  • Bridge / Woodcutter / Nomad Camp (requires careful management, decks will be more Counting House heavy)
  • Talisman / Ironworks / Workshop (gaining extra enablers easily is very helpful)
  • Colony
  • Ill-Gotten Gains (only if Scheme is present to reduce the number of Houses you need)
  • Mountebank (you can buy one too.  once the curses are out, they have to choose: give you a free copper, or miss their +2.)
  • Feast
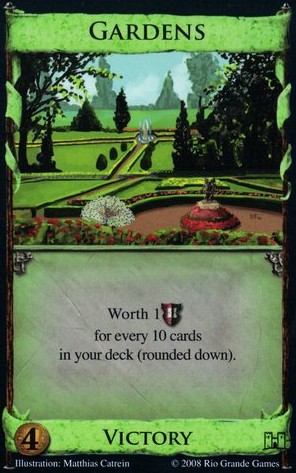
  • Gardens (rush the gardens, but don’t help your opponent rush anything else.  the goal is to province or colony to seal a lead.)
  • Things that can return a Counting House into your deck (Develop, Inn, Watchtower)

Conflicts with:

  • Trashing (of note: Moneylender)
  • +Draw Engines
  • Big Money games
  • Lack of Colonies
  • Action Chains
  • Gold
  • King’s Court
  • Possession
Posted in Prosperity | Tagged | 14 Comments

Alchemy: Scrying Pool

This is an article by Powerman, originally posted on the forum.

Scrying Pool

Dominion: Alchemy

Scrying Pool’s strength is not immediately obvious.  It is not until the first time you see someone chain together some Scrying Pools that you realize, hey, this card is pretty strong.  (Also, his turns are really taking a while …)  And then you start experimenting with it, and realize that in an engine deck consisting mostly of Actions, Scrying Pool essentially reads “+1 Action, draw as much as you please.”  The fact that it is always guaranteed to draw one card is nice, and the Spy effect is just a bonus.

But there are some traps to look out for.

When NOT to buy Scrying Pool

Case 1: Lack of plus actions or many cantrips
Basically without a village (or King’s Court!) of some type, Scrying Pool is useless.  Why?  Because it really doesn’t matter how many Witches, Militias, or Goons you can get in your hand if you can only play one.  If the board calls for lots of actions to be played, SP will be able to get those actions in to your hand, but that does not mean they can all get played.  Also, many spammable actions helps to increase your action density quickly.

Case 2: Lack of (some) trashing
Your deck starts out with 10 non-actions, plus the potion you have to pick up, so at a minimum you will have at least 11 cards that SP doesn’t like (and usually more!).  Without trashing any of them, that means for 1 of your top 2 cards to have a 75% chance of being an action (therefore drawing 2 cards), you need to have 11 actions in addition to the SP already in your hand.  For a 50% chance, you need roughly 6 action cards in your deck.  That means to have a 50% chance of this card being a Lab, you need 11 actions in your deck.  That is a slow build up!

Now, maybe you can get by with a little lack of trashing, but Scrying Pool definitely gets swamped when it sees …

Case 3: Curses
This is an obvious counter to SP because more junk means less action density.  Basically for every Curse added to your deck, you need to add that many extra actions to compensate.  Needless to say, Mountebank is especially bad because those Coppers might as well be an extra Curse!

Case 4: Lack of virtual $
Obviously if you want your deck to be mostly Actions, you want to keep your Treasure count to a minimum.  But you still need to buy cards, so having a way to generate $ from action cards is HUGE for Scrying Pool.  Without anyway to generate Coins from Actions, you have to add treasures which just further dilutes your action density.

Case 5: Lack of +Buy
This alone is not enough to avoid SP, but it should make you think twice.  Why?  First off, without an extra Buy (or gain) you can only add one Action to your deck per turn, which means building up to a good density of Actions will be slow, especially when you want to get numerous SP’s, so your Potion turns pretty much are dedicated to that early.  Secondly, a SP engine is often slower than the fastest other options, so you are likely to fall behind to a good opponent.  With a +Buy, this isn’t a problem because it is easy to get to $13 or $16.  But without?  It can be awfully difficult to make up the lost time.

Case 6: Very quick games
I’m looking at you Jack of All Trades!  The idea behind this being if your opponent is hitting their 4th province by turn 12, SP is just going to be too slow.  So Jack of All Trades and Masquerade do not bode very well for the SP player.

With all of these out of the way, what should you look for?  When should you buy a Scrying Pool?

When to buy Scrying Pool

Case 1: Cheap Cantrips
Scrying Pool basically adds +1 card to all actions, because you draw the actions up until the Victory/Treasure card, so it adds 1 to your hand size.  This means that your Pearl Divers, Great Halls, and Spies all become Laboratories.  The best ones here are Village (gives +action), Pawn (can give +Buy OR +$), Conspirator (gives +2$ and is trivial to activate) and Haven (can save extra SP’s if you draw your whole deck) because they are cheap (easy to mass) and give a fringe benefit.

Case 2: Light Trashing
I say light trashing, because if you have really good trashing then you don’t really need the Scrying Pool to draw your deck.  However, with slower/lighter trashing, SP should be enhanced more than other strategies.  Good options here are Moneylender and Spice merchant (getting rid of your starting coppers should be enough to quickly get through your whole deck), Salvager (although getting rid of your Estates might not be enough, the +Buy is a good addition), and Trading Post (Turning your 10 starting cards into 5 silvers helps eliminate enough junk to cycle through your deck, but also gives you enough economy to buy things).

Case 3: Hand Size Reducers
SP is a great counter to Militia, Goons, etc. because discarding the 2 cards will rarely hurt you if you have a SP in hand, as you will quickly be drawing through your whole deck.  Additionally, because you will be cycling extremely quickly, you can play YOUR Militia every turn and make your opponent play 3 card hands.  Good trade off!

Case 4: Vault, Secret Chamber
Vault (or Secret Chamber) and SP are a great combination.  Why?  Assuming you have some +Actions/+Buy, the general strategies is to draw all of your Actions with a Scrying Pool, discard them for $, and then play another SP to redraw them all.  This can be repeated a few times, and then your other actions can be played out like normal, leading to huge turns.

Case 5: Vineyards (and Fairgrounds)
The things that make SP bad are it is often slow, it needs to avoid many treasure cards, and you have to buy a potion.  If only a card existed that combined these to give VP to allow for comebacks…

Vineyards are Donald X.’s gifts to Scrying Pool players.  The idea being you can fall behind, but because you will have so many actions, buying vineyards can easily be worth as much or more than provinces.  If you can avoid provinces altogether, it will be very difficult for most strategies to buy all 8 of them.  Fairgrounds deserve an honorable mention, because any time you have a Potion cost card it is not too difficult to get them worth 6 VP, and they will almost always be worth 4 VP.

Case 6: Colonies
Colonies mean two things good for SP players: more victory points available, and a longer game.  This means that it will take longer for your opponent to get their strategy together, but it will only take a SP player maybe 1 or 2 turns longer for Colonies than Provinces.

Playing with Scrying Pool

Case 1: Spying your deck
It’s one thing to know when to buy SP, but it’s another to know how to use it.  For your deck, always keep an action on top, even if you don’t plan to use it.  Out of coppers but have a moneylender on top?  Don’t discard it, just draw it instead!  Assuming you show a victory card, discard it.  Those are the easy ones.  Treasures are a little more difficult.  Coppers should almost always be discarded, as your next card should be better.  Silvers/Golds… you probably shouldn’t have many of these in your deck, but if you think you ABSOLUTELY need the cash, keep it and buy the card you need.  Potions, if it’s early and you need more SP’s keep it on top, otherwise discard it as it won’t do you any good.

Case 2: Spying your opponent’s deck
Obviously, your goal is to both skip a good card from your opponent’s deck, and leave a bad one on top.  But what is a bad card?  Well, it depends what strategy they’re doing.  If they are doing a SP deck too, ask yourself if you would discard it from your own deck, and you should probably do the opposite.  If they are going more of a Big Money deck, try and guess what their average money density, and then get rid of it if is higher.  A good synergy with Scrying Pool is cards (namely other attacks) that benefit from knowing what is on your opponent’s deck.  Have a Saboteur in hand?  Keep flipping your opponents cards until a Province is on top.  Have a Jester?  Wait for a card that helps you (i.e., a good Action) and leave that on top OR put a Victory card and give them a curse.  This works better than say, Spy/Jester because Scrying Pools are much, much better than Spies.

Case 3: How many Scrying Pools to buy?
The easy answer to say would be “as many as possible” and you can’t go wrong with getting more.  However, there is an opportunity cost.  With the help of Scheme, or other cards to make sure you start with a SP in hand, you probably are fine with only 2-3 of them.  However, as you start greening, every additional SP limits the chance of your engine stalling.  Plus because it has a relatively low cost of 2P, it is easy on province turns (assuming you have +Buy) to pick one up even late in the game.

Case 4: When to buy Victory Cards
With Scrying Pool, you are almost certain to fall behind a more traditional strategy early.  Hopefully you will be able to set up your engine quickly so that this lead will only be ~2 provinces, but with +Buy, falling behind is not necessarily a big deal.  But when should you jump into the greens?  Well, with alternate victory cards you can wait a little longer as that gives you a bigger pool of points to choose from.  The exceptions being Nobles, Great Hall, and Island, as they still count as actions so buying them early actively helps your deck as well as giving you a VP boost.  But what if there are no alternate VP cards?  The simple answer is there is no perfect time to green — it depends on the board.  But a rule of thumb can be wait as long as you can.  In general waiting to make your first green turn a double (or triple) province, is a good idea, but obviously if your opponent is going too quickly you might need to simply settle for a 1 province turn.

Case 5: Other Potion Cards
Obviously buying a Scrying Pool requires you having a Potion in your deck, so other Potion cards that are either too weak or slow to buy a potion on their own now become an option.  Possession can easily be played every turn, and the opportunity cost is much lower if you already have a Potion in your deck.  Vineyards (as mentioned above) don’t require the potion buy – you already have it for the SP!  Even Transmute isn’t bad; it can turn Coppers into Actions and Estates into Golds; both of which are great ways to juice a SP deck. Eventually, SP decks tend to have a hand or two where either they have 1P or they want to use all their coin on something big (like a KC) and have a pot and a +buy left over.

Apothecary can be good in lieu of good copper trashing, as it can clear off your non-Action cards while building your economy.  Another Alchemy card that can be good with SP is Herbalist — it provides a +Buy, and it lets you return your potion to your hand early to quickly get SP’s.  The Alchemy cards that don’t work well with SP are Philosopher’s Stone (no deck left!) and Familiar (Curses!).  Alchemist and Golem don’t hurt SP, but might not be worth the buy if you can already draw your deck.

Case 6: Manipulating your Draw Deck
Vault/Secret Chamber, as mentioned above, is one example of this.  When your whole deck is drawn, and you Vault away all your Actions except one Secret Chamber, your next Scrying Pool is guaranteed to draw all those Actions right back into your hand.  Warehouse and other sifters play a critical role in helping you separate the Actions from the junk in your deck.

Example Game Logs
[editor’s note: since councilroom.com is currently down, these game log links do not work right now.]

Here I use Remodel (normally very slow) as the only trasher to start drawing my whole deck by about turn 15.  I cash in for 4 provinces on turn 17, and the last 2 (and 2 duchies) on turn 18.  Note how I turned my coppers to Herbalists, as they were easy to draw.

Here I use light trashing from Mint and Expand to counter Witch (and use SP to play my witch very often).  Caravans are useful here to expand hand size to guarantee starting with a SP.

Here I have just enough time to come back from a fairly quick Vault/Tunnel engine.  Using the SP, I am able to pull a bunch of bridges into my hand, and I can use village to play them all.

Here I have a board with Vineyards and Scrying Pool.  With the addition of Wharf for +Buy (and more cards) and Remake for trashing, this board is tailor made for SP.

Here I use a DoubleJack strategy (with disappearing village) to beat a SP strategy on a fairly weak SP board.  Although he makes a mistake ending the game, my VP lead is simply too big to come back from.

Here my opponent goes for SP, and I overwhelm him with Ambassador and Familiar (although, I probably should have picked up some SP’s myself)

Here, I go for SP on a board with A) NO trashing (besides Jack, which doesn’t really trash), B) NO cheap cantrips to load up on… in fact no cantrips at all, C) JoaT which leads to fast games, and D) NO villages.  How do I dominate here?  Using Throne room, which allows me 2 searches with my SP for actions, and allows me to get the +Actions to play my Goons (and later bridge).

Lastly, here I go Duchy-Duke, and the SP player has no choice but to try and fight me.  Needless to say, his deck clogs and I win easily.

Works with:

  • Hand Size Reducers
  • Colonies
  • Vault
  • Conspirator, Peddler, and many other cheap actions
  • Light trashing (Moneylender, Trading Post, etc.)
  • Vineyards (And to a lesser extent, other VP sources)
  • Other Deck-Inspection Attacks (Especially Jester)
  • Outpost
  • Other Potion Cards

Conflicts with:

  • Fast games (Jack of All Trades, Masquerade)
  • Few cheap actions to pick up
  • No +Buy/ +Actions
  • Cursers (especially Mountebank!)
Posted in Alchemy | Tagged | 12 Comments

Taking risks & driving the P2 seat

This is a guest article by -Stef-, who held the top rank of the Isotropic leaderboard for quite some time.

Suppose we’re playing Borinion, a much more boring game then Dominion. Two players, P1 and P2, take consecutive turns. P1 gets to start, and due to the unfair nature of this game it ends after 9 turns. So P1 always gets to make one extra turn. Both players start at 100 points, and every turn they choose…

option A: 60% chance at +3 points, 40% at -3 points
option B: 50% chance at +5 points, 50% at -5 points
option C: 40% chance at +10 points, 60% at -10 points

If you play this game in isolation, it’s easy: always option A is best. In fact, it’s the only option with a positive mathematical expectation. Simulation over one million games shows that if both players follow this simple minded strategy, P1 will win approximately 555000 vs 445000 (55.5 win% for P1).

However, this game is not about scoring as many points as you can. It’s about scoring more points than your opponent. And thus, plans that might look bad at first glance end up being better after all.

Suppose we leave the game plan of P1 what it was (‘always go A’), but experiment a bit with P2. If we change it to ‘option A when ahead, option B when behind’ the win% for P1 drops to 51%. ‘option A when ahead, option C when behind’ works even better; now P1 only wins 46% of the games. We can improve P2 further by delaying the risky things, and enforcing option A on his first turn (42.5% for P1) or his first two turns (42.1% for P1).

I’m starting to get convinced the optimal strategy is actually quite complex. I think it uses all 3 options, and also includes the ‘turns to go’ and ‘actual point difference’ (not just ‘am I behind or ahead’). But I won’t go into that – I didn’t name it Borinion for nothing.

So what does this game teach us about Dominion? Most of all that the optimal strategy always involves your opponent. Even on kingdoms without any attacks, it matters a lot what he’s doing and how well he’s doing. If you both start out the same, but he has some shuffle luck and you don’t, it’s time for crazy things. I he stumbles where you thrive, try to buy safe cards.

It also suggests it’s good to have options. If you create an option B, C or D for yourself to use later on, that choice itself is already good. Engines give you much more options than BigMoney. So in playing engines right, it’s not just about ‘how can I effectively build this engine in solo play’. It also requires a good feeling/understanding for taking risks. Simulators we use today don’t understand it at all, and that may very well be the reason variants of BigMoney strategies do so well in simulation and so poorly in reality.

Opening two terminals isn’t all that bad just because they might collide. P1 has no real reason to take this risk, but P2 is already behind at the start. It of course depends on the questions ‘how good is it if they don’t collide’ and ‘how bad is it if they do’.

One of my favorites is double Steward, because if they collide I can still get rid of 2 cards. I wasn’t going to do much more on a turn with steward without collision anyway. Don’t get me wrong – I’m not happy with the collision at all – but it’s not a game losing disaster either. And depending on the kingdom, being able to get rid of 4 cards in the first round may very well be winning. As a rule of thumb, opening with two terminals is too soon to take risks though.

It’s not easy to define risky or safe things in general. A safe choice that happens often midgame is adding a little more +actions to your deck than the bare minimum. Another safe choice is to stop playing your engine where you could draw some more cards, just to prevent a reshuffle. Maybe you can put a good card on top for next turn?

Risky things could include adding more cards that require other cards (Baron, Remodel, Forge) or buying slightly too many terminals in general. Village + smithy is more risky than laboratory + laboratory. Swindler has the risk build-in all by himself. So do treasure map and tournament, but they’re not really an addition to a deck – they require building your entire deck around them.

In the endgame it can get quite complex because of the ending conditions of a Dominion game. The most common risky thing is buying the next-to-last province. There is a rule for not doing it, but even if it made you lose, that doesn’t automatically say it was a bad thing to buy it. If your deck is not so good, and you’re losing the long run for sure, try to sneak out a victory now.

To summarize: constantly figure out whether you’re ahead or behind. If you’re ahead consolidate, if you’re behind make a plan to get back. As player 2, you’re behind when you start – do something with it.

Posted in Articles | 10 Comments

Intrigue: Conspirator

This article is written by rinkworks, author of A Dominion Fan Card Creation Guide.

Conspirator

Dominion: Intrigue

An homage to possibly my favorite card.  This guide is targeted to players who are familiar with the game but might not be familiar with how best to use the Conspirator card, the power of which is not necessarily immediately obvious.

Building and Executing a Conspirator Engine

The simplicity of the Conspirator card belies its power.  Basically you get +2 coins, and if you play it as your third or later action in a turn, you get +1 Card and +1 Action.  Simple and seemingly meager, right?  Played as one of the first two actions, it’s a Silver that eats up an action.  But that tiny little bonus you get when you play it as the third or later action means you can chain them together.  A whole sequence of Conspirators can add up to a whole lot of money, with which you can buy green.  Few Dominion cards are more aptly named:  a single Conspirator doesn’t do much on its own, but a bunch of them can become a dominating power.

The main concern with a Conspirator Engine is kicking it off.  For this article, I will introduce a couple of terms:  When I say “Starter,” I’m referring to that first action you will play to activate your Conspirators.  For lack of a better term, I’ll call the second action the “Substarter.”  Once you’ve played a Starter and a Substarter, your Conspirators are free to run rampant.

One of the fun things about the Conspirator Engine is how abruptly it activates:  you’ll be slogging through terminal Conspirators and scraping to get 4 coins per turn and then, suddenly, you’ll rip through your whole deck in a single turn!

Part 1: When the Conspirator Engine Will Work

Although the Conspirator engine is fun and powerful, it can’t thrive in all environments.  Before jumping on a Conspirator engine the next time the Conspirator card shows up in a kingdom, take a few moments to make sure the conditions are right.  The following, I would argue, constitute the ideal conditions for a Conspirator Engine.  This is not to say a Conspirator Engine can’t work under any other circumstances, but if you know what the best conditions are, you’ll know what obstacles you’ll have to overcome in other situations.

The other thing to keep in mind is that these conditions only apply to the Conspirator Engine.  If the conditions are all wrong, that doesn’t mean you won’t be able to make great use of one or more Conspirators as a supplement to another kind of engine.  The occasional Conspirator can make a nice addition to a Laboratory engine, for instance, or a Village/Smithy engine.  But to make a Conspirator Engine, you ideally want all of the following to be the case:

1. Conspirator.  You kind of need Conspirator in the kingdom to build a Conspirator Engine.  Black Market and Band of Misfits will only get you so far.

2. Strong trashing or sifting.  Because each Conspirator only lets you draw at most one card, you need to trim your deck as severely as you can.  You ideally want to see Chapel in there.  Single-card trashers aren’t going to be fast enough.  Avoid Forge, too:  it may be a fast trasher, but you’ll burn too much time building up enough money to afford it, at which point you’ll then have extra money to have to get rid of, too.   Shy away from Trading Post, too:  its trashing power is good, but you don’t want those Silvers.

If you don’t have strong trashing, then you can substitute non-terminal sifting; that is, something that allows you to filter through the junk in your hand.  These cards include Cellar, Warehouse, and Hunting Party.

3. Absence of cursing attacks.  Cursing attacks will stop Conspirator chains dead.  That goes for Ambassador, too.

4. A good Starter card.  The best Starter cards are villages — cards that give you +2 Actions and +1 Card.  In the absence of villages, other +2 Action cards will also work.  If there are no +2 Actions cards, you might still be able to make the engine work with simple non-terminals, but you’ll have a tougher time of it.  It also helps (though, again, is not necessary) if the Starter card costs less than 4, as that gives you something to buy on turns when you don’t have 4 to spend on a Conspirator.  More on Starter cards later.

A special case: Throne Room is an amazing Starter, because it doubles as both a Starter and Substarter.  Throne Room a Conspirator, and that second time you play Conspirator, it gets the +1 Card / +1 Action and you are off and running.  Scheme is even better, by essentially guaranteeing that you can get your chain started every turn.

5. Preferably, an absence of hand-size reduction attacks.  This is a less critical than many of the other conditions here, but I’m mentioning it anyway, as I will discuss the impact of hand size on the engine later.  But if the presence of, say, Militia, is the only less-than-ideal circumstance, your Conspirator Engine is probably okay.

6. Preferably, some source of +Buy.  When your Conspirator Engine kicks in, it may very well bring in more money than you can spend on a single buy.  So you want a source of +Buy if you can manage it, though this is not a strict requirement.  More on this later.

7. Optionally, some source of virtual +Buy.  By this I mean Talisman, Workshop, and Ironworks.  These cards can all help you obtain Conspirators and many of the best Starter cards faster in the early game.  They aren’t necessary, but one, maybe two of these bought early can help you rev up your engine faster.  Once your engine is rolling, though, you’ll want to trash these.

If, after surveying a kingdom, you determine a Conspirator Engine is a good fit, it’s time to build one.

Part 2: Building a Conspirator Engine

One of your first two buys should be the strongest trasher on the board.  If you’re going to use Talisman, Workshop, or Ironworks at all, make that your other buy.  An early Silver will help you build your engine, but be very careful about buying money:  money only clogs up a Conspirator Engine.  Whatever money you buy early might have to be trashed later.

For the whole of the early game, be singleminded about obtaining Conspirators at every possible opportunity.  I wouldn’t worry about the Starter cards at first, even if you get to the point where every hand you draw comes up with clashing Conspirators.  The low cost of Conspirator and most of the Starter cards mean that it doesn’t matter so much if you’re not producing very much money per turn early on.

Of course if there’s a plain old vanilla Village on the table, and you fail to produce the 4 coins necessary for a Conspirator, that’s the perfect time to buy that Village Starter instead.  Starter cards that draw at least +1 Card cannot gum up a Conspirator Engine, so buy as many of these as you like.  But if, for example, your Starter card costs 4 or more, you should probably just stick to buying Conspirators until the pile is gone or you have the majority of them by a good margin.

Once the Conspirators are taken care of, you should, if you have not been able to do so already, get some Starter cards and preferably also some +Buy cards.  Ideally, these are the same thing:  Worker’s Village makes an outstanding Starter card, because of its +Buy.

Barring that, follow the general rule that cantrips (actions with at least +1 Card and +1 Action) will not harm your Conspirator Engine.  So Market and Grand Market are both outstanding supplements to a Conspirator Engine.  Woodcutter, on the other hand, is not a great source of +Buy.

Continue to trash away your Estates and treasure cards.  Ideally, you won’t have any treasure at all, though you’ll be able to work around a single Silver or Gold, maybe two.  Once the Conspirators are gone, you’ll also want to trash away your Talisman, Workshop, or Ironworks, if you bought any of those.

Part 3: More About the Starter Card

As stated earlier, the best Starter card gives at least +1 Card and +2 Actions.  Why +1 Card?  Because they won’t stop you dead if a Conspirator chain you’ve already activated draws into them.  Why +2 Actions?  Because they don’t need any help to kick off a Conspirator chain.  But wait!  Don’t you also need a Substarter?

Yes, but if your Starter gives +2 Actions, your Substarter can be anything — a terminal action, for example, not that you want to clog up your deck with terminals.  Frequently it will be a non-activated Conspirator.  Consider a hand with a Native Village and four Conspirators.  You play the Native Village first, play a non-activated Conspirator second, and then the remaining three Conspirators will all draw for you.

Although the ideal Starter card also draws, Festival makes a decent Starter card despite not drawing.  Why?  Two reasons:  It provides +Buy, fulfilling that optional accessory of the engine, and it also provides +2 coins all by itself, meaning that you can earn the same amount of cash with one fewer Conspirator that you’d normally require.  Even so, you want to be careful.  Inasmuch as Festival helps kick off Conspirator chains, its lack of +Cards can stop them, too.

If you’re attempting a Conspirator Engine without any +2 Actions cards, there should at least be plenty of ordinary +1 Action cards to help you get going.  The difference with +1 Action Starter cards is that the Substarter must also be a +1 Action card.  That means you need two such cards to kick off a Conspirator chain, and that’s much more difficult to manage.  Because of this, the more they draw, the better:  Laboratories are among the best of this type of Starter, because they offer +2 Cards.  Markets and Grand Markets only offer +1 Card, but they provide a source of +Buy in the bargain.  Treasuries are nice because once you’ve got a couple, you can keep them coming back to your hand turn after turn as you’re revving up.  But the 5-coin price point of all four of these cards makes them difficult to get early enough in the process.  Ideally you’d like to have cheaper Starter cards available, so you can make good use of early turns that don’t generate enough coins to buy a Conspirator.  Something as simple and lowly as Pearl Diver will suffice: anything that offers +1 Card and +1 Action will help activate your Conspirators without gumming up the engine once it’s rolling.

Part 4: Supplementing Your Engine

If, by the time you’ve drained the Conspirators and loaded up on enough Starters that you can reliably activate a Conspirator chain with any hand you’re likely to draw, it may well be time to buy up green cards.  But if you have any time left to spare, you can make your engine more resilient to the influx of green if you spare some turns to buy good supplemental cards.

Good supplemental cards are anything that offers at least +1 Card, +1 Action, and something else worth having, such as money (Treasury, Peddler, Bazaar) or a buy (Worker’s Village), or both (Market, Grand Market), or an extra card (Laboratory), or an attack (Spy).  If you’ve already got the extra buys, Peddlers are prime targets here, because when your engine kicks in, Peddlers will cost $0 on virtually every hand you play thereafter, so you can suck them up with whatever extra Buys you happen to have.

In the absence of hand-size reduction attacks, Cellar and Warehouse are also good supplements in moderation.  The reason is that although they take up a slot in your hand, the potential is that they’ll free up other slots by replacing those incoming Provinces with more Conspirators.  Certainly you can overdo these, but a small number can loosen your engine up and keeping it rolling.

Part 5: The Importance of Drawing

Since each Conspirator (and most Starter cards, too, like Village) only draws one card, a Conspirator Engine can’t skip over green cards and other non-drawing cards the way, say, a Laboratory engine can.  Any non-drawing cards — including treasure cards, terminal sources of +Buy, your trasher, and non-drawing Starters like Festival and Native Village — can potentially end a Conspirator chain.

Let’s take a more specific look at how “tolerant” your Conspirator Engine will be of these cards.

Suppose you have a Conspirator (C) Engine with Village (V) cards as your Starters.  Suppose you’ve trashed everything else with Chapel (Ch), but you’ve just started to accumulate Provinces (P).  Let’s say your hand and your deck look like this:

Hand:  V C C P P
Deck:  C P V C C Ch C P C

You play the Village first.  That gives you +1 Card, which is a Conspirator.  Now you have three Conspirators.  You play one as the Substarter.  Then you play the next one, which draws a Province.  Now you have one left, which draws a Village.  Playing the Village draws another Conspirator.  Playing that Conspirator draws another Conspirator.  Playing that Conspirator draws a Chapel, and you’re done with your action phase.

For your buy phase, you now have 10 coins to spend.

But now let us suppose those Villages were Native Villages instead, but everything else were the same:

Hand:  NV C C P P
Deck:  C P NV C C Ch C P

For simplicity, let’s say you always use the Native Villages to put the mat cards (of which there are none) into your hand.  You play the Native Village first.  Then you play a Conspirator as the Substarter.  Then you play the last Conspirator in your hand, which draws another.  That Conspirator pulls in a Province, and you’re done.

For your buy phase, you now have 6 coins to spend.

The lesson, again, is that not only doesn’t a non-drawing Starter help you pull more Conspirators into your hand, they grind the engine to a halt when they’re drawn by already activated Conspirators, too.  You can still make the engine work, but it’s not going to be as smooth.

The math is quite simple:  For every +1 Card action in your initial hand, you can skip one non-drawing card in your deck.  This is why in the best Conspirator Engine all of the engine cards are drawing cards, leaving only the green cards (and the odd lingering trasher) to gum it up.

This is also why I said earlier that hand-size decreasing attacks can have a detrimental effect on your engine.  Not always — in the example above, getting attacked by Militia just means you discard those two Provinces.  But Militia is still a threat in general, because the fewer +1 Card actions you start with in your hand, the fewer non-drawing cards in your deck you can skip over.

What do you do when you don’t have an obvious Conspirator engine on the board?

The beauty of Conspirator is that it supplements just about every engine.  By definition, an “engine” is a deck designed to play a lot of Actions, and so nearly all engines will find room for Conspirator as a sort of lite-Grand-Market.  But here, you don’t want that many Conspirators: unlike Grand Markets, drawing a whole bunch of them in hand will often lead to a dead turn, as opposed to priming your engine.  Conspirator supplements those engines, as an injection of self-replacing buying power for your deck.

Conclusions

Because of the unique considerations and constraints of the Conspirator card, it can be one of the most fun to play.  While other types of engines can be constructed from interchangeable parts (e.g., a Village/Rabble engine is not greatly different from a Bazaar/Smithy engine, which in turn functions roughly like a Walled Village/Council Room engine), the Conspirator Engine requires coordinating a unique set of components to get working.  Doing that can be a whole lot of fun — enjoy making it work for you!

Posted in Intrigue | Tagged | 19 Comments

A Guide to Alternate Victory Points

This article is written by jonts26, originally posted on the forum.

Introduction

So you’d like to learn all about the best ways to play all of the various alternate VP strategies (i.e., any Victory card other than Province)? Well too bad. This isn’t that guide. (You might want to read the Duke article, however.)  The purpose of this article is to give general guidelines for how to play with or against general alt-VP strategies after someone has decided to take the alt-VP plunge.

For the sake of clarity, I will introduce a little terminology that I like to use. Every alt-VP can be utilized in at least one of three ways depending on the board: Rush, Slog, and Support. I’ll define these and give guidelines for how to approach these games when you are playing these strategies, either uncontested or in a mirror, or how to counter an opponent who does.

The Rush
Common Players: Silk Road, Gardens

In a normal Province game, whether engines or Big Money, you usually begin the game by ramping up your deck quality, and then switching to buying green. The rush strategy aims to end the game as soon as possible, while your opponent’s deck is still setting up.  Ironworks/Gardens is a common example.

Uncontested

When rushing uncontested, it is often best to get a large number of the support cards before any of the green.  (For example, if playing Ironworks/Gardens uncontested, you’ll want to stock up on Ironworks before going into Gardens.)  The reason is simple, you are looking to drain 3 piles as quickly as you can, before the Province player can build up to buy Provinces.  One of those piles is probably going to be your support card pile, and getting more of them early acts as an accelerant, letting you drain the green pile faster towards the end of your rush. Keep a close eye on your opposition, however. They may try to steal some of your green while you are buying support cards. And while you appreciate the help expediting the end of the game, you still can’t give up too many points or else you could find yourself falling behind.

If your rush begins to fail, and things are coming together too fast for your opponent, you find yourself in the position of no longer being able to end the game. Now you’re in bad shape. But the very cards which are good in rushes also tend to be decent enough in slogs that you can try to transition into a new game plan as a desperation ploy. As for how to play the slog, well, keep reading.

Mirror

If you find both you and your opponent going for a rush strategy, you need to rethink your plan. In fact, ending the game ASAP is no longer a priority since you know your opponent isn’t building up to Province-level points. These games actually play somewhat closer to standard non alt VP games.

Your main goal becomes instead to win the VP split. And if you can sneak in a Duchy or two, all the better. As such, you want to start greening much much sooner than if you are uncontested. If you win the split, you find yourself in a nice position and your goal switches back into ending the game soon, since unlike with Provinces, draining your alt VP pile doesn’t end it then and there. Switch back into rush mode and drain those other piles. If you find yourself on the wrong end of the point split, you need to rebuild your shambled economy and hope to be able to grab some provinces or duchies before your opponent can end it. This means that at all costs, avoid piles that are likely to drain, including estates. While the couple extra points might be nice in a low scoring game, you are only hastening your own demise.

Counter

Sometimes, you deem the rush support inadequate and opt to go the traditional VP route, only to see your opponent come to a different conclusion. Whether you underestimated the rush potential or your opponent overestimated it, you should no longer play as you would in a province mirror.

For a standard Gardens/Silk Road rush, the rusher will probably have about 35 points at game end. For you, that means about 5.5 Provinces. That’s actually somewhat daunting for many games, because in most games you only need to get to 4 Provinces and change. However, you could also steal a few of the rushed green cards yourself. Say your opponent’s gardens will be worth 3 points end game and yours will only be worth 2. Well, every garden you buy, that’s a 5 point swing. Almost as good as a Province, and for half the price. The drawback, of course, is that each rushed green card you buy brings the game closer to piling out, which you don’t want until you can secure some more points. It’s a tricky balance and completely dependent on game state, but usually it’s a good bet to steal 2-3 of the rushed green cards later in the game, while focusing on pounding enough Provinces and Duchies to secure a VP lead.

In general, beginners tend to panic and join in rushes if they see their opponent starting, and are overeager to “steal” VP cards from the rushing player.  But this is usually a recipe for disaster, because helping the rushing player end the game is almost a guaranteed way to lose the game. Of course, you could get a favorable split with your small economy lead, but you’re better off just trying to grab a couple of Provinces. Look at it this way: If it takes 4 turns for you to grab 2 Provinces, that gives the same amount of VP as spending all 4 turns grabbing Duchies. But grabbing the Duchies gives the other player another possible pile to drain if he wasn’t doing so already. Once you’ve gotten a slight lead, it’s easier for you to end the game with a couple of low piles than for him to come back and suddenly grab a Province himself.

The Slog
Likely Candidates: Duke, Fairgrounds, Vineyards, Silk Road, Gardens, Goons

Like a rush, a slog seeks to gain the bulk of its points from sources other than Provinces. Unlike a rush, however, it does not seek to end the game quickly. Just the opposite, you want the game to go on as long as possible. Either the cards you are slogging with continually increase in value (like Gardens or Vineyards), or they put you in a strong position to obtain more than half of the available VP (like Dukes or Fairgrounds).

Uncontested

Uncontested, you play exactly opposite to how you play a rush. Slow the game down. This often means don’t buy Provinces, even with $8.  For your opponent, getting all 8 Provinces solo is quite an ordeal.  Unless there is a good mega turn engine out there, decks begin to crawl to a halt once they pass the 5 or 6 Province mark. It’s the last couple Provinces which are the toughest ones to get, so if you buy a Province or two, you’ve made the game significantly shorter.

Attacks are also very good at slowing the game down, particularly Cursers and hand size reducers. These attacks tend to hurt the Province player much more than the alt-VP player.

Mirror

As with rushes, when in a mirror strategy, the main goal is to win the important VP split. Often this means dipping into the green a little early and then working on increasing their value after you secure the split.

Counter

How do you counter a slog? With a rush. Specifically, you rush Provinces. But don’t just start buying them out right away. You need a solid game plan. Don’t expect any help from your opponent in draining them. You need to get 8 all by your lonesome. In normal province matches, you end up diverting for Duchies once the Province pile starts to dwindle. You do NOT want Duchies here (excepting Duke games). Every green card you get that isn’t a Province pushes the end of the game further from you, making it easier for your opponent to secure the VP lead. Keep your eye on the target and get draining. The real key for you would be end game accelerators like Remodel and Salvager.  If you find yourself in a rush for provinces don’t be afraid to pick up a number of these types of cards in the mid-game.  Even if you can’t actually buy a Province, it’s often worth it to Remodel a Province into another Province if it means ending the game before your opponent’s Vineyards start exploding in value.

As with rushes, you also want to consider denying green to your opponent. But in this case, every extra green you get lengthens the game instead of shortening it because it becomes harder for you to buy Provinces. So again, you need to figure out the proper balance between denial and game length. Remember to think of each VP you buy as a sum of the points it gives you and the points it denies your opponents. If I only have 2 Duchies, I might still buy a Duke in the late game, because it’s an 8 point swing.

Support
Works with: All of them

Most alt-VP cards are not strong enough to give you the option to forgo Provinces.  No one ever beat a Province player with just Great Halls.  But even if you choose to pursue a more standard Province based strategy, the presence of alt VPs can significantly alter the landscape of the game by providing support. We can even consider curse giving cards as a form of this. It is important to consider the total number of points available in any kingdom. With no alt VP’s or Curses, including starting Estates, there are 86 total points. That means once you secure 44 points, you’ve won. But add in even the lowly Great Hall, and you increase the number of points you need to guarantee victory. This does one very important thing, it takes pressure away from winning the Province split. With enough support, you could lose the province split 6-2 or even 7-1 and still pull off victory.

Generally, this benefits engines greatly. Each support VP you add, the more time you have to set up against a big money opponent. As Big Money slows to a crawl once the green starts coming, you can keep on building up, looking to snatch enough points to close out the win. Particularly nice are dual type victory cards as they do more than just junk up your deck.

It also makes a very big difference in games without +Buy.  If we start buying Provinces and I happen to have won the Great Hall split 5-3, you’re going to somehow need an extra Duchy if you plan to split the Provinces 4-4.  In the late game, you often just aren’t going to have the time to do that.  Buying that last Great Hall for a 4-4 split instead of a 5-3 split can save a lot of headaches later in the game.

Colonies

No alt-VP has a greater average effect than Colony and its life partner Platinum. You can have 8 point Dukes and I’ll stick with my 10 point colonies. And good luck competing with Fairgrounds without Black Market, or Vineyards without a killer kingdom. Colonies beat all but the best supported slogs because there are just so many more points on the board to get. And they beat all but the fastest rushes because I only need 2-3 Colonies to beat you instead of 4-5 Provinces.

It’s probably best to think of Colonies as support VP. Or at least, they behave that way. Since you add 80 points to the game, you give engines a lot more time to set up and big money tends to fall by the wayside.  In addition, Colony players “fall back” on Provinces rather than Duchies; most of the alternate VP strategies incorporate Duchies a lot more than Provinces, and so while a Province player is hesitant to fall back on Duchies and help drain that pile, Colony players are totally fine with buying Provinces since an alt-VP opponent wasn’t going for Provinces anyway.

Multiplayer Considerations

My analysis is mostly based for 2 player Dominion. However, alt-VP can change things significantly when more than 2 players are going at it.

Consider 3 player Dominion. Imagine you want to try a rush strategy but the other two players don’t follow you. Now you need to drain 12 of whatever card you are rushing, and likely 12 Estates as well. That’s 8 extra cards you need, which gives the non-rushers plenty more time to get their engines together. Now consider the opposite case. 2 rushers vs 1 non-rusher. With 2 rushers, there are only 6 VP cards to get per player. That means the rush is even faster, giving the Province player even less time to set up.

A similar thing happens with slogs. If one player wants to go Provinces, well there are now 12 of them. If 8 is hard to get, 12 might take forever. On the flip side, if two players want Provinces, there are only 6 per player which is significantly easier than 8.

These effects are even more pronounced with 4 or more players where the number of victory cards doesn’t increase with the number of players.

What this means is that the strategies that other people pursue become critically important.  If you see the three people in front of you in a 4p game open with Ironworks on a Gardens board, you really aren’t going to have much time on Provinces.  You don’t necessarily have to join in their rush, but you need to get in your share of VP before the game ends.

Posted in Uncategorized | 2 Comments

The Secret History of Dark Ages

The “Secret Histories” are a series of articles by Donald X. Vaccarino, detailing the evolution and development of a particular expansion. Previous “Secret Histories” can be found here; the forum discussion topic for this is here.

When I showed Dominion off to RGG, I had five expansions. They were: Intrigue; Seaside and Hinterlands combined; Prosperity; “War;” and a large version of Alchemy with a touch of Cornucopia.

War was interaction-themed. Different ways for players to interact. Its cards included versions of Swindler, Trade Route, Tribute, Council Room, and Smugglers. Council Room kept the same name when I moved it to the main set; now you know how it got that name.

War was my favorite expansion, but the problem was, every expansion needed interactive non-attack cards. Every expansion needed a certain percentage of interactive cards, and attacks slow the game down, whereas non-attack interactive cards may not, and may even speed it up. So I had to spread them around. I made War more attack-themed and gave each other set at least one non-attack interactive card. Man do I need an acronym for that? Maybe I am done saying it.

During work on the main set, I briefly tried rearranging everything into 16-card expansions, and at that time I had an expansion that was top-of-your-deck themed. This theme was no good; it’s fine for making some cards that play well with each other, but since I do that kind of thing in every set, the theme is invisible. So I broke that one up, and War ended up taking a few of those cards, thinking maybe it would end up with a mild top-of-your-deck subtheme, which fit with some of the attacks. In the end it only kept Armory. Those of you noting that Dark Ages is the 7th expansion, and that in the Secret History for Dominion I say that Adventurer came from the 7th expansion: that 7th expansion was the top-of-deck one. Ditto for Shanty Town.

Around the time I was working in earnest on Cornucopia, I realized I had to decide what to do about the sizes of the last two large sets. The main set and Intrigue were standalones, and so 500 cards; Seaside and Prosperity had playmats and metal tokens. Hinterlands and Dark Ages did not have such things. Could they just be cheaper or what? I did not know yet if that was okay. However, I could dodge the issue for one of the sets by making it a standalone, and it seemed good to do another standalone anyway. I picked Hinterlands for that and worked to keep that set from getting too complex. And then what could Dark Ages have? And of course I realized that it could just have more cards; it could be 500 cards rather than 300. This would let me do some stuff that might not seem worth the space otherwise, like having a new kind of penalty card or cards that turned into other cards. So I expanded the expansion.

The original interactive theme was gone, and the attack theme was not going to cut it. Joe Dominion just doesn’t want a heavy attack environment, that’s what I think. And anyone who does can rig it themselves by including more attacks on the table. I figured attacks could still be a minor sub-theme, but slowly the cards that worked with attacks left, until Squire is all that remains (yes plus Beggar but that doesn’t count). And as I mentioned, the top-of-deck theme was never going to amount to much.

I filled the void with an upgrading theme and a trash theme. Lots of cards turn cards into other cards, or themselves into other cards, and then a bunch of cards care if they’re trashed, and a few care about the trash other ways. And of course the stuff I did with the extra 200 cards amounted to various minor themes too.

War was an unacceptable theme for Hans im Gluck, and I knew this basically from the day they took on Dominion. So way back when I knew I would be retheming the set. Dark Ages, there’s a theme. It could be the poor to Prosperity’s rich. Then when Alchemy became a small set, it looked like this set, though originally 4th, would be the last Dominion set, and that seemed cool too, going out with the Dark Ages (then Guilds got bumped to after it due to the basic cards product, which is also why Hinterlands wasn’t a standalone).

Two cards from the original 2007 version of the set remain basically intact – Altar and Band of Misfits. The Knights were in the original set in a different form, and there was a “+1 card +1 action” trasher which can claim to be an ancestor of Rats and Junk Dealer. The other 16 cards went elsewhere or didn’t survive, being replaced by 31 new cards, some themselves from other sets but many new to this one. And of course I added those other cards, the Ruins and Shelters and things. The original war flavor and interaction theme are gone, replaced by the Dark Ages, upgrading, and the trash. The original set was my favorite and it turns out the final set is still my favorite. I liked the original for the interaction between players, and I like the final version for the interactions between cards. It is the crazy combos set.

Let’s check out the cards!

Altar: This is identical to the original version from 2007 except for name. Originally it was Foundry, then Tinker. I called it Altar so you could sacrifice Cultists to it. No, don’t thank me; it’s what I’m here for.

Continue reading

Posted in Dark Ages | 3 Comments

Seaside: Wharf

This is a guest article synthesized from articles by Epoch and WanderingWinder in the forum.

Wharf

Dominion: Seaside

Wharf is, bar none, the best card-drawer in the game.

And on some level, that’s all you need to know.  Card drawing is valuable.  Wharf is the best one.  It works well in all the cases that you want to draw cards.  It excels, paired with a village-type card, in a cards/actions engine.  It is also extremely good, bought in moderation, with a Big Money deck, or practically any other deck.

It may be a bit surprising that Wharf is the best card drawer in the game.  It, after all, gives only +2 Cards, in the same category as such low-tier terminal drawers such as Witch, Steward, and Vault (all of which are good cards, mind you, but not principally due to their ability to draw cards).  Of course, Wharf gives you the +2 Cards effect twice, but the general rule in Dominion is that one big turn counts more than two little turns, so you might imagine that Smithy, with its +3 Cards now, would beat Wharf, with its +4 Cards split up in two.

In practice, what separates Wharf from everything else is its duration effect.  A Moat with a +Buy this turn is OK, not so great, but starting off next turn with the equivalent of Worker’s Village + Smithy is a gamechanger.  It’s like two Labs, with +Buy to make it all the sweeter.  And the key is that its card draw next turn is essentially non-terminal; you don’t use up your Action to get the increased handsize.

As a result, Wharf is arguably the best card in the game which you cannot use to give a Curse to your opponent. It’s versatile, effective in just about every kind of game, and links into all sorts of combinations.  Very few decks aren’t significantly improved with Wharves.

The power of Wharf

Synergies

It is instructive to think through things that Wharf works really well with, and what Wharf doesn’t, because it helps highlight all of Wharf’s strengths and weaknesses.

Wharf pairs well with Peddler.  Wharf not only gives you the +Buy to take advantage of cheap Peddlers, but the fact that it’s a Duration (and therefore stays in play for two turns) means that you’ll often be able to get Peddlers for $2 or less.

Wharf is a natural fit with Throne Room and King’s Court.  There are many reasons for this: first, and most naturally, is that with big hands, your TR’s and KC’s are more likely to hit, and more importantly, more likely to land the killing KC-KC blows.  More subtly, if you draw KC-Council Room, you sort of have a big turn this turn, but it’s wasted if you draw all Actions.  KC-Wharf might waste this turn a little bit, but then next turn you get to start with 11 cards!

Wharf works with Cellar and Warehouse, both of which require large hands to maximize their effectiveness.  This is one of those rare times where Cellar may outperform Warehouse: Wharf’s +Buy lets you pick it up easy, and with such big handsizes you might actually want to discard more than 3 cards.

Wharf is absurdly strong with special Treasures: in particular, Fool’s Gold/Wharf is absolutely brutal.  Wharf gives you the two things that FG wants – +buys and big handsizes.  Bank and Wharf love each other for very similar reasons.

On the flip side, Wharf works poorly with Menagerie.  Menagerie really needs some early trashing to get its massive card draw, and such early trashing is unnecessary for Wharf.  Plus, Menagerie’s benefit (some more cards) is not that helpful with Wharf providing all the cards you need, and the Wharf duration effect actually hurts your odds of activating the Menagerie.

Big Money

If you believe the simulators, and you probably should for Big Money matchups, Wharf is the 5th-best single card for Big Money, after the four top cursers: Young Witch, Witch, Mountebank, and Sea Hag. (Yes, it does beat Familiar.)   And the thing is, with most of the cursers, 1 curser into Wharf is going to be very good on such boards anyway.

Now, how do you want to play Wharf for money? Well, there are actually several viable ways, depending a bit on what your opponent does. But in general (and say for a mirror), you want to get a couple Wharves before gold, pretty much no matter what, and then get a good bit of money, with a third and maybe fourth Wharf, before turning for green. In fact, it almost plays a little like an engine: in most Big Money strategies (say Smithy/BM), you want to green pretty fast — only a couple Silvers and a Gold is enough.  But with Wharf, the +Buy means it’s often worthwhile to build up a tiny bit extra buying power before going green.

Another key distinction is that you can get a bit more Wharves than with most terminals, because the Wharf stays in play and therefore is slightly less likely to draw other Wharves dead.  And the fact that Wharf costs $5 is nice; most Big Money type engines really struggle with $5 turns.

In general, there’s basically no other easy Big Money strategy that beats Wharf, and it beats most simple combos too: Chancellor/Stash, Treasure Map/Warehouse, Tactician/Vault, etc.  It even holds its own against the more complex combos: Hunting Party/terminal Silver, Embassy/Tunnel, Native Village/Bridge.  About the only thing it can’t deal with is the Golden Deck (where you open Bishop/Chapel and trash down to Bishop/Gold/Gold/Silver/Province) and fast Gardens games, but then few things will beat those decks.

Engines

The one thing that you always want with an engine is +buy.  This lets you catch up with faster-to-accelerate but lower top-speed decks like Big Money.  Convenient, then, that Wharf builds it right into your engine, which both enables you to buy multiple engine components in the early-mid game, and also catch up on greens in the late game.  Without Wharf, you’ll have to divert from buying engine pieces to pick up Markets, Pawns, or possibly other suboptimal cards, in rough proportion to your engine; with Wharf, you get one free with every Wharf, a card you already wanted to stock up on.  (Note that this means that Wharf engines, even more so than most engines, is likely to lead to a game ending on piles.)

Like most draw cards, building an engine is not just about adding a Village to a Wharf/Big Money deck.  Wharf/Money beats Village/Wharf, typically, unless that Village produces money for you or allows you to play a bunch of other Actions.  But any Village that gives some money, like Bazaar or Festival, is going to be awesome.  And Fishing Village, of course, is Fishing Village.  FV/Wharf is one of the most destructively dominant 2-card engine combos around.

Wharf really shines with cheap Villages in general.  Its +Buy means that you aren’t really “wasting” your turn when you pick up Native Village and Hamlet; they are cheap enough that you can often scrounge one or two up on your turns while buying other things.  Crossroads is a total superstar, since it both gives Actions and also takes advantage of your massive handsizes.  And Border Village, as always, is a great for Wharf: you’ll often want to buy Wharf on $6 anyway, so the BV is just icing.

Engine-wise also, what the card gives you is zillions more cards. Other card draw qua card draw isn’t necessarily bad, but you usually want Wharf instead. Now, if it holds a good attack, a la Margrave or Ghost Ship, you might make an exception for a copy or two. But the bread-and-butter of the engine should almost always be Wharf, because it’s just more powerful.

It’s also important to note that Wharf engines build a good bit differently than those based around other draw cards. Basically, you need fewer Villages and/or can support more other terminals. The reason for this is that you only need to actually play half of your mighty nice draw cards every turn, even while reaping the benefits of those you played last turn. So when I build a Wharf engine, I usually start Wharf-Wharf-Village-Wharf and then alternate. Well, okay, usually it’s more complicated, because I want to get other stuff, too, but you really don’t need that many Villages to support the draw part of your engine. And the +buys are very nicely and plentifully built in.

As for trashing, trashing somewhat helps a Wharf engine, as it does with most engines, but it really doesn’t help Wharf that much.  It’s easy to end up “over-drawing”, where you don’t have anything left to draw, and trashing slows you down in the race.  So you especially need your trashing to be doing work later in the game — Remake and Masquerade are OK, whereas Chapel and Ambassador less so (Ambassador especially because you might Ambassador all your stuff away only to see a Wharf/money deck absorb the Ambassador and beat you before you get your engine set up).  And Lookout, Moneylender, Spice Merchant, etc., are just not that meaningful.  Especially with something like Fishing Village/Wharf, even the smallest trashing is going to set you back, and you have so much draw you won’t need it at all.

What Wharf does, really, is set you up with consistently massive handsizes.  Council Room may be superficially similar, but it’s more swingy and less reliable; Wharf chains essentially ensure that every turn starts with a minimum of 7 cards.  Where you take your engine after that is up to you, but lots of Kingdom cards favor an engine Wharf as opposed to a money Wharf.  Coppersmith, Outpost, attacks that you’ll be playing every turn, Bank, etc.  Cards like Minion and Lab and Tactician don’t really help, and if anything hurt by promoting alternative strategies.  But the key is, with just about every engine, you’ll want big hands, and there is no easier route to big hands than with Wharf.

Works with:

  • Throne Room / King’s Court
  • Peddler
  • Cellar/Warehouse
  • Bank, Fool’s Gold
  • Fishing Village, Crossroads, other cheap Villages
  • Just about everything

Doesn’t work with:

  • Hunting Party, Laboratory, Minion, terminal draw (not that these are actively bad, but that they don’t particularly help a Wharf deck and do help alternative decks)
  • Tactician
  • Trashing
  • Menagerie
  • Mega-rush strategies, like Ironworks/Gardens
Posted in Seaside | 25 Comments

Dark Ages cards revealed!

The community is discussing these new cards in the Dark Ages Preview subforum.

Dominion: Dark Ages

You can see images of most of the cards here:
https://dl.dropbox.com/u/20240121/dark_ages/1.jpg
https://dl.dropbox.com/u/20240121/dark_ages/2.jpg
https://dl.dropbox.com/u/20240121/dark_ages/3.jpg
https://dl.dropbox.com/u/20240121/dark_ages/4.jpg
https://dl.dropbox.com/u/20240121/dark_ages/5.jpg
https://dl.dropbox.com/u/20240121/dark_ages/6.jpeg
https://dl.dropbox.com/u/20240121/dark_ages/7.jpeg

Altar
$6
Trash a card from your hand. Gain a card costing up to $5.
Action

Armory
$4
Gain a card costing up to $4. Put it on top of your deck.
Action

Band of Misfits
$5
Play this as if it were an Action card in the Supply costing less than it that you choose. This is that card until it leaves play.
Action

Bandit Camp
$5
+1 Card
+2 Actions
Gain a Spoils.
Action

Beggar
$2
Gain 3 Coppers, putting them into your hand.
________________________________________
When another player plays an Attack card, you may discard this. If you do, gain two Silvers, putting one on top of your deck.
Action — Reaction

Catacombs
$5
Look at the top 3 cards of your deck. Choose one: Put them into your hand; or discard them and +3 Cards.
________________________________________
When you trash this, gain a cheaper card.
Action

Count
$5
Choose one: Discard 2 cards; put a card from your hand on top of your deck; or gain a Copper. Choose one: +$3; trash your hand; or gain a Duchy.
Action

Counterfeit
$5
$1
+1 Buy
When you play this, you may play a treasure from your hand twice. If you do, trash that treasure.
Treasure

Cultist
$5
+2 Cards
Each other player gains a Ruins. You may play a Cultist from your hand.
________________________________________
When you trash this, +3 Cards.
Action — Attack — Looter

Death Cart
$4
+$5
You may trash an Action card from your hand. If you don’t, trash this.
________________________________________
When you gain this, gain two Ruins.
Action — Looter

Feodum
$4
Worth 1 VP for every 3 Silvers in your deck.
________________________________________
When you trash this, gain 3 Silvers.
Victory

Forager
$3
+1 Action
+1 Buy
Trash a card from your hand. +$1 per differently named Treasure in the trash.
Action

Fortress
$4
+1 Card
+2 Actions
________________________________________
When you trash this, put it into your hand.
Action

Graverobber
$5
Choose one: Gain a card from the trash costing from $3 to $6, putting it on top of your deck; or trash an Action card from your hand and gain a card costing up to $3 more than it.
Action

Hermit
$3
Look through your discard pile. You may trash a card that is not a Treasure, from your discard pile or your hand. Gain a card costing up to $3.
________________________________________
When you discard this from play, if you didn’t buy any cards this turn, trash this and gain a Madman (from the Madman pile).
Action

Hunting Grounds
$6
+4 Cards
________________________________________
When this is trashed, gain a Duchy or 3 Estates
Action

Ironmonger
$4
+1 Card
+1 Action
Reveal the top card of your deck; you may discard it. If it is an Action card, +1 Action; a Treasure card, +$1; a Victory card, +1 Card.
Action

Junk Dealer
$5
+1 Card
+1 Action
+$1
Trash a card from your hand.
Action

Madman
$0*
+2 Actions
Return this to the Madman pile. If you do, +1 Card per card in your hand.
(This is not in the Supply.)
Action

Marauder
$4
Gain a Spoils. Each other player gains a Ruins.
Action — Attack — Looter

Market Square
$3
+1 Card
+1 Action
+1 Buy
________________________________________
When one of your cards is trashed, you may discard this from your hand. If you do, gain a Gold.
Action — Reaction

Mercenary
$0*
You may trash 2 cards from your hand. If you do, +2 Cards, +
$2, and each other player discards down to 3 cards in hand.
(This is not in the Supply.)
Action — Attack

Mystic
$5
+1 Action
+$2
Name a card. Reveal the top card of your deck. If it’s the named card, put it into your hand.
Action

Pillage
$5
Trash this. Each other player with 5 or more cards in hand reveals his hand and discards a card that you choose. Gain 2 Spoils.
Action — Attack

Poor House
$1
+$4
Reveal your hand. -$1 per Treasure card in your hand, to a minimum of $0.
Action

Procession
$4
You may play an Action card from your hand twice. Trash it. Gain an Action card costing exactly $1 more than it.
Action

Rats
$4
+1 Card
+1 Action
Gain a Rats. Trash a card from your hand other than a Rats (or reveal a hand of all Rats).
________________________________________
When this is trashed, +1 Card.
Action

Rebuild
$5
+1 Action
Name a card. Reveal cards from the top of your deck until you reveal a Victory card that is not the named card. Discard the other cards. Trash the Victory card and gain a Victory card costing up to $3 more than it.
Action

Rogue
$5
+$2
If there are any cards in the trash costing from $3 to $6, gain one of them. Otherwise, each other player reveals then discards the top 2 cards of his deck, and trashes one of them costing from $3 to $6.
Action — Attack

Sage
$3
+1 Action
Reveal cards from the top of your deck until you reveal one costing $3 or more. Put that card into your hand and discard the rest.
Action

Scavenger
$4
+$2
You may put your deck into your discard pile. Look through your discard pile and put one card from it on top of your deck.
Action

Spoils
$0*
$3
When you play this, return it to the pile.
(This is not in the Supply.)
Treasure

Squire
$2
+$1
Choose one: +2 Actions; or +2 Buys; or gain a Silver.
________________________________________
When you trash this, gain an Attack card.
Action

Storeroom
$3
+1 Buy
Discard any number of cards. +1 Card per card discarded. Discard any number of cards. +$1 per card discarded the second time.
Action

Urchin
$3
+1 Card
+1 Action
Each other player discards down to 4 cards in hand.
________________________________________
When you play another Attack card with this in play, you may trash this. If you do, gain a Mercenary from the Mercenary pile.
Action — Attack

Vagrant
$2
+1 Card
+1 Action
Reveal the top card of your deck. If it’s a Victory card, Curse, Ruins, or Shelter, put it into your hand.
Action

Wandering Minstrel
$4
+1 Card
+2 Actions
Reveal the top 3 cards of your deck. Put the Actions back on top in any order and discard the rest.
Action

Ruins (50 total, 10 of each, shuffled into a pile of ten per opponent like Curses)

Abandoned Mine
$0
+$1
Action — Ruins

Ruined Library
$0
+1 Card
Action — Ruins

Ruined Market
$0
+1 Buy
Action — Ruins

Ruined Village
$0
+1 Action
Action — Ruins

Survivors
$0
Look at the top 2 cards of your deck. Discard them or put them back in any order.
Action — Ruins

Knights (these are all one Kingdom pile)

Dame Anna
$5
You may trash up to 2 cards from your hand.
Each other player reveals the top 2 cards of his deck, trashes one of them costing from $3 to $6, and discards the rest. If a Knight is trashed by this, trash this card.
Action — Attack — Knight

Dame Josephine
$5
Worth 2 VP.
Each other player reveals the top 2 cards of his deck, trashes one of them costing from $3 to $6, and discards the rest. If a Knight is trashed by this, trash this card.
Action — Attack — Victory — Knight

Dame Molly
$5
+2 Actions.
Each other player discards the top 2 cards of his deck, and trashes one of them costing from $3 to $6. If a Knight is trashed by this, trash this card.
Action — Attack — Knight

Dame Natalie
$5
You may gain a card costing up to $3.
Each other player reveals the top 2 cards of his deck, trashes one of them costing from $3 to $6, and discards the rest. If a Knight is trashed by this, trash this card.
Action — Attack — Knight

Dame Sylvia
$5
+$2.
Each other player reveals the top 2 cards of his deck, trashes one of them costing from $3 to $6, and discards the rest. If a Knight is trashed by this, trash this card.
Action — Attack — Knight

Sir Bailey
$5
+1 Card, +1 Action.
Each other player reveals the top 2 cards of his deck, trashes one of them costing from $3 to $6, and discards the rest. If a Knight is trashed by this, trash this card.
Action — Attack — Knight

Sir Destry
$5
+2 Cards
Each other player reveals the top 2 cards of his deck, trashes one of them costing from $3 to $6, and discards the rest. If a Knight is trashed by this, trash this card.
Action — Attack — Knight

Sir Martin
$4
+2 Buys.
Each other player reveals the top 2 cards of his deck, trashes one of them costing from $3 to $6, and discards the rest. If a Knight is trashed by this, trash this card.
Action — Attack — Knight

Sir Michael
$5
Each other player discards down to 3 cards in hand.
Each other player reveals the top 2 cards of his deck, trashes one of them costing from $3 to $6, and discards the rest. If a Knight is trashed by this, trash this card.
Action — Attack — Knight

Sir Vander
$5
Each other player reveals the top 2 cards of his deck, trashes one of them costing from $3 to $6, and discards the rest. If a Knight is trashed by this, trash this card.
________________________________________
When this is trashed, gain a Gold.
Action — Attack — Knight

Shelters (replace starting Estates)

Hovel
$1
When you buy a Victory card, you may trash this from your hand.
Reaction — Shelter

Necropolis
$1
+2 Actions
Action — Shelter

Overgrown Estate
$1
0 VP
________________________________________
When you trash this, +1 Card.
Victory — Shelter

Posted in Dark Ages | 61 Comments

Technical issues

The excitement of Dark Ages cards appears to have caused a Saboteur to be played, and the Forum didn’t have a Moat in hand.  We are trying to bring it back up.

EDIT: It’s back.

Posted in Uncategorized | 2 Comments

Intrigue: Masquerade

This is a revised version of a guest article by jonts26, incorporating analysis from DG and jomini, and originally posted in the forum.

Masquerade

Dominion: Intrigue

Introduction

I love Masquerade. But not because it’s awesome. Well, it is awesome, but that’s not why I love it. The first Dominion I owned was Intrigue. And there are some fun cards in there, but none quite so fun as Masquerade. I would buy it almost every game and shout MASQUERADE!!! and wave my hands in the air upon playing it. Clearly this is a card designed for partying, and waving my hands in the air is about the extent of my dancing skills.

Masquerade is one of the strongest cards in the game. In fact, the most recent Top 5 $3 card list has it second only to Ambassador, and rightfully so.  It took a while for the community to grow to appreciate the strength of this card: people are typically drawn to the card by the neat passing mechanic.  However, for most games, the passing mechanic is the least important aspect of the card.  In fact, if you had a card which just offered +2 Cards and the ability to trash a card, it would be just as strong for many games.  But the ability to pass adds on a lot of very fun interactions and the occasional situation when the correct pass means the difference between winning or losing.

Big Money

As far as playing “Big Money” goes, Masquerade is near the top tier of non-attack enablers.  Not much can dethrone Wharf from the top tier, but Masquerade is only a notch below.  The reason is that it combines both card draw and trashing: on their own, each of those abilities is fairly weak, but the combination of the two is what gives Masquerade such strength.

Let me explain.  First, trashers are normally poor Big Money enablers because it leaves you with a gimped early game hand.  (I Chapel four Coppers and buy nothing.)  But with Masquerade, you can simultaneously thin your deck and still have enough buying power to be improving your deck with Silvers and other $3/$4 actions.  In addition, the +2 Cards greatly improves cycling, allowing the card to come back into your deck faster.  Finally, the +2 Cards means you’ll often be able to find something worth trashing (since you’re searching through 6 cards instead of 4).

Since Estate trashing is so much more desirable than Copper trashing for Big Money games, you likely won’t need a second Masquerade. But you should definitely add another strong terminal into your deck: since Masq only draws two cards, collisions are more unlikely than if you were playing another terminal draw card like Smithy. Often in money games with another strong Big Money enabler, the correct move is to get both, and the Masquerade first.

Cursing attacks in particular tend to dominate money games. Masquerade counters them harder than most, so the best move is typically to open Masquerade and transition into your curser.  The exception being Sea Hag, which is simply crushed under Masquerade’s weight. The combination of no early game economy and the decent chance that the Curse comes right back to you simply gives the Hag no chance.  Familiar is also not very good: it’s a curser that takes some time to set up, so it gets crushed by Masquerade’s speed.  Masquerade can also handle Torturer (take the Curse and give it right back), but a very strong Torturer chain is one of those attacks even Masquerade can’t handle.

One final point, and this is particularly true with Masquerade/Money mirrors, or games with only one Buy, is that keeping an Estate for yourself (either by refusing to pass it or just refusing to trash it) can give you a huge advantage in the end game. You only need to win by 1 point. Certainly in the early game you want to aggressively remove Estates but as the game wears on, it is often to your advantage to leave yourself one Estate.

Engines

While Masquerade shines in Big Money games, it is darned good in engine games too. Again, it’s not the best card draw, and it’s not the best trasher, but it does both. And the thinner your deck gets, the more often Masquerade gets played, giving you good deck acceleration. Masquerade is particularly strong as an opening when there are strong $5 engine cards you want like Wharf and Bazaar. While Masq/Silver opening makes it difficult to see $6 for a little while, $5 is still very likely.

But the card is a double edged sword in these games. As you thin and improve your deck, you start running the risk of having a great hand, only to have a Masquerade played on you. So in any engine game that involves Masquerade, do not over-trash your junk. Trash just enough so that you are likely to still have a card to pass on an opponent’s Masquerade while still being able to fire your engine reliably. Easier said than done.

Special mention should be made for discard attacks. Masquerade tends to boost the effect of discard attacks.  For example, when Masquerade and Militia are present, you’ll often have to keep a junk card in hand when Militia is played to guard against Masquerade.  So Militia ends up hurting even more than usual.

Moreover, you can play mindgames with your opponent with Bishop, Vault, and Governor (cards that give optional benefits to your opponent).  With a hand of Gold-Silver-Silver-Curse-Province, for instance, do I discard to your Vault and hope you don’t Masquerade me?  Do I trash my Curse on your Bishop or hope to be able to pass it to you?

More advanced is being able to manipulate what your opponent passes to you.  Rabble is a great way of doing this: in the late game, Rabble can often set up massive stacks of valuable green cards ready to be Masqueraded on the next turn (or even worse, play Village -> Rabble -> Minion (discarding) -> Masquerade).

Slightly less special mention goes to cards which are top-decked. Alchemist, Treasury, Scheme, et al. if top-decked too aggressively will force you to pass good cards more often.

Multiplayer

The way Masquerade works in a multiplayer game is nearly too complex to describe, what with its interactions with Torturer, Militia, and Cutpurse.  The key things to remember are:

1) Masquerade equalizes the worst card of everyone’s deck.  You better hope that the person on your right is building a high-quality deck that will pass you medium cards as opposed to total junk cards.  Similarly, you might be more willing to do things like buy an Estate with Hoard, or an Embargoed card.

2) Masquerade will be played far, far more frequently than in 2-player, meaning you should feel free to get short-term advantage cards (Baron, Moneylender) and count on being able to pass the junk away later.

3) If you can force someone else to do better to help you, you might want to pass more than your worst card.  For instance, as a Province player against two Duke/Duchy rushers, you’d probably rather see the Duchies split 6-6 instead of 7-5, and passing coin might help achieve that goal.  Or, with two Provinces left and enough money in your hand to buy one, you might want to pass enough money to the next player so that he can buy the last Province to give you the win.  Your appetite for this may depend on your gaming group’s politics.

Possession

Possession is not an attack. This is because your opponent cannot actually hurt your current hand or deck at large with it. Except, of course, when Masquerade or Ambassador is on the board. Passing is not trashing and it’s not gaining. So any cards you pass while Possessed remain passed. Now, Masquerade/Big Money is fast, and if there is no good engine, it’s unlikely that your opponent is able to buy Possession, play it, and pass enough points to himself before you can drain Provinces.

But if there is an engine, or a fast route to Possession, then buying Masquerade is very dangerous unless there is a good way to trash away your Masquerade fairly quickly. Except, well, Masquerade might be the card you need to really ramp up your engine and there might be no other trashing. Then what? Well, buy a Masquerade anyway, and hope the shuffle luck fairy is on your side.  You need Masquerade to get to the Possession faster, but you better hope you don’t have it in hand when your opponent plays his Possession!  And if your opponent stays away from Masquerade or trashes it by the time you grab your Possession, buy a second Masquerade and pass it over to him.  This is not a good way to make friends.

The Pin

Well, I can’t go ahead and write an article on Masquerade without at least mentioning the infamous pin potential. By now, most Dominion enthusiasts are aware that the unique passing ability of Masquerade can lead to a game state where you can trash your opponent’s entire deck while leaving them with a 0 card hand every turn. Note that this only really works in 2P games, as you can only trash the deck of the player to your left, while any other players are free to do whatever they wish.

The pin comes in a variety of flavors. The only truly required card is Masquerade, but the other cards in potential pins are all fairly specific. Finding specific 3 and 4 card combos is exceedingly rare given the amount of possible kingdom configurations. As such, I won’t bother going into great detail but read this post for a detailed break down of possible pin methods.

Regardless of what cards you use, the goal is to reduce the opponent’s hand size and then play a Throned or King’s courted Masquerade with no cards left in your draw or discard. You pass no cards but you do receive a card from your opponent, which you immediately trash. Thus, each time you play Masquerade, you trash a card from your opponent’s deck while reducing their hand size by one. Just rinse and repeat until their entire deck is trashed. Also note: This, too, is not a good way to make friends.

Posted in Intrigue | Tagged | 12 Comments