Seaside: Ambassador 201

This article is written by WanderingWinder, originally posted on the forum.

Ambassador

Dominion: Seaside

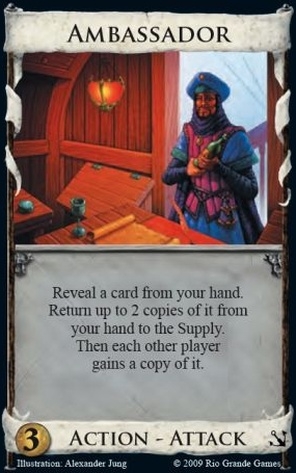
I know there’s already an article on the blog on Ambassador, and I’m not trying to say it’s a bad article in writing this. Only, Ambassador is an extraordinarily complicated card, and I wanted to add some beef to its analysis. In fact, if you are newer, you should go read it now, because I’m assuming you already have some basic familiarity with the card throughout this article.

I used to hate Ambassador, but now, even in second position (and it has MASSIVE first player advantage), I’m pretty unlikely to veto it.

I should note that I don’t think this is a definitive article on the card that will stand up to the test of time – it’s too complicated for that. But I do hope that it will be found mostly insightful, if not all-encompassing, on down the line. For one thing, this has only the barest treatment of Dark Ages, since I’ve yet to play a game with Ambassador and DA cards together. Further, this is entirely dedicated to the 2-player version of Dominion; Ambassador plays entirely differently with more players, probably most significantly out of all the cards.  For one, repeated use of Ambassador drains the piles in 4-player: even if you return 2 copies, three copies are distributed.  Many Ambassador games in 4-player end on piles for this reason.

Strategy

What does Ambassador want?

The absolute number one thing to understand about Ambassador is that you desperately want card draw – some way to increase your hand size (whilst still having an action left). Look at it this way – if you return two cards from your hand, and you haven’t drawn anything, then that leaves you with a two-card hand. Well, even the best two-card hands are generally pretty lousy. This can actually work sometimes, Ambassador is that powerful, but you don’t want to have to make it work if you don’t absolutely have to (and more on that subject later on).

Looking at it another way, why are you thinning your deck out in the first place? Answer – to get rid of bad cards (and/or give them to your opponent). Right? Okay, but why? What makes them bad cards? Virtually every card actually gives you some kind of benefit over having no cards (exceptions being Curse and some of the Ruins and such); terminal actions can be worthless if you have too many, but generally why these things are bad is because they get in the way of more important cards. You draw them instead of drawing a better card. But of course, this is only a problem because you are limited in your draw. If you had unlimited drawing, you’d have no problem at all. So to the extent that you can be drawing through your whole deck even with things like Copper and even Estate in them, then they are actually decent cards rather than bad. Of course, this comes with the caveat that you need to be able to keep drawing your deck through them, and its rare that you can do this indefinitely with lots of them. But if you can, then so much the better.

And here’s where we come to a really important point about Ambassador wars: one Ambassador can counter two, over the long haul. But I’m getting ahead of myself.

The Ambassador War

Very often, both players go for Ambassador, and take turns (often very many turns) flinging junk at each other in an attempt to win what is known as an ‘Ambassador war’. In such a situation, the thing which is in the foremost of your mind strategically is what I call one player getting ‘snowballed under’ – getting so flooded with junk, having such a high percentage of your deck be junk, that you basically can’t do much of anything. You play maybe one action (usually none) in a turn, make maybe $4 or so on average, and buy something. For the whole game. It can be pretty depressing.

Anyway, this is where the property of one Ambassador countering two comes into play. Playing two Ambassadors can only give two cards’ worth of junk, which is the same amount which can be gotten rid of by a single Ambassador. So a deck playing one Ambassador consistently won’t need to be taking on any water against one which can play two. Flinging different kinds of junk can make more of a problem, but over the course of two turns, you can get into a syncopated rhythm where you return two of one on one turn, then two of the other, then two of the first again, and keep yourself almost as clean anyway – just with one extra card of junk all the time. Actually this generalizes – for every different kind of junk card past the first, they can make you keep one extra junk in the deck all the time. But generally, there aren’t very many different kinds of junk.

Of course, it’s important to note that for this defense to be able to work, you need to be playing the Ambassador every turn, which generally means drawing at least most of your deck. This underscores the importance of being able to draw cards, and it also means that at the beginning of the game, where you can’t draw a super high proportion, you’re vulnerable – hence the reason you very often want two Ambassadors early on.

But the upshot of all this is, it’s quite possible for nobody to get snowballed under, for neither player to lose the Ambassador war, and for the game to just continue to go on, with an eventually more or less steady state, usually with some Estate tennis going on. Now, you can try grabbing lots of extra Ambassadors to really force through the snowballing, but it’s basically just a losing proposition. On the one hand, to defend themselves, they only need to have half as many Ambassadors as you need to attack with, but more important even than this is that once they get themselves thinned enough, it’s just going to be more cost efficient to build up their draw in most cases.

Thus, in the Ambassador war, you’d like to keep your deck squeaky clean, but you really need to work towards getting your engine up whilst of course all the time making sure you don’t get snowballed under. Once that happens, you’ve generally just lost.
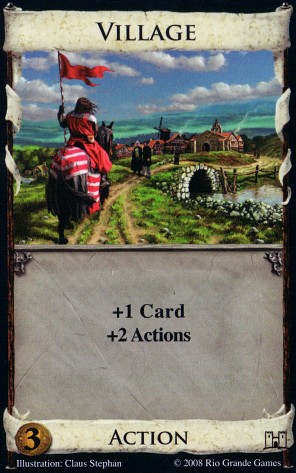
Villages

Still talking about what Ambassador wants, well it is obviously a terminal action, and it’s a card that wants to have an engine. So generally it needs sources of +Actions – some kind of Village. This will help you get two Ambassadors played on a turn, which is often important in the early going, it will help you play draw cards most usually, and it will let you play the other juicy terminals you want to. You very often want LOTS of actions, so lots of Villages can well be in order. The nice thing about Ambassador is it makes the game long enough that you have the time to accumulate them.

Draw-to-X

Cards which draw to a fixed handsize can work really well with Ambassador, because Ambassador makes lots of cards disappear from your hand. The big thing to note, though, is that you’re going to need just tons and tons of actions in order for that to work.

Cantrips

So, with Ambassador, you’re trying to thin your deck, and the clog problem is the reason you want to get rid of your junk. But cards with the cantrip property – at least +1 Card, +1 Action – are essentially ‘free’ cards; unlike Treasures, Victory cards, and Actions that don’t draw, they don’t count against your effective deck size. So they go really well with Ambassador. The best variants are those like Laboratory (+2 Cards/+1 Action); that extra draw is really nice, as described above. Villages which draw, again like talked about above, are also quite beneficial.

But it’s also worth talking about the third big category (there are some cantrips that fit into none of the three) of cantrip, which is some kind of Peddler-variant (+1 Card/+1 Action/+$1). These help you build money while keeping card neutral, and so it’s actually possible to build a deck from these and Ambassador with no card draw, and have it be decently strong. If you Ambassador your deck thin enough, you can play a big chain, make a bunch of money, and get some nice things.

The best card here is unsurprisingly Grand Market, if you can get to it. Conspirator also gives good cash for the card, but it is a little risky in that you definitely need to get it in the right order with other cantrips to make sure it is activated.

Bad engines can work in the same way as this kind of deck; specifically, I’m referring to those where the drawing power is equal to Moat’s (and terminal) and the Village nets no cards, such as Festival or importantly, Hamlet (which can’t be a cantrip and a village simultaneously). If you can pick something up along the way with these, they work like cantrips that you need to get in the right order. Of course, with no other ancillary benefits, they wouldn’t be worth it at all.

In either case, the biggest problem this kind of deck runs into is that it needs to be very thin to work right, which means that when it starts greening, it’s very liable to falling apart pretty quickly. This makes it particularly vulnerable to things like slogs, but just not terribly strong overall anyway, considering its slow set-up – decently strong big money can usually beat it.

Fighting Ambassador Entirely

Few decks can beat Ambassador when it has all its toys, but when its missing something, there are a number that can. And this is more of a sliding scale thing – the more things the amb deck is missing, the less strong the counter has to be.

Pseudo-Counters

It’s very easy to look at a number of cards and think that, because Ambassador tends to sink us in a bunch of a particular kind of card, other cards which make those cards useful can counter it. That is not a very clear sentence, so let me give examples. Counting House, we might expect to be great, because our deck will be huge and full of Copper. Similarly, we might think Apothecary or Crossroads or Baron will counter it nicely. But one of the big problems in trying to do this is that Ambassador players don’t have to pump you full of Coppers for your Counting House – they will start giving you Estates, or if you have Barons, they’ll flood with Copper.

The more of the pseudo-counters you have available, though, you can more get away with it – if you have something to deal with Copper AND something that uses Estates, it might work. But the tricky bit is that if you need some of them to collide right, the bigger your deck, the less likely this will happen.

Some of them, though, particularly the more engine-oriented ones, can help WITH the Ambassador to get your deck up and running in the middle of the war, as they will defray the pain of what your opponent is flinging.

Slogs

One way to fight Ambassador entirely is to go for a slog. Estates aren’t so bad for you in a slog as in most other decks, and Coppers are downright helpful. Horse Traders is particularly noteworthy here, as its reaction will frequently trigger for nice six-card hands. Gardens of course benefits no matter what they give you, and so can be quite nice. Silk Road will like the extra Estates and can grow VERY powerful. And Duke gives a long potential for points and forces them in some cases to get all the Provinces quite quickly, or quickly for an Ambassador game at any rate. In any of these cases, though, the Ambassador deck should win if it has decent enough support; you definitely need to watch for slogs, though, with Ambassador, particularly on the weaker boards for it, like those cantrip-centered decks discussed above.

The Rush

Ambassador is a very slow card, so Rushes tend to just float by it without noticing all that much, particularly as the extra cards here, like the slog, give extra points; and the speed at which rushes go helps out even moreso. Furthermore, lots of the engines that Ambassador wants to go into are going to be curtailed against a rush, because they’ll have to worry about getting 3-piled.

Combos

Nothing is safe from a really good combo deck, and Ambassador is no exception. The attack can give you leverage against some of the more precarious ones, like the Golden Deck, and give you enough time to get an engine up to outrace others, but there are some decks – like Chancellor/Stash, or various other decks which have a way of manipulating their start hand (mega-scheme comes to mind) – which will be able to withstand you, no problem. Your best recourse here is either some kind of hand-size attack, or sometimes just to join them, and not go with Ambassador.

Big Money

Big Money can blast right though Ambassador under the right circumstances. Mostly this means that the money deck needs very good longevity. Jack can of course give this. Trader is good here, too, better than normal since it can turn the attack into quite a nice positive. Wharf can blow past, but then, if there’s almost any Village, you’ll want to go engine with Wharf and Ambassador. Courtyard can sometimes get through, but it needs to be a weakish Ambassador board. And the number one candidate is Vault. Vault only needs to be able to hit one Gold or two Silvers, and then it doesn’t matter what other junk is there, it’s got a Province. It’s fast. And the drawback (letting your opponent discard two to draw one) doesn’t hurt much either, because it’s usually the exact opposite of an Ambassador deck wants anyway.

Other Junking Attacks

Generally, trying to fight Ambassador with junking attacks is a losing proposition – you give one junk, they return two and give you one. When playing the Ambassador side, you will usually be able to get ahead, as though Ambassador is pretty slow, the game will most often last more than long enough for the Ambassador to come back. It’s possible to use another junking attack in conjunction with Ambassador, but generally if you do this, it should be largely because you want the ancillary benefit of the junker, more than the actual junking attack itself. The big exception here is Mountebank, which actually gives two bits of junk rather than one, and of different kinds. This makes it hard for Ambassador to deal with, and although it should *eventually* be able to, if the Mountebank player can make the game end with halfway reasonable speed, it might not last long enough for this to matter.

Tactics Against Ambassador

Trashing

Trashing can work against Ambassador, but generally, if you are trying to thin, it’s better to go with Ambassador to do it, as it will keep on giving that persistent attack and is generally stronger over the long haul. Of course, there are some exceptions to this, if the trasher is strong enough, and in the right circumstances. Masquerade, for one.  Remake can work occasionally, but it’s a little sketchy if there aren’t gobs of great $3 and $4 cards you really really want. Steward gives you cards or money down the road, and so can be an option. And Chapel has the virtue of costing 2 (if you get that split), and is generally a little faster to get off the ground, so if you can get your other components up lightning fast, it can be the way.

Let’s look at the Chapel case specifically to get a picture of what I’m talking about. Ambassador will sooner or later pass all of its starting cards to the Chapel player. This will take at least 6, but often will be 7 plays. This means Chapel will have to trash 16-17 cards, which would ideally be 4-5 plays, but more likely will be at least 6, given the fallout. All of which means that in terms of thinning, they look fairly similar. The advantage of chapel is that it’s usually a little faster. But Ambassador can be useful on down the line, which means that it’s a pretty close call – and often dependent on whether there are nice cards for Ambassador player to pick up while trashing down, or whether the speed of Chapel will give it a decisive head-start on the engine building. Or if it’s a 5-2 split.

Forge can of course take care of everything at once, but it will be hard to set this up. And everything else will markedly fail to Ambassador in terms of deck thinning – if they are to make up for this, they have to do it in other ways (and sometimes this is possible).

Playing against the thin deck

Most of the methods that generally work against thin decks are good here, too. Handsize attacks are powerful (but not Torturer!), even moreso than normal – but less potent in the early stages than they are against something like Chapel. Council Room’s downside isn’t a big deal if they’re drawing their deck anyway. Ditto on Governor for the cards. Governor for trashing is generally not so bad, either, as they won’t be trashing Copper or Estate with it so much, but if there is something they might want to upgrade, you need to watch out. Bishop’s drawback is almost entirely negated, though with the thin deck, Ambassador will sometimes be able to get better use out of it than you. But actually the magic bullet here is masquerade. It gets you the drawing right there, and it’s definitely faster at getting up to speed than Ambassador. And against a thin deck, the passing can be downright attack-like. It isn’t foolproof of course, so it still needs to watch out for getting snowballed under.

Ambassador’s Recourse

The Curse Trick

If your opponent isn’t fighting you at all, you can pull the trick where you buy a Curse and then over some number of turns, pump all of the curses in the supply over to the opponent. This can clog them in a way that can’t be pseudo-countered, and perhaps more importantly, give them a big stack of negative points.

It’s important to know not to go for this too early. You want to really be snowballing them under, drawing your whole deck very reliably, before you go for this. And you almost never want to do this out of an Ambassador war, unless you really really have it lock-down won. Because you’re voluntarily grabbing extra bloat, and if you aren’t very careful, and their deck is at all thin, it can let them right back in. In an Ambassador war, to slam the door, you usually just want to build your engine and do something big for yourself with it.

It’s also worth noting that due to three pile ending concerns, you should not give them the WHOLE stack all the time; often you want to leave one, and if one then usually two or three, so that they can’t snap the game over before you are ready.

The Province Trick

On the last turn of the game, you often Ambassador to reveal a Province, returning none, so as to make sure the pile is empty at the end of a turn. Now it’s true that you are usually going to win anyway if you’re in a position to do this, but it can be important in some cases, particularly if your deck is getting to the point where it is going to start having trouble maintaining a running engine and/or the game is close (though, obviously it’s not THAT close if you can gift them a Province).

Typically this happens when:

  1. There are two Provinces left, and you have a tiny lead right now and can buy a Province.  You return one Province and buy the other to maintain your current lead.
  2. There is one Province left, and you lead by more than 6 points.

This can also be done, of course, with Colonies, but more important, with any pile which is going to end the game. So watch out for being able to force a three pile ending this way, it can actually win a decently high number of games.

Possession

I want to look specifically at Possession for a second, as something which looks like it counters Ambassador, and sometimes does, but actually usually ends up supporting it, but in a weird way. If you can Possess a player who has Ambassador and get their Ambassador in a hand with, say Province, you can have them conduct very generous diplomacy toward you by forcing them to gift you that Province. This is an enormous point swing (and with two Colonies, it’s up to a 30 point swing.)  But, usually a deck with Ambassador is going to be able to play Possession faster and more often than a deck without it, so it’s not like you can just ignore Ambassador. And this is particularly true in that you can Ambassador them an Ambassador. If possible, the answer to this dilemma is trashing – trash that Ambassador, and trash to thin. But it’s tough – you are almost never totally safe until the game is over.

Playing with Ambassador

Stop Cards

As alluded to above, the reason you have Ambassador is to get rid of bad cards. More explicitly, you are thinning your deck to build up an engine. Until you have such an engine going, you want to have as few stop cards as possible. A stop card is any card which doesn’t help you get through your deck any more – basically anything that doesn’t draw. Now, Ambassador itself is a stop card, but it helps you get rid of others so it’s okay (but not too many! Three is almost always overkill, and I’ve never seen four or more be optimal).

But anything else, you want to ask yourself, do you really need it? Because until you get to drawing most of your deck, most of these cards are poison to you. Now, sometimes you will need some – a Silver or two, some kind of economy is necessary to get that engine up in the first place. But you really want to keep this as minimal as possible until your engine is up and you can handle them – even Platinum could be an annoyance to you, because it can get in your way. So you want to keep your deck very tight, and then, once you’ve built up to where you can draw your whole deck, you start adding in some cards to help you build up your buying power and such, adding in extra drawing components at the same time to make sure you can keep drawing your deck.

Eventually, you will almost always HAVE to go for some stop cards, which will risk your engine not firing some times, if for no other reason than most of the Victory cards fit this criteria, and you almost always need them to win. But time your push towards these, particularly if it makes it reasonably likely for your engine to break sometimes, as late as you can get away with. Still, be cautious of three pile endings, as with any engine.

Two Copper or One Estate?

This question of what to return is an oft-asked one by Ambassador players; if you have the same number of either card, you usually want to return the Estate over the Coppers, as Copper do stuff for you (you can buy things, huzzah!), which while not great, is better than Estate until very very very late in the game. But what about returning TWO Coppers vs Estate? Perhaps most important is when this question comes up on an early hand of A/C/C/C/E.

Long story short, in an Ambassador war, you usually want to return two Coppers, unless you have a good reason to go the other way. The reason being, two cards is one more than one, and your goal is to get thinner faster than the other guy, really; one fewer card is one fewer card to cycle through, which gets you through your deck and back to your important cards faster. It’s also a more efficient use of the Ambassador – you’re getting your whole money’s worth, which is important because you’re probably going to have the chance to return the Estate with a partner later on.

But okay, what’s ‘a good reason’? First and foremost, if returning the Coppers leaves with insufficient money in your deck to buy anything meaningful down the line – i.e. if it will leave you with 1, or most often also 2, Coppers in your deck total. You don’t want to be in the position to have to buy Coppers up, that defeats the purpose.

Beyond this, you want to look at engine construction – if returning the Estate lets you buy something which immediately helps you get your drawing up (Lab, maybe Caravan, a Smithy variant if – and only if – you have a high enough number of Villages already) – then that looks much more attractive. You want to get that draw up.  Basically, this means that you’re more likely to return the Estate in the midgame than the opening, where you’re all about number of junk cards all the time – if you’re already drawing your whole deck, the Coppers are often even an advantage.

Finally, if there are engine components which key off of one or the other, for one of you or more likely both, then return the thing which doesn’t help the engine. Prime examples here are Apothecary, which shoves you toward returning Estates, and Crossroads, which makes you really want to return Coppers.

If you’re not in an Ambassador war, some of the same concerns apply, but you’re much more likely to want to return the Estate. The reason for this is that you will eventually clear your stuff out anyway, but you want to have something good going on when you do, since you don’t have much impediment, so it’s a little more important to be able to get to those key cards (usually 5-costs) a little faster; you often want to get not only the key card itself, but one step further, the card which will allow you to get the key card. Also, in such situations, usually either a) you’re just going to destroy them, because they aren’t going Ambassador; or b) they are playing some kind of deck that doesn’t mind Coppers NEARLY so much as Estates. Of course, use some sense – if they are Mountebanking you, thinness is way important again, and you do still want a thin deck quickly, so if you’re likely to be able to get up to your key cards as quickly returning the Coppers anyway, go for it.

How should you open?

Depends on the board.

Okay, I’ll give you more than that. You need to look at what’s available, more precisely what you’d want, at each of the price points. I’m a fan, in general, of going Ambassador/Ambassador (hereafter A/A), particularly on a board with a Village, which will eventually let you play both. But different things can pull you different ways. Strong 2-costs for your deck (say, Native Village, Crossroads, Hamlet) are going to pull you toward A/A, as often you’ll get early hands of A/C/C/E/E or A/C/C/C/C and be able to grab a 2-cost. Good early $5’s (Lab and variants, mostly) will pull your toward A/Silver (/A), as the Silver will help you get there faster. Only, here you have to be careful and really think about what you’re doing. You probably aren’t going to get the $5 on the first shuffle anyway (though you nicely have no collision). If you draw A/S/C/C/C here, you basically always want to return 2 Coppers (and buy an Ambassador) over returning 0, because while a nice draw card is nice and can compensate for a little missed thinning, 2 cards’ worth is almost always too much (in a war, anyway; you can consider 0 if not in a war). If it’s a really nice early $5, though, you can roll those dice – and take a little comfort in that you won’t have any collision right away.

$4-cost cantrips make excellent partners for Ambassador, in general. Caravan gets you started on that draw you want; tournament gives you a little economy; and spice merchant, while not *strictly* a cantrip, might be best of all, since it helps in on the trashing. (Ironmonger from DA, one presumes, should be EXCELLENT here). Sometimes, though, you’ll want to open A/A anyway. In these matchups, A/A usually gets a little advantage if they can get through early without colliding, but the cantrip gets a somewhat bigger advantage if there is a collision from the opponent. This balance usually is on the side of the cantrip, which is safer, by a little bit, but with sufficiently strong $2’s, and depending on the exact cards available, the exact cantrip, etc., A/A is sometimes the way to go. Even Wishing Well is a decent cantrip to pair with Ambassador on the opening.

Pairing Ambassador with another trasher is certainly a viable option on many boards. Chiefly, we’re looking at Remake and Steward here – Chapel is overkill, and most of the other trashers just don’t cut the mustard, and a second Ambassador should be preferred. To want to go with Remake, you will generally want to have useful 3-cost cards – just Silver doesn’t really cut it, because that’s a stop card; generally you want some kind of cantrip and/or Village, but sometimes you can get away with a draw card, like Watchtower or Oracle, with good Villages elsewhere.

Steward is nice in that it turns into a component after a couple of shuffles, and has very good flexibility; since you eventually don’t need two Ambassadors anyway, Steward can be a nice replacement for the second Ambassador. You still want to thin early, preferring Ambassador to thin rather than steward, if you can get 2 cards back with Ambassador anyway.

Finally, I’d like to look at Quarry. It’s an interesting card here, and I don’t have tons of experience, but the principles ought to hold – if you have $4-, $6-, and especially $5-cost actions you want to get quickly, it can be very nice. The better the $2-costs, once again, the more you want to go A/A – Quarry can always pick up $3-cost actions as well as $2-costers, so there’s no advantage there. It is a stop card, but almost any time you’d want to get a Silver, plus other times with pretty juicy $5’s, you’ll want to go quarry. A/A vs A/S/A is close, so it’s natural for A/Q/A to be a little better than A/A most of the time, though again, it is a fairly close-run thing.

What if there aren’t any Villages (or any gettable Villages within a reasonable amount of time?)

If there’s no villages at all, I would strongly consider going without Ambassador. If you think it’s necessary anyway, though, go more heavily for A/S than normal, as the collision will hurt you at some point. If you think Ambassador is still important though, you want to try to get a thinner deck (well, you wanted it for some reason), which means that you want 2 Ambassadors usually (though more apt, again, for A/S/A than normally), unless your opponent is going Amb-less, in which case you’re likely safe with one. This can be a bit hard to judge sometimes though. This also makes the Ambassador/cantrip openings no-brainers.

Example Games

http://councilroom.com/game?game_id=game-20130110-192703-46d1ff42.html
Now, my play here, especially early, is no paragon of perfect play, but there are some important points to make. First, the only Village is Throne Room, which especially early on, isn’t so hot as far as Villages go, particularly for getting an engine up. Wharf is an EXCELLENT drawing card, and Cellar helps me get around to my Ambassador as often as can be, providing really nice cycling here – this all contributes to the A/S/A opening choice. The Cellar gets used liberally, and this is really important – the deck is mostly junk, we want to get to the important two to three cards as much as we can. But the bigger point is that my esteemed opponent focuses too much on getting Silvers into Grand Markets. Now, don’t get me wrong, GM is really nice. But getting reliable drawing up is the biggest factor, and with Throne Room to give you the big chains eventually, that really needs to be the focus – everything else comes later. I am able to do this, and it gives me control of the game. In fact, I hardly care about GM at all here, as it’s a nice card to have, but not essential to the deck – and I can always HoP into it later.

http://councilroom.com/game?game_id=game-20130128-151239-44c16fe3.html
Here we see a classic Ambassador/cantrip opening, with a second Ambassador picked up later on. I prioritize Apprentice as the first 5-cost, as Villages will take a while to come by, and it can plow through Estates. Fool’s Gold is important here, as I anticipate eventually having a very thin deck. And then the focus goes to overbuilding a strong engine, making myself unbustable. We also see the three Ambassador plan as ineffectual.

http://councilroom.com/game?game_id=game-20130130-112807-293d0abf.html
This one shows how Mountebank can be effective as a junk-dealer as well as the importance of getting the drawing up quick, with Hunting Party – which also helps a lot in a junked deck.

http://councilroom.com/game?game_id=game-20130110-135942-84701763.html
Here, there are LOTS of psuedo-counters, and so I go for that route. Counting House, Horse Traders, and Silk Road all come up very big for me, but of course Ambassador is nice and strong itself, and with Island, Menagerie, Pawn, and far-and-away most importantly Colonies to support, even despite my pretty good luck, -Stef- is able to eke it out.

http://councilroom.com/game?game_id=game-20130126-160124-3e5bb9c0.html
Here I go for A/S/A against Obi Wan Bonogi’s A/A, looking for an early Stables. This, with not the best shuffle luck (look at the differences in turns 3/4), get me behind. However, the really interesting bit here is the midgame. He has $5 in coins in his deck. I am fairly swamped with little junk, but I do have enough stables to draw most of my deck, and about a turn and a half lead when we do start greening. He wisely keeps his course and just pounds the Stables – the important thing is to keep his engine from breaking. I follow him down the path all the way until they’re out, and then the race is on. Basically he needs my deck to fail to produce Province twice more than his before they all run out. As his deck is in quite a bit better shape than mine AND he invested enough time picking up Stables to stabilize it, this is a high-percentage play, and it pays off for him.

http://councilroom.com/game?game_id=game-20130131-154825-fea21e40.html
Here I hedge my bets a little with the opening (and my Ambassador serves to slow him down a good bit), but mostly ride Trader and Gardens as effective counters, particularly with the engine not being particularly great shakes.

http://councilroom.com/game?game_id=game-20130201-130943-859bad7e.html
Here I use Ambassadors, Cities, and Smithies to build up a strong engine. This gives me a very powerful lead, but I am careless in grabbing too many Duchies, and a little bad luck on not being able to connect things then totally kills me. I could have had this easily if I’d held off and made sure my engine was in better shape before plowing through the Embargoed Duchies so far.

Posted in Seaside | Tagged | 3 Comments

Combo of the Day #30: Hermit/Market Square

This Dark Ages combo was first identified and discussed at length by Herowannabe, whose article is reprinted below.  The comments to that article further elaborate on additional combo interactions.

We don’t do a lot of combo articles lately, since the increasing number of Kingdom cards has lowered the chances of seeing any given combo.  But we make an exception for combos within a single expansion, especially when they are as powerful as this one.

I want to preface this by saying that this is probably a combo for advanced players. It requires a careful balance, a knowledge of exactly what’s in your deck, as well precise timing to pull off correctly, without which your deck could easily flop.

The gist of the combo is this: grab as many Hermits as you can, then grab as many Market Squares as you can while you turn most of your Hermits into Madmen. Then, in one explosive mega-turn, use the Madmen to draw your whole deck then use the Market Squares and remaining Hermits and Madmen to simultaneously gain a whole bunch of golds and draw them into your hand, then buy a bunch of Victory cards and end the game. Sound far fetched? Let me explain.

STEP 1 – Grab the Hermits

Ideally you should open Hermit-Hermit, then on your next turns, use the hermits to gain more hermits in addition to buying any hermits you can afford. If you can’t afford to buy a Hermit then don’t buy anything that turn and let the Hermit you played change into a Madman. (Note, if you draw any of your Madmen then resist the temptation to use them! You’ll need them later.) If you use the Hermits’ trashing ability, make sure you leave at least 1 estate/shelter/useless card in your deck to trash later.

Ideally you should aim to grab 9 of the Hermits, but if you can’t grab 9 then 7 will work (5 is less useful, but maybe not completely disastrous). There isn’t much use in gaining an even number of Hermits, so if you can’t get the 9th or 7th Hermit, don’t bother with the 8th or 6th. Move on to step 2 instead.

Step 2 – Turn Hermits into Madmen while grabbing Market Squares.

Start grabbing as many Market Squares as you can. You do not need to empty the market square pile completely- it’s a good idea to leave a few behind to pick up with your hermits on your megaturn if you think your opponent will leave them there.

At the same time start turning more Hermits into Madmen. Your goal should be to have exactly 3 more Madmen then you have Hermits (ie: 6 Madmen and 3 Hermits, or 5 and 2).

Also, beware of letting your deck grow too big (i.e., if your opponent is filling it with Curses/Ruins and you are Hermit/MSing them into golds). The ideal deck size is 29 cards or less. You’ll see why in the next step.

Step 3 – Determining when to pull the trigger

I made this its own step because sometimes even when your deck is ready you will want to wait a few turns before pulling the trigger.

There are many things to consider when deciding when to pull the trigger, but here are the most crucial ones:

  • Your deck: it should be 29 cards or less, and is composed of your starting 7 coppers, 1-3 Estates/Shelters, exactly 3 more Madmen than you have Hermits, as many Market Squares as possible, and maybe a gold or two.
  • Your hand: it should have at least 2 Madmen in it, and you haven’t been hit by any hand-size reduction attacks this turn. Pulling the trigger with only 1 Madman in hand is risky- you might miss drawing a second one.
  • The kingdom: There should probably be enough nearly-empty piles that you can end the game quickly, and you want to make sure you don’t wait too long and give your opponent(s) enough time to snatch up too many provinces.

Beyond this I don’t know what else to tell you about deciding when to pull the trigger. At the very least I suggest that you practice this combo a few times solo or against a computer before trying it against a live opponent.

Step 4 – KaBOOM!

Pulling the trigger should go something like this:

  1. Play your first Madman, drawing 4 cards.
  2. Play your second Madman, drawing 7 cards.
  3. Play your third Madman, drawing 13 cards. Assuming you kept your deck 29 cards or smaller, you should now have your whole deck in your hand.

Play your first Hermit, and trash that useless non-treasure card you have been holding on to this whole time. If you need more junk cards for your other hermit(s) to trash, make sure to pick one up now. Or if you can pick up those market squares you left behind to use later in the turn.

As a reaction to your trashed card, discard all of those Market Squares in your hand and gain a fistful of gold.

Play your fourth Madman, drawing all those Golds and Market Squares.

Repeat with each Hermit/Madman pair that you have, using the last Hermit to pick up a silver, or maybe a card from a pile you want to empty.

Now you should have a giant hand full of Gold and Market Squares, with a spattering of copper. Play all of your Market Squares to get all the +buys that you need.

Now just buy up a bunch of Provinces and any cards you need to 3-pile the game (if needed).

Strengths

This combo/engine has a lot going for it.

  • It’s very fast. It may not seem like it, seeing as it takes around 10+ turns to build it up, but unlike most other engines, the “mid game” and “end game” phases happen entirely on one turn. This also makes it rather surprising for your opponent if they haven’t seen it before.
  • It isn’t really affected by most attacks, with one or two exceptions (see below). Since you really only need to be able to play one Hermit each turn, hand size reduction attacks are pretty much moot. They will still slow you down a little, but likely not enough to matter. Cursers or Junkers don’t do much either, since (unless they are giving you coppers) you can use your Hermits to trash them out of your hand or discard pile.
  • You only need to buy two cards (Hermit and Market Square) to pull this combo off, and both of them only cost $3. No need to build up to get the $5s or $6s or $7s.
  • Both of the cards you need are from the same expansion, meaning that this combo should show up fairly often when you’re playing with Dark Ages.
  • Also, thematically, you have to admit this is one of the coolest/wackiest combos to play. You have droves of hermits wandering around outside of town, gradually going mad. Meanwhile you spend all your efforts building the largest grandest market square in the world, and then, on opening day, all of those insane hermits rush into town and run amok… And somehow you end up filthy rich and reigning over a massive kingdom.  ;D

Weaknesses

  • While this combo resists most attacks, Trashers (such as Knights or Saboteur) can destroy it, as you need a lot of the right cards to pull it off. Also, being hit by a hand-size reducer attack on the turn when you’re ready to pull the trigger will stop it dead. If your opponent has built up an engine where he is Militia-ing you every turn it can be devastating.
  • Possession, as it does to most combo decks, completely destroys it
  • While you only need two types of cards, you need a LOT of those two cards. If your opponents are snatching them up as fast as you are it will sap a lot of the strength out of your deck (However, in my experience, Hermit and Market Square don’t tend to be very popular, so unless another opponent is going after the same combo you’re probably fine).
  • It is a high-skill combo, demanding a lot of attention to detail, and also requires a lot of buying restraint. It can be really hard to fight the temptation to buy that really awesome $5 card when you get a lucky hand of coppers, but don’t do it!

Works well with:

  • Scheme: which will let you turn your hermits into madmen without having to trash them, and will help you line up your madmen when you’re ready to pull the trigger. Also, at $3 it’s perfectly priced for this combo.
  • Versus Cursers/Looters: all they do is give you fuel for your hermits and market squares to turn into gold.
  • Other Cheap Trashers: can possibly be substituted for Hermits during your megaturn if you weren’t able to get as many as you wanted.
  • Talisman: as an opener it can help you pick up components faster.
  • Tactician/Haven allow you to start your turn with a slightly larger handsize
  • Bank has an insane effect on your Golds

Sample Games:

(Unfortunately I haven’t played on any of the computerized versions of Dominion, so I don’t have any records of games I have played to show you.)

In solo play I was able to set it up and was ready to pull the trigger by turn 12, but didn’t have any Madmen in my hand so I had to wait until turn 13. With 9 Hermits/Madmen and 9 Market Squares I ended up with over $70 to spend and 10 buys. Of course that would be the perfect situation, and not very likely in a real game.

I finally got a chance to try this against real opponents: it was a 3 player game, and I was able to snatch 9 Hermits and 5 Market Squares, and then I pulled the trigger around turn 12 (I lost track exactly) which was actually too early- I miscounted, and only had 5 madmen to my 4 Hermits (instead of 6-3) and the Kingdom wasn’t to the point where I could immediately end the game, but it still worked beautifully. I ended up with $35 and 6 buys, netting me 4 provinces and several Estates from my Hermits. Over the next several turns I was able to use all that gold to grab 2 more provinces and empty the estate pile to end the game well in the lead.)

Some Goko sample logs of this combo:Game 1, Game 2, Game 3

Posted in Combo of the Day | Tagged , , | 18 Comments

Winner of the 2012 Kingdom Design Challenge

2012 DominionStrategy.com Kingdom Design Challenge

jonts26 has won the Kingdom Design Challenge (and will be receiving a copy of the Dominion base game) with the following Kingdom:

2012 Kingdom Design Challenge Finalist #7

2012 Kingdom Design Challenge Finalist #7

We selected this Kingdom for the final because it offered a number of intriguing choices, most of which the actual championship game (and third-place match) brushed on.  Note, for instance, that all four players chose four different openings.  Below are jonts26’s comments that accompanied the set submission (don’t read if you want to try the set out yourself, and don’t want it spoiled!):

This is a power board with two distinct strategies. The idea is that both strategies are equally viable (as is a hybrid of the two if played right). Also, either strategy is still interesting and very tactical in a mirror match.

The more obvious strategy revolves around Silk Road with a lot of support. There are also a few different ways to play the Silk Road ranging from rush to slog. Use Tunnel/Warehouse to get Gold and buy Province/Duchy support? Thin Copper with Spice Merchant and use Crossroads/Village/Warehouse to draw big and cycle big? Many opportunities for tactical advantage to shine through.

The less obvious, but more powerful strategy revolves around Apprentice/Tunnel/Warehouse to gain and Apprentice Golds for massive draw and spending power. The limiting factor for this plan is how quickly you can buy provinces. Since all +Buy options require a card to be trashed and are terminal,  likely you will settle for a few 2-3 Province turns. Embargo exists to allow the Silk Road player to slow this down by clogging the apprentice deck, hopefully leading to dead turns, bringing the two to roughly equal power levels. In a mirror, end game dancing will be more interesting since both players would know exactly what the other is capable of. Additionally, there is room for one player to quickly, unexpectedly Embargo Provinces and transition into a Silk Road/Workshop game. If done right, it could potentially be the strongest strategy of the board.

Of course, all of the eleven finalists were wonderfully designed.  Set #5 was an extremely close runner-up, featuring multiple combos (Herbalist / Philosopher’s Stone, Mandarin/Copper/Silver/Gold + Royal Seal + Horn of Plenty) up against engine enablers like Fishing Village/Watchtower/Young Witch, +Buy, and Vineyards.

So we would highly recommend all of them if you’re looking to try a custom set game.  Each offers enough depth to be played multiple times without identifying any obviously optimal approach.  You can see all the finalists here, or on DominionDeck.com.

We also have an online spreadsheet of all submissions, with designer comments, ready-made strings to paste into Isotropic, the candidates we considered for the finalists, a breakdown of what expansions are needed to play each Kingdom, and stats on the submissions.

Once again, the eleven finalists:

This slideshow requires JavaScript.

Final Bronze Match Designer Set
* indicates Bane
Game 1 Game 1 Powerman Vineyard, Apothecary, Fishing Village, Menagerie, Envoy, Young Witch, Market, Goons, Hoard, Expand, Colony, *Wishing Well
Game 2 Game 2 shark_bait Fool’s Gold, Lookout, Shanty Town, Warehouse, Woodcutter, Remodel, Sea Hag, Apprentice, Bazaar, Hoard
Game 3 Game 3 Wingnut Hamlet, Menagerie, Tunnel, Watchtower, Monument, Remake, Inn, Tactician, Adventurer, Bank
Game 4 Game 4 WanderingWinder Courtyard, Oracle, Trade Route, Tournament, Golem, Bazaar, Mint, Rabble, Fairgrounds, King’s Court
Game 5 Game 5 Beyond Awesome Vineyard, Herbalist, Fishing Village, Philosopher’s Stone, Caravan, Young Witch, Horn of Plenty, Mandarin, Royal Seal, Trading Post, *Watchtower
Game 6 Game 6 Robz888 Ambassador, Lookout, Wishing Well, Bishop, Ironworks, Monument, Trader, Venture, Expand, Peddler, Colony
Game 7 Game 7 jonts26 Crossroads, Embargo, Trade Route, Tunnel, Village, Warehouse, Workshop, Silk Road, Spice Merchant, Apprentice
Game 8 Game 8 ednever Moat, Fortune Teller, Bridge, Moneylender, Smithy, Throne Room, Festival, Jester, Vault, Fairgrounds
Game 9 Game 9 RobertJ Chapel, Embargo, Fool’s Gold, Oasis, Workshop, Thief, Throne Room, Worker’s Village, Margrave, Wharf
Game 10 Game 10 Polk5440 Haven, Fishing Village, Scheme, Steward, Horse Traders, Mountebank, Upgrade, Festival, Library, Goons
Game 11 Game 11 Tables Native Village, Talisman, Treasure Map, Worker’s Village, City, Vault, Venture, Grand Market, Expand, Peddler, Colony

Thank you all for your participation!  This has been a great experience, and we hope to do it again next year!

Posted in DominionStrategy Championships | 1 Comment

Finalists for the 2012 DominionStrategy.com Kingdom Design Challenge

2012 DominionStrategy.com Kingdom Design Challenge

These are the eleven Kingdoms that we selected to use in the Final of the 2012 DominionStrategy.com Championships. These are outstanding Kingdoms highly recommended to anyone looking for a custom set game.  They have been designed to encourage divergent and competing strategies, and we’ve provided links to the Final and Bronze Match games so you can compare the paths you chose with the expert players.

(If you want to use these sets in a real-life game, feel free to make substitutions as needed depending on what expansions you own, like Village for Bazaar, Cellar for Warehouse, or Chapel for Remake.)

This slideshow requires JavaScript.

These sets are also available on dominiondeck.com.  If you want to see all the entries, with the 35 candidate sets that made the final cut for consideration, as well as each designer’s comments on their set, click here.  And last year’s finalists are here.

After you’ve had a chance to think through the sets or try them out, don’t forget to vote for your favorite! Remember, the winner of your vote will receive a Dominion expansion of his or her choice, so go and support the creator of your favorite Kingdom!

Final Bronze Match Designer Set
* indicates Bane
Game 1 Game 1 Powerman Vineyard, Apothecary, Fishing Village, Menagerie, Envoy, Young Witch, Market, Goons, Hoard, Expand, Colony, *Wishing Well
Game 2 Game 2 shark_bait Fool’s Gold, Lookout, Shanty Town, Warehouse, Woodcutter, Remodel, Sea Hag, Apprentice, Bazaar, Hoard
Game 3 Game 3 Wingnut Hamlet, Menagerie, Tunnel, Watchtower, Monument, Remake, Inn, Tactician, Adventurer, Bank
Game 4 Game 4 WanderingWinder Courtyard, Oracle, Trade Route, Tournament, Golem, Bazaar, Mint, Rabble, Fairgrounds, King’s Court
Game 5 Game 5 Beyond Awesome Vineyard, Herbalist, Fishing Village, Philosopher’s Stone, Caravan, Young Witch, Horn of Plenty, Mandarin, Royal Seal, Trading Post, *Watchtower
Game 6 Game 6 Robz888 Ambassador, Lookout, Wishing Well, Bishop, Ironworks, Monument, Trader, Venture, Expand, Peddler, Colony
Game 7 Game 7 jonts26 Crossroads, Embargo, Trade Route, Tunnel, Village, Warehouse, Workshop, Silk Road, Spice Merchant, Apprentice
Game 8 Game 8 ednever Moat, Fortune Teller, Bridge, Moneylender, Smithy, Throne Room, Festival, Jester, Vault, Fairgrounds
Game 9 Game 9 RobertJ Chapel, Embargo, Fool’s Gold, Oasis, Workshop, Thief, Throne Room, Worker’s Village, Margrave, Wharf
Game 10 Game 10 Polk5440 Haven, Fishing Village, Scheme, Steward, Horse Traders, Mountebank, Upgrade, Festival, Library, Goons
Game 11 Game 11 Tables Native Village, Talisman, Treasure Map, Worker’s Village, City, Vault, Venture, Grand Market, Expand, Peddler, Colony

Vote for your favorite!

Posted in DominionStrategy Championships | Leave a comment

The Best Dominion Cards 2013

Qvist is publishing the results of the Dominion Strategy Forum’s 2013 Card Rankings.  They are available on YouTube and the forumThe YouTube playlist is here:

If you just want to read the lists:

Posted in Rankings | Tagged | 1 Comment

Dark Ages: Shelters

This article is written by werothegreat, originally posted on the forum.

Shelters are the most drastic change made to Dominion by the Dark Ages expansion.  They were saved for last in the previews before release, after we saw the trash-gainer, the $1 cost card, the Ruins and their Looters, the upgrading cards, and Spoils.  While each of those do change the game in their own ways, ranging from the subtle to the not-so-subtle, they certainly more or less fit into the game space of Dominion as we know it – at the end of the day, they are simply Kingdom cards with cool, new effects.  But Shelters change how we play Dominion at a fundamental level.

As we’ve known since our first game, our deck in Dominion starts off with seven Coppers and three Estates – we’re so used to this concept that we plan our entire strategies around knowing this.  We think about the risk of opening with two terminals, we consider whether trashing Estates is worth losing the points they give, we see the power of Ambassador and Baron as opening buys, and we rest easy knowing our first Silk Road will be worth at least 1 point.  Shelters throw all those concepts out the window, and give us some new ones.

First, they all cost $1, which affects quite a few cards that depend on other cards’ costs (as you’ll see soon).  Next, they all do something – you are now starting the game with cards that have text on them – get out those reading glasses.  Third, you no longer start off with 3 Victory points, so strategies that trash into engines no longer have to worry about a tie-breaking Estate.  Finally, only one of them is a Victory card, which has ramifications to be discussed in time.

More broadly speaking, all opening theory related to Estates goes out the window.  For example:

    • Baron gets completely neutered (Crossroads, too, to a lesser extent)
    • Ambassador is unable to return a Shelter (since they aren’t in the Supply), so it only works on Coppers now
    • Bishop, Remodel, Salvager, Apprentice — all the early game “trash for benefit” cards tend to do much worse when they can only trash $1 cards instead of $2.
    • Remake and Upgrade now give you $2’s instead of $3’s.  Whether this is a plus or minus is entirely dependent on the board: you’re probably happy to pick up more Fool’s Golds, but probably not if you’re picking up more Secret Chambers.

Cards that depend on variety get stronger: Menagerie (which didn’t really need the help), and Harvest (which does)

  • Swindlers, instead of trashing an Estate and replacing an Estate, will just trash it out of your deck (or replace it with a Poor House)

Later in the game, not having those three Estates has some other effects:

  • Hunting Party trips over them instead of bypassing them all
  • Silk Road is worth a lot less, but Fairgrounds is worth considerably more
  • Rebuild starts off with fewer initial Victory cards
  • Fortune Teller discards much more
  • Death Cart has an extra Action to trash

So, in general, cards that interact with Victory cards are weakened in Shelters games, but most cards that deal with trashing, engines or hand/deck variety are bolstered.

Let’s look at each Shelter one by one.

Necropolis

Necropolis is easily the most useful of the Shelters, and, at first glance, would seem to be the only reason why anyone would ever want to use Shelters.  It is nice to immediately start off with a card giving +2 Actions, particularly if you are transitioning into an engine with more Villages and more Actions.  A single Necropolis doesn’t go that far if there are no other Villages on the board, but it can also help if you plan on opening with two terminal Actions.  If they collide (probability 30.3%), your odds of also drawing the Necropolis in that hand is about 30%.

Hovel

Hovel is probably the closest we will ever come to a Dominion card that is just a Reaction and nothing else.  Being able to trash a card upon buying a Victory card is not completely new – Farmland introduced us to this concept in Hinterlands.  But Hovel allows you to do this when buying any Victory card, so long as the card you’re trashing is Hovel.  So what is the point of this?  It tilts towards alternative Victory cards.  In a vacuum, buying Harem becomes somewhat stronger than buying Gold with its tiny bit of deck-thinning.  It allows that Province buy to be just a little bit less harmful to your carefully crafted engine, as instead of adding to your deck, it is replacing a card.  Perhaps the only time you’ll want to save Hovel from trashing is in a Gardens game, where every extra card counts.

Now, suppose you open 5/2, and there isn’t anything to buy with $2.  Your Hovel is in your hand.  Do you buy an Estate to trash the Hovel out of your deck?

This was a heavily-debated question on the forum, and it did not come to a clear consensus.  ehunt‘s explanation is quite helpful:

Sarah and Laura play a game. On turn 2, Sarah replaces a Hovel with an Estate. Laura declines to do this, keeping the Hovel and buying nothing.

Now Sarah’s and Laura’s decks are identical (let’s say no card on the board references Estates). We can imagine their decks and draws stay identical hand for hand (except Laura draws her Hovel whenever Sarah draws her Estate). At some point, Sarah will buy a green card with her Estate in hand. Nothing happens. Laura buys a green card with her Hovel in hand; she trashes it. Now their decks are different. Sarah’s got an Estate in her deck that Laura doesn’t have.

So the question is: is the turn on which you expect to buy a green card with Hovel in hand late enough that you’d be willing to take a free Estate?

It’s important to point out that this might never happen.  You may in fact, never draw your Hovel with a Province-buying hand, in which case you certainly would have rather just swapped it out for an Estate early on.  But you might be guaranteed to draw your Hovel with a Province-buying hand (let’s say you have a big draw engine), and you might not want an extra dead card in the deck so early.

Note also that alternative green cards (like Great Hall or Harem) mean that you’ll almost certainly be drawing a green-buying hand with Hovel quite early on, in which case there’s no need to buy an Estate.  And of course, quite a few cards depend on Estate, either directly or indirectly: Baron, Crossroads, even Bishop.

Finally, the game might — or might not — be decided by that 1 VP.  On boards with +Buy, it’s unlikely, so the advantage of that Estate probably won’t decide the game.  But on boards without +Buy, that 1 VP can prove quite valuable (especially as there are no starting Estates in each player’s deck).

Overgrown Estate

Overgrown Estate has a cute little on-trash bonus, but not much else going for it.  Its main role is its Victory label, which makes it eligible for cards like Rebuild and Crossroads.  You can do tricks like Hermiting an Overgrown Estate from your discard to let you draw a card, or trashing it on your opponent’s Bishop so you can swap it out for a hopefully better card in your hand.

Conclusion

Bear in mind, though, that Shelters are, according to the rules, only supposed to show up in majority Dark Ages games, just like Colony and Platinum are only supposed to show up in majority Prosperity games.  So Shelters, while game-changing, has not upset the entire Dominion paradigm, and you can choose not to play with them if you wish.  But personally, I feel that, other than making Baron a sad panda, Shelters make for a more interesting, enjoyable Dominion experience.

Posted in Dark Ages | Tagged , , | 12 Comments

The Five Fundamental Deck Types: The Combo

This is the last in a week-long series by WanderingWinder.  For the introduction and links to the other posts, click here.

King's Court

What characterizes the Combo?
A combo deck is a one that revolves entirely around a particular specific combo of 2+ different cards, generally getting 5-20 copies of the required cards in total. Once the combo is in place, if this has happened quickly enough, the deck should basically just win. This archetype does not deal with cards that work well together – i.e. it’s not just decks that have combos in them, a la Horse Traders-Duke, which is a Slog, or Warehouse-Treasure map, which works together well but isn’t an entire deck, but rather deals with combos that are self-contained, the-entire-deck-and-gameplan-is-this strategies. Typically, these combos are fairly resistant to adding other cards in with them.

Usually, with more than two distinct cards, you are really talking about an engine, which is a bunch of good cards that work well together and draw a lot, but this is not a hard-and-fast rule. Even things like Hunting Party stacks and Minion decks aren’t combos – they’re engines – that’s just (strong) cards being used to cycle you through, which can sometimes be extremely powerful with few cards, but isn’t a combo – there needs to also be some particular synergy, a sum-is-greater-than-the-parts, but particularly in such a way that goes beyond the normal functionality of a cards.

For instance, something like Worker’s Village and Rabble pair really nice together, as they give you actions, attack, buys, and draw – everything you need for an engine except money – but this is clearly not a combo, it is an engine, and part of how you can tell is that the parts are really modular – you might lose a little bit of efficiency by switching to another kind of Village or Smithy variant, but generally those roles can be filled by a number of other cards.

Something like Native Village/Bridge, on the other hand is very much a combo – it plays quite differently than other decks featuring these cards, and more important, you can’t get the same kind of functionality out of any other cards.

Some examples of Combo Decks include (not an exhaustive list!):

  • The Native Village/Bridge deck
    • Buy nothing but Native Villages and Bridges.  Use Native Village at every opportunity to put every card on the Native Village mat.  When the time is right, empty your giant Native Village mat and mega-turn out with all your Bridges.
  • The Chancellor(or Scavenger)/Stash deck
    • Buy 4 Stashes and multiple Chancellors.  Every turn, play your Chancellor, put 4 Stashes on top of your deck, and get a Province.  Repeat as soon as you draw another Chancellor.
    • Scavenger makes this even more powerful, since it allows you to guarantee putting a Scavenger in your hand every turn.  Plus you only need 3 Stashes.
  • The Golden Deck (video)
    • Bishop/Chapel into a 5 card deck of Gold/Gold/Silver/Bishop/Province (or Gold/Silver/Silver/Bishop/Province).  Bishop the Province, buy a Province.  Earn 5VP every turn while rushing the game end.
  • The Counting House/Golem deck
    • Your deck is nothing but Copper, Golems, and one Counting House.  Every Golem puts your whole deck in the discard and plays the Counting House, which draws all your Copper.
  • The Apothecary/Native Village deck
    • Have 8 Copper, 1 Native Village, and tons of Apothecaries.  Never use Native Village blindly; only use it to filter out green cards that your Apothecaries leave on top of the deck.  Once you start humming and your Apothecaries draw $8 or $11, your sole Native Village sucks up the new green card every turn, while your Apothecary leaves an Apothecary on top of the deck, essentially guaranteeing that it can keep going indefinitely.
  • Various forms of the Deck Deletion Pin deck
    • The crux is that you use Masquerade to “trash” your opponent’s deck into nothing.  This combo has the nice property that since your opponent starts every turn with 0 cards and ends the game with 0 cards in his deck, you can usually take your time setting it up.
  • King’s Court/King’s Court/Scheme/Scheme + just about anything guarantees $8 or $11 every turn thereafter
  • Philosopher’s Stone/Herbalist
    • With every buy you bloat your deck as much as possible.  You buy nothing but Coppers, Philosopher’s Stones, and Herbalists.  You use the Herbalist to repeatedly buy, then play, the PStone.
  • Tactician/Vault
    • Tactician gives you 10 cards.  Vault draws you 2, to a total of 11, and you can discard up to 9 of them for $9.  The remaining two cards are a Tactician and something you discard to the Tactician to repeat this process.
  • Black Market/Tactician
    • Tactician gives you 10 cards.  Black Market plays all your Treasures.  Another Tactician discards your last card and gets you back to 10 cards next turn.  Black Market saves all your Treasures from being discarded, so it’s basically like playing Dominion with 10 cards every turn.

What’s Good For Combos?

Combo pieces.

Matchups
Again, this is all dependent on what combo you’re playing, but there are some general tips. Usually, there is some weakness of the combo.

This is most commonly an attack – i.e. the Golden Deck is vulnerable to junkers and discarders.  Chancellor/Stash or Scavenger/Stash is very vulnerable to discard.  Scheme combos are vulnerable to Minion, and if it’s a large enough Scheme chain, Fortune Teller.

There are also other kinds of holes – for instance, combos which eventually attack the opponent into submission can be vulnerable to reactions.  Most forms of the Deck Deletion pin can be blocked by Moat or Horse Traders. All deck deletion pins can get into a stalemate (or lose) if there is a massive lead for the opponent, in VP chips or on a mat somewhere, or there are drawing duration cards available. Native Village-based combos are extremely vulnerable to possession. So watch out for these things, know when they counter you, if they can be fast enough, etc. And know how to use them to counter combo decks if you are on the other side.

Combo decks are also in general vulnerable to not getting up and running in enough time. What ‘enough time’ is depends on the combo – a deck deletion pin is in time if it ever gets in before buying out the Curses (or rarely, Coppers).  Others need enough expensive VP on the board, or at least 50% in many cases, to be available.

The biggest threat to making this happen is generally a strong, fast engine, as they can certainly outrace Combos, most normally if they have strong trashing to kick-start them. Rush decks also pose a serious threat in being able to finish things off too quickly for the combo to get in place.

Mirrors become strange things. Either it is a race to get the combo up first, which is a combination of 1st turn and luck, generally, with some skill on the order of the build, or very often it will end up in a 3-pile ending, where you want to build as long as you can so that you can cash out, but if you DO cash out too early, then this gives them a lot of time to build up for a bigger turn, and if you build too long, you run the risk of them three pile ending you. So the timing of when you pull the trigger, particularly if your combo is one that can go off as a matter of scale, is a huge skill in this kind of matchup. If the three pile ending is very likely, you need to watch out for defensive greening. Sometimes, a seemingly random Duchy can be VERY good – it gives you the lead, will be good in the long run, and most importantly, it can stop your opponent from being able to buy more engine components, by utilizing the threat of that three pile ending.

Posted in Articles | 14 Comments

The Five Fundamental Deck Types: The Rush

This is the fifth in a week-long series by WanderingWinder.  For the introduction and links to the other posts, click here.

Estate

What characterizes the Rush?
A Rush deck is conceptually very simple – get the game to end on three piles as fast as possible, while having some way to have the lead when this happens. A decent rush deck should be able to pile out the game in less time than flat big money could get to four provinces, generally around the time that a BM-Smithy mirror would be ending.

What’s Good For The Rush?
This is also pretty simple. You need some way of gaining things, and some way to do it fast. You also need some kind of cheap VP to be able to get, because 8 extra Estates is basically never going to cut it – you just CAN’T be THAT fast. Furthermore, you basically need your gainer to be able to gain those VP cards as part of the piling out strategy.

Thus, your major contenders on the VP side are Gardens and Silk Roads; occasionally Islands and rarely Great Halls or Tunnels.  I tend to doubt Feodum’s ability to work in a legitimate rush, because for it to even be two points you’d need 6 silvers, and that does not speed up three pile endings, so it seems more of a Slog card.

On the gainer side, you want most preferably Ironworks, or failing that Workshop or Armory.  Occasionally, you can do something with Develop, Remake, or Remodel to crank out a bunch of cheap piles, but this is pretty rare. Talisman is very good for ending the game fast enough, but getting the VP you need is a real issue – you really don’t want to buy everything out one at a time, that’s just far too slow for a rush.

Trashing is really interesting here. Unlike for the slog, where trashing, particularly strong trashing, is terrible, here it CAN be good. Very often it is superfluous and can slow you down. But in the right kingdom (particularly you will need some way to get multiple gainers played in a turn, so a Village), trashing down INTO your rush can make it a bit faster, and a bit faster is just what you need. Chapel works here, but Remake is the king, IF you have something to do on $3 other than silver, AND a village to take advantage of your higher action density.  For example, a trashing strategy with Chapel into a Gardens rush is extremely strong in the (unused) Game 9 set of the 2011 Kingdom Design Challenge.

How can I play the Rush?
Basically, you’re trying to rush them out, almost no matter what they do. You need to keep an eye on the score. The big thing is that you want to make sure they can’t block you out from enough of your key VP card – generally they can’t contest you, as that only speeds game end, but you don’t want to wait and buy gainers too long, because then they WILL be able to block you, and probably have some Provinces to boot, and suddenly you can’t rush the game to an end.

The other big point is to watch them for hitting piles – you need to have a plan for ending three piles, but this plan can be flexible. An opponent who needs to hammer a cheap pile very hard is the best friend for a Rush deck, because that becomes a de facto third pile, and speeds up your ending. This is particularly true if the pile is a Village, particularly Fishing Village or especially Crossroads, as the extra actions can let you double-play terminal gaining cards. Haven is another nice card, being cheap enough to buy out while also giving you the ability to make sure you get the precise one gainer played per turn that you typically want.

It’s worth noting that rush decks are in the abstract the most resistant to attacks of almost all kinds. Curses? Thanks for ending another pile for me. Handsize? I probably had junk or collisions anyway, and it’s not like I was going to buy something expensive. Trashing? This can be potentially annoying, but Saboteur and Swindler tend to speed up the game end, which is good for rush, and Treasure-trashers you can generally brush off with impunity.

Matchups

Against Big Money
Not the best matchup for rush, actually, because Big Money is one of the more likely decks to be able to get enough points from Provinces quick enough to stop you from ending – and if you’re too far gone, they can end it themselves. If you aren’t going to be fast enough, you generally need to abort to a slog and try to win the long game. You can even play a bit of a hybrid here, and decide how much rush vs slog you want to go for in terms of how much big money they are going, and how much longevity they are going for. If they are going for a longer deck, play more Rush-y, but if they go more Big Money blitz, you play more Slog-y

Against Engines
This is a good matchup for the rush. The idea is to play your basic rush gameplan, but look for piles they are going after to help you to three pile. If they have a fast enough engine, they may be able to get enough points early enough to block you from the ending you want – in this case, look and see if they’ve over-greened, because in order to be that fast, they’ve probably had to buy more green faster than they would against most other deck types, and this may well leave them susceptible to clogging. If this is the case, you can go slightly more in a slog direction to win the longer game, but you generally still need to have three piles in sight at all time. The strongest engines will just be able to beat you though, if they aren’t reliant on pile-driving a particular cheap pile.

Against the Slog
This is almost all about winning the split of the VP card you are going for, by enough that you can go ahead and end things instantly. Typically you’re looking for 6-2 or better. But if you only get 5-3 or even 4-4, you generally have to try to go for the quick ending anyway. 4-4 and worse, you can just be in bad shape – but you’re playing the rush, you ought to be able to win this split, and then with it, the game.

Against the Combo
It depends on the combo, but generally it’s about whether you can get the game ended before their combo is set up. Speed is of utmost importance, and that means speed to get ALL piles out, not just your key card.

Against the Rush (mirror)
This is, again, about winning the split. This is so important here, you want to cut short your build-up of gaining gainers WAY earlier than you would in other matchups, and very early on head for the green. If you can win the split, that’s usually game.

If you tie the split though, there are two things that can happen. One is that you keep rushing down the other cards you need to end the game. But usually, because there’s lots of cards left in that gainer pile, you don’t actually want to do that, because there’s going to be all this extra awkward time with your alt-VP and estates empty where you are struggling to come up with enough to grab that last pile. So often in the tied split, you want to abort your rush and go for a slog, trying to get enough other VP (generally duchies) to overcome, though you will still need to get 1-2 estates away from them usually. Trashing is bad here, because it’ll lose you the split. And if there are MULTIPLE cheap alternate VPs, waiting for a slog isn’t going to happen (and you will probably want to build up just slightly more than you would in in a normal mirror).

Posted in Articles | 1 Comment

The Five Fundamental Deck Types: The Engine

This is the fourth in a week-long series by WanderingWinder. For the introduction and links to the other posts, click here.

Village

What characterizes the Engine?
An engine plays important Action(s) repeatedly, very often, and in large quantity every turn.  Practically speaking, this means that you have massive deck-cycling in the form of card draw. (Not deck-cycling like, for example, Chancellor.)

They are also typically fairly general and to some extent modular – you are looking more for types of cards than specific cards. You can replace most of the cards in the engine with similar substitutes and it would still work (e.g., swap Warehouse for Cellar), but if almost all of the cards must be a particular card and nothing else, then you’re probably looking at a “combo” more than an engine. Again, though, there’s not a bright dividing line.

What Different Kinds of Engines are there?
Engines encompass a wide variety of decks. They are generally characterized by some way to get lots of cards, then a “payload” of whatever important actions you plan to play a lot. You can’t just buy nothing but Villages and Smithies, since if all you want to draw is Treasure then you may as well have played Big Money instead. Payload can be an attack (Militia, Goons), some massive source of money and buys (Baron, Death Cart) or just things you want to play a lot (Horn of Plenty, Monument).

As for the deck-cycling, exactly how the deck works is going to vary from kingdom to kingdom, but there are some general categorizations which can be made.

The [Village] [Smithy] Engine
This is the most basic kind of engine you can build. The idea is that you play some card which gives multiple Actions (Throne Rooms, King’s Courts, and Golems can also count here) to be able to play big terminal draw cards in order to draw large portions of your deck. Once this comes together a bit, you can generally string several, Village-smithy-Village-smithy-Village-smithy plays together. You can do almost anything as a payload for this kind of engine – what you want, exactly, will depend on the kingdom.

The Draw-to-X Engine
This is similar to a Village/Smithy type of engine, but instead of regular draw, it uses one of the draw-to-X cards – occasionally Jack of All Trades, but more often Watchtower or Library, and most notably Minion. Given the differences in how the draw works, this deck needs to behave a little bit differently than the Village/Smithy version talked about above – you would ideally want to play some of your payload actions BEFORE your draw cards, but if your payloads and particularly draw cards are both terminals, you will need extra Villages in order to make this happen.

Disappearing Villages (Native Village and Fishing Village, sometimes Crossroads, University and Festival) tend to be better here relative to the smithy versions, as the missed card draw isn’t AS problematic here. Further, cards that give benefits for discarding (like Horse Traders or Warehouse) shine a little extra in these decks, as you can draw past their downsides. Menagerie can sometimes work like the draw in these decks, bridging the gap between these and the next engine type.

It’s worth noting that these kinds of decks don’t work nearly so well as the Village/Smithy variety when your payload has to be Treasure.  This is because you can’t really get rid of Treasure until after your Action phase (unless you have Black Market!).

Non-terminal Draw Engine
This engine depends on non-terminal drawing cards to go – things like Menagerie, Lab, Stables, Level 2-3 Cities, Apothecary (and others). Non-terminal draw, to be balanced, tends to draw you less than terminal draw, but there are a couple advantages to this kind of deck compared with the previous engines: it can work even without Villages, and if you do have some Villages, you can have more payload cards without getting too much terminal collision.

Sifters are also fairly decent here, if they are non-terminal, and even something like a large stack of cartographers can make this kind of engine work, possibly without ever getting a handsize over 5 cards.

Hunting Party famously often works differently than the rest of these, with HP/X decks. Apprentice can work here, but you either need some mega-turn mechanism to go off, or the ability to gain very expensive cards for fuel, or the engine isn’t going to be running all that long.

Specialty Draw
There are basically two cards that work very well here: Crossroads and Scrying Pool. They have amongst the highest drawing potential in the game (being unbounded in the amount they can draw), and if you are going for this as the basis of your deck (certainly you can at least use Crossroads without it being the focus), you need to prioritize the requisite cards more highly than normal. For instance, in a Crossroads-based engine, if you play something like Warehouse, you want to discard Coppers, usually Silvers, and even Golds, in order to be able to draw more off of the Crossroads.

Double Tactician
This is much more specialized than other kinds of engines, and along with the next kind of deck, lies between engine and combo. These work somewhat similarly to the draw-to-X engines actually – you need virtual money (or Black Market!), and then you need to play the second tactician at the end of the turn. Cards that need large handsizes to reach their full benefit can really shine here, as this can get set up to draw more cards faster than most other engines, though the upside is potentially smaller; in any case, this includes things like Forge, and Cellar.

The Mega-Turn Engine
Again, this plays, at least in terms of endings, almost closer to a combo deck than an engine. This is also more of a payload type than it is the actual driving force of the engine. Mega-turn engines seek to gain all of their points in one massive turn at the end of the game (or occasionally two or three). In these decks, you usually don’t want to green at all until the very very end, unless you have to green sooner to stop your opponent from being able to end in the lead. Embargo is particularly potent in these kinds of decks, as you can shrug off the clogging effects of the Curses – they’ll never cycle through your deck.

What’s Good For Engines?
In any engine you are going to need components to make it go, but that will vary from engine to engine. There are some general points though.

  • Trashing, particularly strong trashing, is very good. Thinner decks turn into an engine  faster than fatter decks.  So Chapel, Remake, Ambassador shine most in these, and things like Upgrade are slightly worse but generally strongest in these kinds of decks as well.
  • Attacks to slow your opponents down or sometimes to hurt their point totals give you extra time to get set up and dominate the game.  Discard attacks and Saboteur find their best homes in these kinds of decks. Cursing attacks CAN be very good for these decks, too, IF you have the trashing (usually needs to be strong trashing) and draw in order to be able to clean them up – a non-engine opponent won’t be able to do the same.  Otherwise your engine pieces will never connect.
  • Alternate VP cards lengthen the game to give you time to get your engine up and running, provided that the engine is able to go for either the alt VP cards or Provinces; certain alt VP cards can help our your opponent more than you in some cases, particularly if it’s a slog you’re up against. But most especially Colonies, Vineyards, Fairgrounds, and VP chips are big, big-time engine cards.
  • Gains. Most engines need some way of gaining more than one card in a turn in order to come out well. This helps to be able to get a critical mass of components, as well as extra payloads and very often multiple Victory cards at once as well. For this, straight +Buy is usually important as well.
  • +Actions like Village.  Not always necessary, but they are commonly the only way to get all those cards into your hand (by giving you the Actions to play your +Cards) and/or the only way to play all those Actions you’ve drawn into your hand.
  • Generally, you want payload.  Engines are built to play certain Actions over and over again every turn.  If there aren’t suitably strong Actions on the board, there’s no point in building an engine to play 10 Spies every turn.

How do I play an Engine?

The biggest thing about playing the engine is to get the engine up and running first, before worrying about other things.  This means not focusing on Treasure — you will need a little amount of money to get this going but not all that much. And then just focus very very hard on getting the cycling up to speed before worrying too much about other things. You often will want to pick up one attack early on to slow your opponent down, and at some point you may start to get hampered in your ability to buy more components because you can’t generate enough buying power – this should be your cue to get more payload; usually, you want to prioritize a nice $5 (or even a $4 or a $3) engine piece over Gold, unless you really need extra money.

Eventually, you will have to turn for points, but you want to make sure that you are very well prepared to do so first. Generally it’s a bad idea to pick up any Provinces before you go virtually straight for green, green, and only green; if you green too early, your engine can gum up, and you will almost never have time to repair it afterwards. As for Villages vs terminals, you generally want to get the a terminal before you get a Village to support it, while you are building up, though at some point you will switch over to over-villaging in order to make sure your initial hand can get off the ground. This gets skewed a little more when the Village is giving you something else useful, a la Hamlet in a draw-to-X, Festival or Bazaar, or Worker’s Village where you are desperate for more +buy.

Endgames usually depend a bit on the specific matchups, so…

Matchups

Against Big Money
A good money deck will usually be faster than you. Wait for quite a while before you go green, and when you do, be able to close the game out. Decently often, you will need to be able to get smaller VP in order to mount a comeback; keep this in mind, but also keep in mind that if you’re building a decent engine, you WILL be able to do this. Don’t get scared because you’re behind and start reaching for Provinces to close the gap – this is only sealing yourself in.

Against Slog
The nice thing here is that the game will already be longer based on their deck choice, which gives you longer to get going than against a Big Money deck, and you sometimes need that. Against a slog, you need to be aware of what they’re going for. You don’t want to deny their cheap Victory cards in most cases, at least early on, because you will gum up much worse than they will.  Make sure you don’t green until you can consistently buy out the big VP cards, take the lead and win.

Alternatively, if they are playing slower, and building up to get an insurmountable VP matrix that you won’t be able to overcome, then they will probably need to start greening later, in order to have enough economy to finish this out. In these cases, you can look to see if you can green early and actually go for some late blockage, after you have a decent amount of bigger VP. This can lock them out of their VP matrix, and in fact, there are some cases where you just win right there, since they won’t be in a position to go after the expensive VP to come back, so it won’t matter that you’ve gummed yourself up.

In any case, watch out for a three pile ending.

Against Rush
This is a difficult matchup for engines – you need to be able to get a lot of VP before they can end the game. The strongest engines can do this, of course, but they need to be very strong. Once you get the lead, and stabilize it against them grabbing Estates or hitting a new plateau on their scaling VP card, you’ve very often won, because they won’t have a lot of other ways to gain points. But surviving long enough to have this happen can be a problem. And three pile endings can KILL you here.

Against Combo
You would play this very similar to the Rush. Watch out for three pile endings. Here, you also want to look to try to make your own happen. Most of all, you want to either have the game ended, or be about to end it, by the time they establish their combo. Because if they get it up fast enough, you can well be dead.

Against Engine (mirror)
This plays differently than all the other matchups, and particularly different than the big money matchup. Usually, you need a lot of engine components, and they do too, so you end up going for many copies of the same thing… which does a couple things. First of all, winning splits becomes rather important in many cases – to figure out when, look for what makes your engine go, what it needs to survive. Generally, you will need multiples of at least draw cards and some form of extra actions (i.e. Villages). If there’s only one draw card or only one Village, winning that split can be massive. This is probably most true on the Village front – Villages let you play your terminals; if you win even 6-4, you can play 7 terminals on a turn, and they can only get 4 – this is massive. +buy or gaining cards CAN also work this way, though this is somewhat more rare, as usually you don’t need more than 4 buys in a turn that badly.

The other thing is that this makes three pile endings much more common. WATCH OUT FOR THEM. This in turn, makes having a lead more important, so that you can three pile end it on them, and so they can’t do the same to you. In fact, you can use something like a Duchy as a weapon against them – not only does it give you points, but it can actually stop them from picking up engine components, as you threaten to three pile end it if they do.

One of the things you have to watch out for when winning splits is that you don’t go too crazy – if you win a Village split 8-2, you need to make sure they can’t end it so fast that you won’t get to enjoy the advantage, i.e., you need to be able to do something with it at some point. So here, you want to green earlier than you would in any other matchup where you are playing an engine. Only, you need to take care that you aren’t greening too early, as they will be able to play the long game and grab LOTS of points to wipe you out. To figure out the timing right, keep watch of each of your decks to see how reliable they are, and more importantly, how much they can get in terms of money and buys.

If there are gains to be had, remember that they can happen mid-turn and then those gained cards can be used mid-turn in a lot of cases – watch out for it. Always keep your eye out on potential. If they won’t be able to three pile you, generally keep building, unless you reach the other stop criteria, which is that if you can just straight buy enough VP to end the game with a win, should you start buying green right now, then go ahead and green. I.e. if you can buy 5 Provinces easily starting now, without gumming too much, and this won’t gum you too much to be able to maintain the lead, then go for it.

Posted in Articles | 4 Comments

Interview with Thief Division champion: lespeutere

lespeutere
2012 DominionStrategy.com Championships Thief Division champion

Final Four overview

Initial seed: 13
Round 1: def. (244) hecpan 4-0
Round 2: def. (116) secret tunnel 4-3
Round 3: def. (205) alex 4-1
Round 4: def. (45) Fabian 4-3
Division semifinals: def. (29) KristianBahle 4-1
Division finals: def. (21) HiveMindEmulator 4-2

lespeutere will be facing off against -Stef- in the first (European) semifinal.  We caught up with lespeutere and asked him a few questions.

Continue reading

Posted in DominionStrategy Championships | Leave a comment