Guilds Preview #1

This is the first of several previews by Donald X. Vaccarino, introducing the next Dominion expansion: Guilds.  The community is discussing these new cards in the Guilds Preview subforum.

Baker

Dominion: Guilds

Casimir III, greatest of the Polish kings, came into power in 1333. He took a country in ruins, and brought prosperity to it, while doubling its size, in part by claiming the Duchy of Halicz. Since I am previewing Dominion cards though, that’s all pretty irrelevant.

Guilds is the 8th Dominion expansion. Man. That’s a bunch of expansions. People always ask about a 9th expansion, and I always say, well who knows, but there are good reasons for stopping. You can go read them in some other thread, I am busy previewing a card here, I will get to it any second now. Guilds itself only exists because I needed a small expansion to go in-between Hinterlands and Dark Ages. Base Cards ended up showing up there instead, but I’d already made Guilds, so why not release it.

Guilds has two main mechanics, as you can see in the terse sentences that accompany the flavor paragraph. One of them is coin tokens. And here today is a card that uses them.

The coin tokens are those metal things in Seaside and Prosperity. Guilds has cards that give you some, and then they’re yours, they don’t belong to some Pirates or anything. The significance of a coin token is, in your buy phase, before buying cards, you can cash in any number of coin tokens for +$1 each. That’s it, that’s all there is to know. They’re money you can spend later. The turn you play Baker, you get a coin token; you can cash it in that turn, but you can also hold onto it.

Guilds is the most skill-based expansion, and coin tokens are a big part of that. There you are with $5 some turn; you could buy a card for $5, or maybe a cheaper one. There are a certain number of options. Coin tokens increase your options; with just one coin token, you can now consider cashing it in and getting a card for $6 instead.

Baker has another special twist, which is, it gives players a coin token at the start of the game. You only get one coin token then, not one per Baker in the pile, why is anyone even asking that. You get the coin token even though no-one has a Baker yet and possibly no-one will end up buying one. It’s a free sample.

That starting coin token drastically shakes up the opening two turns. You can get a $3 and a $5 no matter what your starting draw is. If you got $2/$5, you also have the option of $2/$6; if you got $3/$4, you have the option of $4/$4. You can also save that coin token for later and live with your draw.

That’s the preview, I’m here all week.

Posted in Uncategorized | 7 Comments

Dark Ages: Marauder

This featured forum article is written by KingZog3.

Marauder

Dominion: Dark Ages

I saw somewhere someone saying that Marauder is not a good card because “it’s way too slow.” I’d like to show that in fact, Marauder is not too slow to attack, and not too slow in gaining Spoils, and is in fact almost a must buy in many kingdoms without lots of attack cards.

Slow attack? I think not!

Sea Hag is great as it can be bought in the first two turns and can deal Curses on top of other people’s decks, putting the Curses “into play” very fast. While Marauder is the same $4 price as Sea Hag, it only gives Ruins and not on top of people’s decks. Opponents will only get the ruins in their hands on their second reshuffle, which may seem like a long time away, but those ruins hurt more than you think.

This is because Ruins, while still giving marginal benefits, are totally pointless in the early game. Great, I can play Ruined Market for +buy. Yay! (The exception being Abandoned Mine, since it can help players early on…ish). And without fast trashing, there is a good chance that the Ruins will stay around for quite a while. If they don’t play the Ruins, it has the same effect as a Curse in their hand, which leads to the second point of why early Ruins are still very harmful.

At the start of the game, playing those action cards you bought is very important to get Golds or $5 cards or whatever else they do. That leaves little time for playing ruins, even if they give you $1 extra to spend, or and extra buy to pick up…um… two Pearl Divers. Most of the time, Ruins are still just junk, so dishing them out early is a good thing. And Chapelling may get rid of them easily, but then your opponents are still left with Coppers or Estates that they didn’t get to trash because of the Ruins.

That being said, Ruins are still not as bad as Curses, and so attacks like Sea Hag, Militia, etc. do hurt more at the start of the game.  If you don’t buy it fast and start using it fast, it’s possible for your opponent to build a card-drawing engine that manages to keep the Ruins trashed as they come in.  But of course, that is only half of the card . . .

But…Spoils is just a Gold…

Yes, it is just a Gold, but it’s not what Spoils is that matters, it’s how you get it. There are two things which make gaining spoils from Marauder a great thing.

Firstly they help boost your economy, possibly skipping Silvers. Unlike Bandit Camp, you can’t rely on playing Marauder every time it comes up, so turning the Spoils into real Gold is essential. But if you buy Marauder on the first two turns, then play it as soon as it comes into your hand, you’re looking at a Spoils in your second reshuffle. Is that slow? That’s the same as if you had just bought the Gold (Which would require some luck in pulling up 6$ on the third or fourth turn). Sure the Spoils goes away, but just play Marauder again and it’s back. Once it’s replaced with a real Gold, you can trash Marauder. Now you’ve got a Gold and your opponent has a bunch of Ruins. Even if you only manage to give him 3-4, that’s enough to slow him down for a while, especially without a cheap trashing card.

Note also that this is what distinguishes Marauder from Sea Hag.  Both are punishing early game junking attacks, but one boosts your economy as you do it.  In exchange, Marauder doesn’t hurt quite as much as the Hag, but it means that your economy is stronger for it.

Secondly, the “price” of the Spoils is important. Marauder costs $4 and gives you Golds. $4 Gold is a great deal! It costs you an action to keep the Gold, but it gives your opponent Ruins in the process. Just like Bandit Camp is a $5 Gold which gets delayed, Marauder is a $4 Gold that is delayed and costs you an action. It’s just a price you pay for how cheap it is.

The one drawback of the Spoils is that it slows your deck cycling.  You may not think this is a big deal — who doesn’t want to have pseudo-Golds in their deck?! — but it does mean that your Marauder is cycled slightly slower.  You aren’t going to be able to spam it as effectively as, say, a Sea Hag.

Counterfeit — another Dark Ages card — works quite well with Spoils/Marauder:

  • It can trash out your Coppers, letting you play your Marauders more;
  • It doubles your Spoils, and heck, you were going to trash the Spoils anyway.

How to Counter it?

The best way to counter the junk you’ll get is heavy trashing. It’s pretty lame I know, but other than Lighthouse or Moat, that’s the best way to deal with Ruins so early in the game. You may want to keep some if you’re going for a Gardens strategy, but in general you’ll want to trash them. If there’s no trashing, get a Marauder yourself. There is nothing more boring than playing a game with all 10 Ruins while your opponent uses his cheap Gold to buy the more powerful $5 and $6 cards. What I’m trying to say is don’t look at Ruins and think “Oh, they’re not that bad. They give me a little effect when I play them.” Take them seriously, especially when they can be given to you so fast.

Quick Summary

In the end, there are faster, better attack cards that can be bought at the start of the game. However, by buying Marauder you guarantee yourself a Spoils (Gold) in your second reshuffle, eliminating luck factor for getting $6, and you give (mostly) useless cards to your opponents. Sea Hag is better, but Marauder is up there in terms of starting cards. The important thing to lookout for is other Marauders, since then everyone will just have tons of Ruins and Spoils.

Works with

  • Buying it early
  • Counters action based cards like Wandering Minstrel and Golem
  • Fast deck cycling
  • Scheme or Sage (can skip the Spoils with Sage, but plays Marauder more)

Conflicts with

  • Other, better, 4$ attack cards
  • Opponents Scrying Pools
  • Heavy trashing
  • Your Bishops
  • Your Rabbles
Posted in Dark Ages | Tagged | 14 Comments

Don’t Play Everything!

This is a featured forum article written by Davio.

A mistake I often see less experienced players make is that they just keep auto-playing every Action card in their hand until they’re out of actions, even when the Action cards have 0 effect. What’s worse is that they keep playing those Action cards if they actually have a negative effect. Why? Well, just because they like playing strings of cards, because that’s what the game is about, right? Nothing like playing 10 Villages and feeling like a boss.

Zero Effect
This is the least hurtful, but it can still be annoying for your opponents. Imagine having drawn your entire deck and still having 5 Wishing Wells. Luckily, online interfaces know that you have no more cards and thus you can’t wish for anything, but I wouldn’t be surprised if someone got a smack in the face in real life for doing this and still wishing for stuff and acting all surprised “Oh, I don’t have any cards in my deck anymore!” every single time. Still, it’s not so bad to play Actions for 0 effect, it’s just pretty useless. But this paragraph only serves as a step-up to negative effects.

Negative Effect
When does playing an Action card have a negative effect? There are a couple of cases:

  • They hurt yourself directly
  • They hurt yourself indirectly
  • They help your opponent directly
  • They help your opponent indirectly

Let’s deal with each case separately to give you an idea of what I mean.

1. They hurt yourself directly
Now how can playing an Action card hurt yourself directly? Well, you could play Caravan before Menagerie, drawing a duplicate card when you had a hand of uniques, but that’s not what I mean. What I mean is with a card that forces you to do stuff like Golem-ing into an Ambassador, Masquerade, Trading Post and the likes. Let’s say your hand is a Golem and a lot of Colonies.  In the rest of your deck is two Poor Houses and 1 Ambassador.  Maybe your Golem will hit two Poor Houses for $8 and let you buy a 6VP Province.  But maybe you’ll hit that Ambassador and give your opponent 10VP.  Do you play it?  Well, if you’re desperately behind, then yes!  But you should weigh the risks before auto-playing the Golem.

Throne Room is similar: weigh the risks vs. the rewards. If you have TR-TR-Lab and some risky cards still in your deck, consider just TR-ing a single Lab instead of starting off with TR-TR.  Maybe you draw into Ambassador, and now you’re forced to Throne your Ambassador even though there’s no cards in your hand you want to return.  It’s too easy to automatically start a chain with TR-TR without thinking it through. TR-TR-Lab-Terminal leaves you with 2 Actions remaining while TR-Lab, TR-terminal leaves you with 1 action remaining. Is that one action worth the risk? I don’t know, but you should think about it.

With a hand full of Rats, don’t play a Rats, unless you’re really willing to just randomly trash the top card of your deck!

2. They hurt yourself indirectly
Actions that hurt yourself indirectly have mostly to do with your next hand. An easily understood example is playing a cantrip after a chain of Hunting Parties. A typical Hunting Party deck will be constantly discarding Coppers and Estates while finding your good cards, and after each Hunting Party you have an empty draw deck and a full discard of bad cards.

What happens when you play that cantrip? Your Coppers and Estates get shuffled into a new deck, one of which you will draw, and now your Hunting Parties played this turn will miss the shuffle. For the next several hands you’ll be drawing only those bad cards you tried to skip with your Hunting Parties. Shuffle timing is very important in HP decks, play the cantrips first to not risk drawing into your discarded crap.

Warehouse has a similar lesson. After a few Warehouses, you’ve discarded most of your crap.  Don’t trigger a reshuffle and redraw all those bad cards, leaving your next few hands to be nothing but Warehouse rejects.

There are a lot of cards which mess with the top of your own deck, either by revealing or drawing, and can cause an unwanted reshuffle. If you played a lot of good cards this turn, they will miss that shuffle. If you have reached a certain treshold, $8 for Province or $11 for Colony, and only have 1 Buy, always consider stopping the chain as an option. Think about what’s left in your deck. Try to leave $8 for the next hand as well instead of $12 for this one.

Cost reduction cards often have unexpected side effects.  If you’re planning on using Salvager, perhaps you should do so before your Bridges.  Once you play a few Bridges, your Salvagers (or Bishops, or Apprentices) might not be nearly as powerful as they used to be!

3. They help your opponent directly
Reactions immediately should spring to mind when thinking about cards that help your opponent directly.  Your Mountebank into her Trader is pretty beneficial for your opponent.  Of course you don’t always know whether your opponent is holding Watchtower or Trader when you’re thinking about playing that Sea Hag. But again, you should think about it. Sometimes you can know in advance due to having seen the cards of your opponent with a missed Bureaucrat or Cutpurse. There are also cards which give the opponent an extra card or choice, Governor, Council Room, Vault, Bishop, etc.. I’ve made a costly mistake once when I needed to play 2 Governors as remodels to get the last Duchy and Province. I took the Province first, allowing my opponent to sneakily transform a $4 into the last Duchy. It was a silly mistake which could have been prevented if I hadn’t played on auto pilot.

4. They help your opponent indirectly
Examples of cards that help your opponent indirectly are the ones that mess with the top of the deck. Uncertainty plays a part with Sea Hag and Swindler. Consider a game where you’re trailing by less than 1 Province and you already have $8. Curses are gone, but you think “what the heck, let’s play Swindler” and oops your opponent trashes a Province for a Province, and now you lose.

It helps to know what’s on top of your opponent’s deck, Oracle, Spy, Scrying Pool etc. help, but even if you don’t know it’s good to pause for a second. The information you have about the top of their deck is not 0. Because Dominion is a game of incomplete information, the trick is to make the best decision based on the little information you do have. Oftentimes you can prevent looking like a fool if you think about the order you want to play your cards in. If after a couple of Rabbles your opponent has 2 Provinces on top and then you play a Tribute for kicks and giggles (you don’t need the benefit of 2 cards), your opponent will be very grateful!

If you’re playing at a high level it’s important to not give your opponent more information than what’s absolutely necessary.

  • You might want to play your Treasures one at a time, revealing only what you need to.  (No need to let your opponent know you drew all five Platinums in your deck this turn.)
  • Imagine a game with Governors where you just played your single $4 card, a dead Sea Hag, for no real reason other than maybe discarding a good card. Your opponent can now safely use Governor to remodel knowing that you can’t pick up a Duchy this turn.
  • If you draw your Smugglers, but then your opponent buys a Province, don’t play the Smugglers gaining nothing!  Now your opponent knows that his purchases are not going to be smuggled until at least your next reshuffle.
  • If you draw multiple dead King’s Courts in your hand, just discard them.  Don’t make a show of sympathy by playing them for no effect.

What to take away from this
I’ve shown a couple of ways for Action cards to either hurt you or help your opponent. Now I’m not trying to scare you into never buying or playing some cards or doubting every simple situation, I just urge you to weigh the risks versus the rewards. Don’t just play your Action cards simply because you have actions left over. Dominion is a highly situational game where solid tactics can sway close games in your favor. Don’t just consider which cards to play, always consider if it’s even worth playing them at all.

Posted in General Strategy | 8 Comments

Hinterlands: Develop

This is a featured forum article written by dondon151, the 2012 US Champion.

Develop

Dominion: Hinterlands

A quick perusal of Qvist’s Dominion card rankings will reveal the community’s general consensus that Develop among the worst $3 cards in the game. It is not immediately obvious why this is the case, as Develop is an exotic trash-for-benefit card that gets the player two cards at the cost of one and topdecks both for their immediate use on the subsequent turn. Less expert players will either blindly follow this consensus and ignore Develop where it is situationally useful or misjudge its power and use Develop in the wrong contexts.

It is helpful to first cover the main reasons why Develop is generally a weak card:

1. It’s terminal.
You wonder, should this count as a point against Develop? Most other trash-for-benefit cards (Salvager, Remodel, etc.) are terminal. However, one must consider that the opportunity cost of a dead Develop is a Silver or a non-terminal $3 that could have done something useful.

2. It doesn’t benefit the current hand.
Develop doesn’t produce $, nor does it draw cards, and it trashes a card from the player’s hand. Assuming no interference from the opponent, that leaves the player with 3 cards from a 5-card starting hand. Even if the player manages to increase his handsize beforehand, choosing to play Develop renders two cards in hand unusable for the buy phase. Opening with Develop sacrifices a lot of buying power on the turns where it appears in hand.

3. It slows deck cycling.
Develop gains cards to the top of the deck. Unless Develop topdecked cards that draw cards, this anti-cycling effect inhibits deck momentum by delaying the speed at which the player can get subsequent reshuffles.

4. It’s bad at gaining Victory cards.
In the final stages of the game, when the player’s deck is in its dying throes (or just choking on Victory cards), most TfB’s are useful because they can convert assets to points in some way. Develop can do this too; the problem is that topdecking a Victory card strongly hampers the subsequent turn, and Develop is fickle about what cards it can trash for points in the first place. And while Salvager, Apprentice, Forge, Remodel, and Expand can all perform some variant of trash Province -> gain Province, Develop lacks this function entirely.

5. It’s inconsistent between kingdoms.
Develop is unlike most traditional TfB’s in that its potential benefit is strongly dependent on the other cards in the kingdom. In particular, Develop benefits most from there being in the kingdom good $3 cards and/or synergistic cards that are exactly $2 apart. Some of the benefit from Develop is negated if, for example, you’re forced to topdeck a Silver that you don’t necessarily want. This also makes most $3 cards generally bad targets for Develop, as good $2s will not always be in the kingdom and Estates are ubiquitous.

Naturally, by examining Develop’s shortcomings, we can identify the conditions that make Develop much stronger than we normally perceive it.

1. When Develop is the best form of trashing in the kingdom.
Develop is a weak trasher, but it’s a trasher nonetheless. It provides no benefit at all upon trashing Coppers and Curses, but sometimes we use other TfB’s, such as Salvager, $0 Trade Route, or Trader for that purpose. In engine games in particular, Develop’s trashing is an important consideration, because there is potential to play Develop more often and the weak trashing goes a long way towards improving engine consistency.

Example: Menagerie typically synergizes with Develop because it trashes Estates for Menageries (or other $3s), and the Copper trashing is also beneficial to this type of deck by reducing the frequency of duplicate cards.

2. When cards of cost $2-$4 in the kingdom are abundant and strong.
This is an indicator for Develop in a few ways. First, hands with Develop on turns 3 and 4 will tend to hit $2-$4 depending on the opening, so being able to buy something useful with those hands is a boon. Second, Develop converts Estates into $3s. Third, it is not as bad to trash a Copper with Develop in the midgame and knock the player’s buying power from $5 to $4 if he doesn’t mind passing up the $5 in the first place.

Note that Develop is not always a must-have if there are kingdom cards at $3, nor should it always be ignored if there is only Silver at $3. Developing Estate to Silver substantially improves the deck’s economy in future shuffles, and the topdecked Silver may very likely let the next hand reach $5.

Example: a Fishing Village – Watchtower engine likes a Develop opening because both key cards are at $3 and Watchtower’s draw benefits from Develop’s trashing due to handsize reduction.

3. When there is a combination of surplus +action and +card.
There is no doubt that most terminal cards are significantly improved given the means to play them frequently and in large numbers. The question is whether this is even worth mentioning with regards to Develop. In these situations, not only is Develop an adequate trasher, but it can also be a potent gainer. Because Develop gains cards to the top of the deck, a drawing engine can easily play the gained cards on the same turn. Or, one can choose to leave the gained cards on top in order to kickstart the next turn.

Example: any variant of a village / terminal +3 cards drawer can work here. Several factors are preferable, though: a drawing village, a $3 village, supplementary nonterminal drawing, gainers (Workshop, Ironworks, etc.), and so on. Draw-to-X creates a mild synergy as well, because a play of Develop reduces handsize by 2 cards.

4. When important cards are exactly $2 apart.
If the player is forced to gain 2 cards that are $2 apart, then obviously the ideal situation is when both cards are important components of the deck. This is another reason why Develop likes kingdom cards at $3: power cards are most commonly at $5 but not as common at $6. $4 cards also tend to be weaker than $5 cards and are easier to gain, so there is less opportunity cost in trashing them instead of playing them.

Example:
– $3 villages and $5 terminal drawers make for synergistic pairs. These tend to be common.
– $4 villages or cantrips and Goons, Border Village, Grand Market, or Hunting Grounds at $6 are also pairs to watch out for.
– $5 drawers (both terminal and non-terminal) synergize exceptionally with King’s Court at $7.

The best case scenario is if there are good cards at all price points from $3-$6. In these circumstances, Develop can be used repeatedly to gain more cards at each of these price points. It is possible, for instance, to trash a $4 into Develop and a $5, and then to trash the $5 into a $4 and a $6. The flexibility offered here can prove to be extremely advantageous. A special mention goes to $7 kingdom cards, which can be trashed into a Province and a $6 if the situation calls for it – usually, near the end of a game.

Something to watch out for, though, is getting caught in the trap of only trashing your good cards and not playing them. Inexperienced players who get too Develop-crazy end up spinning their wheels instead of building an amazing engine. It is of paramount importance to keep in mind that, though the goal of Develop (in this context) is to gain new cards, the goal of the deck is to play those cards, preferably as often as possible.

In summary:

Indicators for Develop:
– Engines. There are a few exceptions (e.g., Estate and Silk Road rushes), but Develop is heavily reliant on kingdoms having engine potential in order for it to be worth using.
– Strong cards at $2-$4, particularly at $3. $3 is important because Estates can be trashed into $3s. Non-terminals are especially desirable here.
– Desirable cards that are $2 apart. Develop’s strength as a gainer is greatest in these circumstances. Even better is if there are good cards at all price points from $3-$6.

Counterindicators for Develop:
– Lack of surplus actions. In the absence of surplus actions, Develop will often be competing with stronger terminals. However, note that it is possible to transition from using Develop as the terminal to using a different card, particularly when there is no need to continue trashing.
– Lack of draw. Without drawing, newly gained cards will be played less often, and Develop’s anti-cycling effect becomes noticeably bad. Hands with Develop will always be burdened by the card slot that it occupies.
– Handsize attacks. This can swing both ways – a handsize attack doesn’t matter if someone can draw his deck, and handsize attacks promote engine-building, but hitting a 5-card hand that has Develop will usually deny the receiving player a buy or a Develop play.
– Fast engines and/or power $5s. Sometimes you just don’t need Develop. Picking up Develop increases the likelihood of being unable to hit $5 until turn 5.
– Stronger trashing. Whether it be Ambassador, Chapel, Jack of All Trades, or Remake, those cards can more or less do what Develop does, but better (or with a bonus). CR.com stats indicate that stronger trashers tend to lower Develop’s winrate to most (thanks DG!).
– Shelters. Even assuming that there are good $2s, trashing a Shelter forces the player to gain a Copper, Curse, or Ruins. Plus, most $2s aren’t good enough to be worth opening Develop for anyway.

Develop is a high-skill card, and even with the advice in this article in mind, it can be hard to see exactly when investing in Develop will pay off and when it will flop. One rule of thumb that I generally follow is to consider Develop first as a trasher, and to consider it second as a gainer. Its power is modest as a trasher on certain boards, but Develop’s power truly shows when it can be used effectively as a gainer. Hopefully this article has provided you a better understanding of this card.

Example games:

http://councilroom.com/game?game_id=game-20130120-133204-a3a98c42.html
In this tournament game, -Stef-‘s Swindler wreaks havoc on my deck. However, the Develops that he gives me let me trash useless $4s and $5s for useful cards. Shanty Town and Council Room are gained together at $3 and $5 and help build a massive drawing engine in conjunction with Mining Village and Mint.

http://councilroom.com/game?game_id=game-20130130-020915-7a44dc5b.html
I (cbaka) use Develop to launch my deck into a Fishing Village – Watchtower engine.

http://councilroom.com/game?game_id=game-20130105-163323-1b5b25f9.html
Here I use Develop to build a Menagerie engine. Not much else to say about this game and the previous one.

http://councilroom.com/game?game_id=game-20130126-215017-0d4dbfd3.html
Though some of my opponent’s choices were suspect, Develop helps me win the Fishing Village split and get my Torturer engine running faster.

http://councilroom.com/game?game_id=game-20130302-092551-90bdd231.html
-Stef- uses Develop to transition into a Grand Market deck supplemented by Farming Villages, Libraries, and Shanty Towns. Here, Library and Shanty Town is a modest $5/$3 combination, and Spice Merchant is an idea target for Develop once its role is done. With the surplus actions from Farming Village, Develop synergizes with Library by reducing handsize by 2 cards. The presence of Expand in this kingdom lets excess STs and Silvers be converted into GMs. Expand itself can be trashed into a Province.

Posted in Hinterlands | Tagged | 2 Comments

Hinterlands: Haggler

This is a featured forum article written by Markov Chain.

Haggler

Dominion: Hinterlands

Haggler is the better +Buy.  With +Buy, you can pick up an extra card, but must split your money; good cards with +Buy require a lot of money to get a benefit from the +Buy.  Haggler can get you a $4 and $3 with just $2 additional in cash, or a Province and a Gold with $6 additional in cash.  This works well with many different types of decks.

General Uses

Haggler reduces the stalling when you start greening.  You can gain a Gold or Grand Market with your Province, keeping your money density up, or gain a card such as a Laboratory which lets you play extra cards to compensate for the dead card.

Haggler works well with expensive cards, and the ability to buy them.  In Platinum/Colony games, if you have $11, you can get a Colony and a Platinum rather than needing to choose one.  If you have $7 and can buy a Bank or an Expand, adding a Gold makes for a much better deal.  If your hand is full of Curses and you need the Haggler to reach $3, the extra $2 card or Copper won’t help much.

Haggler can also be useful for three-piling without losing VPs.  If you are trying to end the game on piles and the third pile costs $4 or less, Haggler allows you to buy the Duchy you want and still exhaust the third pile.

Deck types

In an engine, Haggler lets you pick up an extra component every turn, as long as you have components with different costs.  You can get a Village with your Smithy, a Worker’s Village with another Haggler, an extra Haggler with your Gold, a Conspirator with your Bazaar, or a Hamlet with almost any purchase.  Multiple Hagglers, or Hagglers with +Buy, allow you to build the engine even faster.  When your engine buys a Province, you can pick up another engine card, keeping the engine tuned up; thus engines with Hagglers can start buying Provinces a bit earlier.

In a big money deck, keeping your money density up is important at the end of the game; gaining Gold with your Provinces and Silver with your Duchies helps keep your ability to buy more greens.  To get a mid-game benefit from the terminal Haggler, you need non-terminal $4 or $5 cards, as you don’t want too many terminals in a big money deck.  If you don’t want any $4 or $5 cards, then Haggler gaining Gold will only add another Silver, and turns with $4 will force you to buy a terminal unless you want Silver and Copper.  (With $5, you would probably choose not to play the Haggler, or buy a Duchy and Silver.)

In alternate-VP rushes, keeping your money density up is even more important, as you will have more VP cards, and Silvers are enough for you to keep buying VP cards.  Haggler is best with Gardens and Feodum; not only can you gain a Silver with these cards to keep from stalling, but the Silver also increases the value of the VP cards.  You can also use it with Fairgrounds to get the $4 and $5 cards you are missing; the fact that you cannot take Gold as your extra card is likely to be irrelevant, as Fairgrounds decks do not need much Gold.  And even though it doesn’t directly help Silk Road or Duke, those decks need a lot of VP cards, and Silver keeps them going.

Weaknesses

You cannot take a Victory card (except indirectly if Haggler gains Border Village), so Haggler is no substitute for a +Buy when you want three Provinces on one megaturn, and it doesn’t help when the second card you want is a double-type Victory card such as Island.

You cannot gain two cards of equal value; this can be a problem if your engine components all have the same cost (such as Worker’s Village/Caravan/Smithy or Bazaar/Laboratory/Rabble).  One-card engines (Hunting Party) may still work; you gain Hunting Party as your second card with Gold or Province, and gain some lesser card with Hunting Party.

Haggler doesn’t work as well with Potion-cost cards, as the only less expensive cards are either other Potion-costs (and you cannot take Vineyard) or low-cost cards. Some combinations of Potion-cost cards will still work well, such as Alchemist/Apothecary, but Apothecary, Scrying Pool, and University will force you to take a Transmute or a Copper unless there are $2 kingdom cards.  (Vineyard is still worse, as Copper and Curse are the only cards costing less than it, but you have no need to play Haggler when buying a Vineyard unless you have a +Buy and are haggling the other card.)

And the card gain is mandatory; buying a $3 card with Haggler may force you to take a Copper if there are no useful $2 actions, and some engines with no card under $4 may be stalled if you must take a Silver with your $4.

Watch out for three-piling with Hagglers around, as the cheap piles will get taken.  If there are Hagglers but attacks are leading to weak turns, then $3 and $4 turns with Hagglers will exhaust the $2 and $3 actions.  And if there are high-demand $2 or $3 cards (Fool’s Gold, Fishing Village, Lighthouse with attacks around), they will go quickly as second cards with Hagglers.

You do not gain additional extra cards if you Throne Room or King’s Court a Haggler, but mutliplying the $2 bonus is still valuable, as the bonus can add to the value of your extra card, so this is not a major weakness.  KC/Haggler gets you at least a Gold and another Haggler, and with just an extra $2, it gets you a Province and another King’s Court.

Haggler is weak in the late game.  If you get a Haggler too late, it is essentially just a Silver, as you may not have many chances to see your new cards.

Handsize attacks and cursing attacks devastate Haggler.  In other words, if you can’t afford to buy good things, Haggler is going to be gaining you a bunch of crap.

Openings

Haggler is a reasonable opening with a 5/2 start, although it isn’t as good as the powerful attackers.  If the only $2 cards would conflict with Haggler (such as Moat or Secret Chamber), it’s probably best to pass on the $2; if you need the $2 for defense, you should have bought the attack rather than the Haggler.  (Haggler/Lighthouse is still good, as they do not conflict, and you gain the defensive benefit from the Lighthouse.)

Council Room says that the strongest opening, other than the obvious Haggler/Chapel, is Haggler/Haven.  If you have both in hand, you can choose to use the Haggler this turn or next, whichever is better.

Works with

  • Alternate VP, particularly Feodum and Gardens
  • Most engines
  • Non-terminals at $4 and $5
  • Royal Seal/Watchtower (to top-deck both parts of a combo)

Conflicts with

  • Megaturns without +Buy
  • Engines with all components at the same price (Worker’s Village/Smithy), or single-card engines (Minion)
  • Potion-cost cards, particularly $2P
  • Powerful attackers (cursers, Ambassador) leading to weak turns
Posted in Hinterlands | Tagged | 3 Comments

Dark Ages: Rebuild

This article is written by werothegreat, originally posted on the forum.

Rebuild

Dominion: Dark Ages

Rebuild is a powerful card.  Some powerful cards make games stretch on, almost interminably, like Goons and Mountebank.  Others, like Tournament or Wharf, can make a game go by in a few minutes.  Rebuild is one of the latter.

So what does Rebuild do?  Like Rats (which I wrote my previous article on) and most other Dark Ages cards, the point of the card is not immediately apparent from its wording.  Rebuild essentially upgrades your Victory cards, as long as they are in your deck.  Generally, this means going from Estate to Duchy to Province (and sometimes Colony).  This process, like that of Rats, tends to be very quick, and a player who can get a couple Rebuilds going before the other will have a marked advantage, barring other game-changing cards.

When should I buy Rebuild?

As soon as possible, and you should probably get two.  Since Rebuild gives +1 Action, there’s no need to fear terminal collision (drawing two in one hand and being able to only play one).  I like to break cards into two groups: those you should get early, and those you can wait to get.  The former group includes Rebuild, along with Mine, Goons, Monument, and most Attack cards – cards whose effect you want as often as possible for as long as possible.

Okay, I’ve got a Rebuild (or two) in my deck – now what?

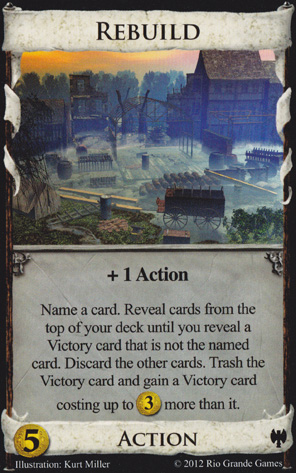
Rebuild’s wording allows you to name a card that you don’t want to see trashed, and then Rebuild will hunt through your deck for a Victory card that is not that.  In most situations, you’ll want to name Province, as you want to upgrade your Estates and Duchies, as doing so will increase your point total.  But, like with the Remodel trick, trashing a Province to gain another Province can be quite effective in emptying the pile if you already have a significant lead – in those cases, simply name Estate, to ensure that your Duchies and Provinces are the ones getting trashed, thus emptying the Province pile.

Remember that you only start (normally) with three Victory cards in your deck – if you Rebuild them fully, you’ll only have three Provinces.  Therefore, you need to help your Rebuild out by throwing a couple Duchies (or, if you’re having trouble fielding $5, Estates) its way.  Just one or two can help you get the better end of the Province split.

Also note that Rebuild will discard your Actions and Treasures, so don’t develop an attachment to them.  Just think of it as express cycling.  In fact, Rebuild’s nature means that you won’t need as many Treasures.  Most decks are oriented around the need to field $8 (or $11) every turn in order to get Provinces (or Colonies).  You’ll be getting Provinces through your Rebuilds, so, like a Duke deck, your deck should be oriented to field $5, so you can pick up Rebuilds and Duchies.

Is there anything else I can do to help my Rebuild?

You can use Rebuild as a supplement to an engine, or you can make Rebuild the centerpiece of your strategy.

For the latter, remember that your two objectives are:

1) Play Rebuild as often as possible, and
2) Throw extra Victory cards into the mix.

So you want to look for cards that will help you do that.  To further objective 1, look for sifting cards, particularly non-terminal ones, such as Cellar and Warehouse.  Sage is moderately useful, but will get caught on Duchies and Provinces too often in the mid/late game.  Rebuild is a great target for Throne Room and King’s Court.  But the very best way to play Rebuild as often as possible is to just buy lots of Rebuilds, which is what you should be doing with your $5 hands when the Duchies run out (and they will run out).

For objective 2, look for cards that either specifically gain Victory cards, like Followers or Count, cards that gain cards of any type, like Workshop or Armory, or cheaper cards that field enough coin to procure Duchies, such as Horse Traders.  Cards like Mandarin are too expensive, as you want to focus your $5 buys on Rebuild and then Duchies.  Count, on the other hand, works very well with Rebuild because it has the awesome power to just straight up gain Duchies.  You’ll be getting your $5 investment back in spades if you pick up a Count on a Rebuild board.

If you elect to have Rebuild complement your engine, be mindful of the order in which you play your cards.  In general, you’ll want to play Rebuild first, as cantrips and drawers will bring your Victory cards into your hand, where you don’t want them to be.  Sifters, on the other hand, should be played first, as they will let you discard those Victory cards.  Embassy is the best of both worlds here, but at $5, it’s interfering with your Rebuild and Duchy buys.

When should I not go for a Rebuild strategy?

When a more powerful strategy is available, which will be rarely.  An Attack that should give you pause with a Rebuild strategy should be Saboteur, which can undo your Rebuilding, or worse, destroy your Rebuilds, but most players ignore that card often enough for you to not worry too much about it.  While Rebuild is fast, there are some faster strategies out there.  A well-made engine that can buy Provinces outright will outstrip a Rebuilder that has to trash precious Victory points.  Mountebank can fill your deck with enough junk to prevent you from seeing your Rebuilds, and you should never ignore it in favor of getting the early Rebuild.  A competent Goons player can easily outstrip a Rebuilder; while the discard Attack should not concern the Rebuilder, a Goons player will not be helping the Rebuilder empty the Provinces, and a good Goons player will be able to accrue enough points to be guaranteed a win against a player using Victory cards alone.  Now this is not to say that you should ignore Rebuild in these cases; you should instead shift focus to the more powerful card, but feel free to pick up a Rebuild as a supplement.

My opponent is Rebuilding like crazy – what do I do?

Well, typically the best thing to do is mirror the Rebuild, and hope you can get a few more Duchies into your deck than your opponent.  If, for some reason, you don’t want to do that, there are a couple things you can do.  Attacks are conventionally the easiest way to slow a player down, but Cursing/Looting will do little against a Rebuilder, except possibly make his Rebuilding less frequent.  Discard or Top-decking Attacks will usually help the Rebuilder (see below), so don’t try those.

To counter a Rebuilder, you have to keep in mind how the Rebuilding goes down.  Rebuild works stepwise – Estate to Duchy to Province.  If you remove a step by emptying the Duchy pile, suddenly Rebuild is neutered.  Also realize that a Rebuilder is not gaining as many points as a player buying Victory cards outright – Rebuilding a Duchy into a Province only gains you 3 points.  Those other points are being thrown into the trash pile, where a Graverobber can handily nick them.

Now, Graverobbing the leavings of a Rebuilder may not be enough; the best way to knock one down is in the literal fashion: with Saboteur or Knights.  Rogue would simply be a Graverobber here, as its Attack only activates when there’s nothing in the trash to find.  If the trash is full of Duchies, you won’t be Attacking your opponent.  Only the first few turns will you be able to – the point when they’re turning Estates into Duchies.

Saboteur is probably the best Attack to use against Rebuild.  Why?  Saboteur has no upper limit, so it can hit Provinces.  Saboteur is doing exactly the opposite of what a Rebuilder is trying to do – downgrading cards.  And a Rebuilder’s deck is going to be full of Rebuilds and Victory cards – perfect targets for the typically mediocre Saboteur.  This will be most potent when the Duchy pile has run out, making Provinces drop 5 points down to an Estate, or 6 points to a non-Victory card; one such play can win you the game.  As such, Saboteur should be a mid-game buy – you’ll want to get your own Rebuilds first while helping to empty the Duchy pile.  Now, you won’t want to just pursue Saboteur – even here, you should be trying to Rebuild yourself, but that Saboteur can spell the difference between victory and defeat.  And if you can hit your opponent’s Rebuilds, they are now dead in the water without a strategy.

Knights can also be helpful here, but they cannot hit Provinces, and can’t go hunting like Saboteur can, so they may just uselessly discard Coppers.  Now be mindful that you need to be a fairly skilled player to pull off Sabotaging a Rebuilder – a novice player would most likely have too much trouble creating an economy while going for Saboteur, which is death when the other player really doesn’t need to add to their economy.  The other options are to either fill the Rebuilder’s deck with junk quickly enough with either Mountebank or Cultist that they can’t find their Rebuilds often enough, or to pursue a Victory token strategy, typically with Goons, that can amass enough points to have no need of Provinces.

To review:
1) Rebuild is a very fast card that can dominate boards.
2) In general, name Province.
3) If going for a pure Rebuild strategy, only spend $5 on Rebuilds and Duchies.
4) A skilled player can use Saboteur to counter a Rebuilder.

Now let’s discuss specific interactions with other cards.  Bear in mind that if you’re going for a pure Rebuild strategy, any card costing $5 will get in the way of you buying Rebuilds and Duchies, and should most likely be ignored.

Shelters: According to Donald X, Rebuild was the last card to be added to the Dark Ages set, and, like Ironmonger, seems oddly ill-fitted to the expansion, as both cards suffer when Shelters are used.  Using Shelters replaces your starting Estates, leaving your starting deck with a single Victory card in it, and Overgrown Estate only costs $1 – that’s not enough to Rebuild it into a Duchy – thus you have to make an extra step on your way to Provinces (or, happenstance forbid, Colonies).  This is not to say that you should ignore Rebuild in a Shelters game – just be mindful that you’ll need to buy a few more Duchies (or Estates) to make it worthwhile.

Colonies: Rebuild, unlike most other cards, takes neither a boost nor a slump when Colonies are used.  True, it now requires an extra play of Rebuild to get your Victory cards to their highest potential, but Colony games tend to be longer anyway.  Rebuild can even be helpful in Colony games, as you need not outfit your deck with the necessary funds to procure Colonies – just Rebuild up to that.  Be aware, however, that although Provinces are now a stepping stone up to Colonies, they still count as an ending condition when they’re all gone, so be mindful of the size of the pile.

Kingdom Victory cards:  Rebuild is certainly a convenient way to acquire alternate Victory cards, but don’t look to it as a means to beef up their point totals.  Since Rebuild essentially replaces cards, most of the variable point Victory cards will not get any mileage out of Rebuild.  Better to just buy them outright, particularly Silk Road, which would prefer to keep your starting Estates.

So does Rebuild actually combo with any kingdom Victory card?  Yes, actually.

Tunnel: Just name Tunnel.  Your Estates will turn into Tunnels, and then you’ll be swimming in Gold as the Tunnels just fly by.

Feodum: Unlike the other counting kingdom Victory cards, Feodum’s point total will actually increase with Rebuild – when you trash a Feodum, you get three Silvers, increasing every Feodum you have by one Victory point.  Just remember to at least hang on to some Feoda.

Duke: Name Duchy or Duke every time.  Your Estates will turn into Duchies, allowing you to focus your $5 buys on Dukes, whose pile will quickly empty as your Rebuild finds them.  Or let them turn into Dukes, and buy Duchies.  Either way.  Just be mindful of that emptying, or you’ll start to lose Dukes and/or Duchies.  Remember – you don’t have to play a card in your hand.

Other standout interactions:

Baron: Rebuild takes away your Estates, so Baron can’t make money for you (sad face), but then Baron gives you more Estates, which you can turn into Duchies (happy face).

Tournament/Explorer: Rebuild can help you get to those precious Provinces more quickly, allowing you to get the full potential out of these cards.  Once you’ve Rebuilt an Estate into a Duchy, make sure to name Estate to ensure your next Rebuild will hit that Duchy.

Trade Route: Don’t you hate that niggling desire to buy an Estate to make your Trade Routes better?  Rebuild helps you get around that by quickly getting the token off of Duchies, and usually Provinces as well.

Rebuild as a defense: Rebuild can be an excellent way to counter a lot of Attacks.  Any Attack that forces you to place cards on top of your deck can be countered by putting Victory cards there for Rebuild to hit.  And Spying Attacks that like to leave Victory cards on top are very effectively neutered by Rebuild.  And while Wandering Minstrel and Farming Village snag on Ruins, and Scrying Pool snags on Curses, Rebuild discards them all (along with everything else).

Does well with:

  • Duke/Feodum/Tunnel
  • All that stuff I mentioned

Does badly with:

  • Scout
  • Most alternate Victory cards

Counter with:

  • Saboteur
  • Mountebank/Cultist
  • Victory token cards
Posted in Dark Ages | Tagged | 15 Comments

Cornucopia: Hamlet

This article is written by HiveMindEmulator, originally posted on the forum.

Hamlet

Dominion: Cornucopia

Hamlet has a bunch of attributes that don’t seem like much on their own, but when combined make it into a real power card:

  1. Costs only $2
  2. Non-terminal
  3. Can give +2 actions (for -1 card)
  4. Can give +buy (for -1 card)
  5. Can discard cards
  6. Can be a cantrip (when you decline to do 3-5)

None of these are going to blow you away, but the combination has great synergy. The key is that it’s an amassable $2 card that provides its own +buy. Other amassable 2’s like Fool’s Gold and Native Village need some other source of +buy to make them really useful, while Hamlet has it on its own. Hamlet+4 Coppers+Estate buys 2 more Hamlets. This ability to quickly infuse a large number of Hamlets into your deck give reliability to a +Cards/+Actions engine even without strong — or possibly any — trashing. And there’s no real issue with having too many Hamlets, since at worst you can use the extra ones as cantrips that replace themselves in your hand. (Of course, there are some issues with having too many cantrips.)

The fact that it’s a 1) village, 2) a source of +buy, and 3) reduces/alleviates the need for trashing means it nearly enables engine strategies all on its own. The only thing it needs is a means of increasing handsize (and some way of making .

Handsize Increasers

You have to be careful with terminals that give only +2 cards (e.g., Moat), since if you have to discard for +action and then only draw 2 cards, you still only have 5 cards in your hand. This can be okay if you’re trying to sift/cycle to play cantrip money or repeatedly cycle to find a key card, but a lot of the time you’ll find that you’re just spinning your wheels and would be better of just skipping the Hamlets and going more for money (or a non-handsize-decreasing village if possible).

But terminals giving more than 2 cards (Smithy, Council Room, Torturer, Nobles, Rabble, Margrave, Catacombs, Hunting Grounds, Envoy, Wharf) are great. Draw-to-X cards (Library, Watchtower, Jack, even Minion) are even better, since they negate the downside of discarding, and can benefit from it (discard bad cards with Hamlet to draw hopefully better ones). With non-terminal handsize increasers (Laboratory, Shanty Town, Apprentice, Apothecary, Scrying Pool, Alchemist, Menagerie, Hunting Party, Stables, Governor), you can use less of the +actions discard, just using as many as needed to play your terminals or to help activate the draw of Menagerie or Shanty Town. Hamlet even works nicely with the oddball handsize-increaser, Counting House — discard Coppers just to scoop them back up, and use the +buy to get more!

With Other Villages

While the presence of Hamlet makes it quite likely that it will be an engine game, it is not necessarily the case that Hamlet will be the best village for the engine. Very often, you will prefer to purchase a more expensive village if you have the money for it, sticking with a couple Hamlets to add in the non-terminal +buy. Because of the discard, Hamlets are generally inferior to other villages when used strictly as a village, with the primary exceptions being when the discard is beneficial. This problem becomes even worse with the case of the aforementioned +2 card terminals, and also with handsize attacks. If you start with only 3 cards, it’s very hard to have stuff you want to discard. Every card is precious.

But even when you’re not using Hamlet as a village, it can be very beneficial as a +buy or even a very easily amassed cantrip. For example, with Scrying Pool, you just want as many cantrips as possible, so you can draw them up, and then play them to substitute in other cards. And for Vineyards or Gardens or Philosopher’s Stone, the more (action) cards in your deck, the better. And you can even use the buys on Coppers to get even more cards into the deck!

Handsize Attacks

In order to do anything useful, Hamlet must decrease your handsize. This makes it much more painful to use when your hand already starts small. Additionally, having excess Hamlets to use as cantrips can cause decision problems with your discard. Since you don’t know what the Hamlets will draw, you have to make hard decisions between discarding Hamlets and other cards.

Purchase Timing

Since it only costs $2, you will likely have to “overpay” for your first Hamlet. But you usually want to get it early so that you can use the buy to tack extra Hamlets onto your other purchases or to purchase multiple Hamlets at once. Since it’s so easy to quickly collect a bunch of Hamlets in a small number of turns, you have to be careful not to get caught with too few Hamlets when the pile runs out. If the Hamlets are the only villages and are so far split 3-3, then your opponent buys the remaining 4 in one turn, you can find yourself on the wrong side of a 7-3 split. This gets even worse with more players as the number of Hamlets that can disappear between your turns increases further. So there is some need to get your Hamlets in early. But on the flip side, you can end up with a “village idiot” deck if you just focus on grabbing Hamlets at the expense of overall economy and draw. So there’s a delicate balance here, particularly when you’re not first player. Naturally, this makes Hamlet a first-player-advantage card.

Tactical Play Decisions

When you play Hamlet, you have a couple decisions to make, so you generally want to play them as late as possible so you know if you need the extra actions of buy, but this is often not possible, since you may have to use it as a village right away in order to play your terminal draw card. You have to have a reasonable sense of whether or not you might need the extra buy and if you’ll have another Hamlet play later to get it. Also, if you have a lot of Hamlets in hand, you may want to use more for +actions, even if it means discarding a Hamlet, since there is an increased likelihood that your terminals are also clumped, and you’ll need to have the actions available when you draw a bunch together. If you waste all the Hamlets as cantrips, you may run out of actions.

Works with:

  • Cards that draw +3 Cards like Smithy
  • Cards that “Draw-to-X” like Library
  • Menagerie
  • Decks that want lots of cards/cantrips (Scrying Pool, Vineyards, Gardens, PStone)
  • Nearly any engine
  • Tunnel (or other cards that you want to discard)

Doesn’t work quite as well with:

  • Cards that only draw +2 cards like Moat
  • Handsize attacks like Militia
  • Worker’s Village (which is nearly strictly better except for the cost)
Posted in Cornucopia | Tagged | 14 Comments

Hinterlands: Highway

This article is written by platykurtic, originally posted on the forum.

Highway

Dominion: Hinterlands

It’s hard to talk about Highway without talking about its more popular older brother, Bridge. Both provide cost reduction, but they do so very differently.  As a general rule to take advantage of cost reduction, you also need +buy and money (unless you reduce all costs to zero). Bridge provides all three, but since it’s terminal, you need a serious village/draw engine to take full advantage of it. Highway provides only cost reduction, meaning you need to get money and buys elsewhere, but as a non-terminal it can fit into a much wider variety of decks.

Without any +Buy, Highway is for the most part just a Peddler, with the cost reduction equivalent to +1$. There are times when you’d buy a 5$ Peddler, if you really need virtual money, but for the most part it’s overpriced and, moreover, there are better 5$ cards to be had. It’s important to note that the Highway card text is worded such that Throne Room and King’s Court don’t multiply the cost reduction, so in that sense it’s worse than Peddler, and some of the crazy combos you get with Bridge get short circuited.

Where the cost reduction does come in handy, however, is with cards that care about cost. This isn’t really specific to Highway, but as non-terminals it’s significantly easier to chain them and then a payload card, whereas with Bridge you’d need an engine up and running to even have a chance. There are a few categories here, and it’s worth going into the subtle tricks and pitfalls in their interaction with cost reduction.

Gain a card costing up to X$:
Workshop, Feast, Ironworks, Smugglers, Talisman, University, Horn of Plenty, Hermit, Altar
Highway expands the range of cards that can be gained by reducing their costs.  For example, play a Highway, then Workshop, and you can gain a card costing up to 5$. Of course, you could have just bought that card instead of the Highway, so you really need an engine to enable these happy collisions multiple times, ideally every turn. After enough highways, any gainer can start on the Provinces, or even Colonies. Horn of Plenty works especially well here since it doesn’t require actions. Highway makes your HoPs useful even when your engine doesn’t have many unique cards. Soon your HoPs can gain Highways and other HoPs, and so long as you don’t stall you get your megaturn.

Gain a card costing up to X$ more:
Remodel, Mine, Swindler, Expand, Forge, Rebuild
Remodel type cards can also benefit from a few well placed Highways. Since costs only go down to zero, after 4 Highways you can Remodel a copper into a Gold, for example, since the Gold only costs 2. If you plan to depend on this doing this to gain Provinces, you need to make sure to leave enough junk in your hand to Remodel. Swindler is a special case since you’re choosing the card for your opponent. This only matters if you’ve reduce the cost of the card you’re Swindling to 0$, in which case you can downgrade it to a Curse. Forge gets weaker as cards you might want to forge together start costing 0$, but once the card you want costs 0$ you can Forge any combinations of things into it.

Gain a card costing exactly X$ more:
Upgrade, Remake, Develop, Procession, Farmland, Governor
Much like the above category, you can reduce costs towards zero until you can Upgrade Coppers into Golds or Provinces. However, because Upgrade specifies “exactly 1$ more”, if you reduce the cost of the card you want to 0, you can’t Upgrade to it anymore.

Do something with a card costing exactly X$ less:
Develop, Border Village, Haggler, Band of Misfits
These cards don’t get any benefit at all from cost reduction, and in fact become useless when the card costs 0$, and there’s nothing costing less.

Do something with a card costing between $X and $X
Knights, Rouge, Graverobber
These are a mixed bag as you’d expect. By lowering costs you can attack or graverob more expensive cards, like Provinces, but you may also push cards down out of the range.

Do something with a card costing $X or More
Saboteur, Sage
Highway can focus these cards on higher priced cards, for better or worse. Both seek out cards costing $3 or more, but as you reduce costs that starts to include only the more expensive ones. In the extreme case, after 4 or 5 highways the only card worth $3 is Province (or Peddler of course, and add 3 Highways if you’re dealing with Colony). This make sage virtually useless and Saboteur deadly, though I’ve never seen that one pulled off.

Trash for benefit proportional to cost
Salvager, Apprentice, Bishop, Forge, Trader
These cards become weaker each time you actually play a Highway, since the cards you’re going to trash cost less. This doesn’t make them entirely useless though, especially if they help you get your Highway deck up and running (Trader’s not too relevant for that). If you can manage to play your TfB before your Highways, you can “buy low, trash high” to get extra benefits. You can hope for this to happen luckily a few times, but if you have an engine where you can keep drawing and avoid playing your Highways until you’ve used your TfB card, you’re golden.

There are a few good combos in there, but for the most part these are supplemental tricks you’ll use to grab an extra province or some engine parts. At the end of the day you still need to get your points by more conventional means, and with the right support highway can be excellent at this as well. It’s definitely an engine card though; if you’re not playing tons of actions, your Highways won’t collide with your other cards and they’ll just be overpriced Peddlers.

One key insight with cost reduction is that it’s often possible to win with a megaturn, which means getting all your points and ending the game in one turn. This may mean buying all the Provinces, but often if your opponent is buying the same cards as you, it becomes possible to end the game on piles with a small VP advantage earlier. Don’t forget to look for that every turn, it may be a bit of an anti-climax, but winning by one point is the same as winning by fifty, and your opponent can probably do it next turn. You also have to remember the extended Penultimate Province Rule, which is “don’t leave the board in a state where your opponent can win next turn, even if it means passing up cards you want, unless you’re behind and banking on a lucky break”. Megaturns let you build flimsy decks with no hope of surviving greening, since you’ll never have to actually play with the green cards you buy at the end. Highway allows for especially flimsy decks as a non-terminal itself; a little cycling or light trashing like Loan can sometimes be sufficient. The player who does the absolute minimum buildup before firing off their megaturn is likely to win.

Here’s an example of a game that should scream megaturn
http://dominion.isotropic.org/gamelog/201302/26/game-20130226-193803-bac46a33.html
There’s Remodel to clear up the deck a bit and gain Highways (benefiting from the Remodel trick explained above), Festival for money and buys, and Lab + Margrave for the draw to get past the Festivals and junk you haven’t trashed yet.

The obvious pairing for Highway is Market or Grand Market, since they provide money and buys in a convenient, non-terminal package. This combo is good enough that it’s got a wiki article devoted to it already. The short version is that via good trashing, cycling, or a little draw you get your deck to a state where you’re drawing through all your Highways and Markets each turn. This screams megaturn, and the chances are high that the game will end with the Highway, Market, and some other pile gone.

Powered up Cities are similar, but they bring endgame brinkmanship to a new level. The actions let you mix in some terminals early on to help with buy, and after a pile runs you’ve got draw. With two piles gone, Cities providing draw, money, and buys, and Highway reducing costs, the game isn’t going to last another turn. You don’t want to give your opponent that chance, so case is if you can drain the second pile during your turn with a gainer, so that you’re the one that gets the Unstoppable City Stack.

Market Square, Workers Village are the other non-terminal +buy cards, and they can work for a strategy like this too. It will be slower though and you’ll need to have some other virtual money, or have a lot of faith that you can reduce costs to 0. Festival similarly is missing one piece of the puzzle: draw. Too many will stall you unless you have some draw.

Forager and Counterfeit deserve special mention, since they thin your deck without requiring extra actions and provide +Buy with at least a little money. Neither one replaces itself though, so you’ll need some draw to keep playing your highways.

Tactician provides a bit of +Buy and a large hand from which to play more Highways. More so than usual, sacrificing a turn for a big next turn is well worth it with Highway, and if you gets some Highways in before playing the Tactician you may even be able to buy something then. As virtual money, Highway helps to enable double Tactician, which is always powerful. The big Tactician turn can also be the platform for your megaturn, even if you couldn’t have managed it from a five card hand.

Goons is another great pairing, since it provides money, +buy, and an alternate path to victory. Even without villages and just one Goons at the end of a Highway chain it’s powerful: you get 2 chips and can buy 2 cards for cheap each turn. With some villages and draw you can play multiple Goons, which can enable a victory chip strategy. The goal is to be playing multiple goons a turn and getting tons of points off of each buy. Normally with Goons you’re stuck buying mostly copper to make use of extra buys, but with Highway you should be able to get the prices low enough that you can buy zero-cost non-terminals instead and not clog your deck. With two or three Goons in play you can gain more chips per turn than your opponent can counter with victory cards and drain piles at your leisure. King’s Court brings this to the level of insanity, in spite of scaling up neither the cost reduction nor the chip gaining.

Highway also doesn’t conflict with the other cost reducers, Bridge and Princess. You’ll need an engine to take advantage of them, but Highway can supplement it without requiring any more draw, helping you get down to that all important 0$ where costs cease to matter and you’re only limited by your +Buy.

Highway will never pack quite the same power as Bridge; at 5$ you usually can’t open with it, and by itself it just doesn’t do enough. But with the right pairings it can be part of some awesome decks indeed. It’s a fun little card and worth an extra look on any board.

Works with

  • Markets
  • Goons engines
  • Forager
  • Counterfeit
  • Tactician
  • +Buy
  • Gainers, especially Horn of Plenty
  • Remodelers 
  • Other cost reducers

Conflicts with

  • Trash for benefit
  • Lack of +Buy
  • Upgraders and other cards that care about cost if you’re not careful
  • King’s Court and Throne room (unless they’re part of an engine)
  • Big Money
  • Slogs and Rushes
Posted in Hinterlands | Tagged | Leave a comment

The End of Isotropic Dominion

When Isotropic was released to the public, it didn’t even receive a full topic on BoardGameGeek.  dougz introduced it in a reply to another thread.

Who could have known that it would go on to host a staggering 12,051,301 games over the next two and a half years before finally closing its doors.  Championships were claimed, epic ragequits were had, but most importantly, Isotropic introduced thousands of people to Dominion and showed them just how fun it could be.

The final leaderboard:

The final leaderboard

The final leaderboard

Of course, online Dominion has not ended.  Goko’s PlayDominion.com is alive and well, and though it’s a very different experience, it’s able to offer features that Isotropic never could support (single-player, tutorials, card art).

Nevertheless, we are all indebted to Dougz for his work in designing, hosting, and  maintaining such a fantastic site. So if you wish to express your gratitude, we encourage you to show him your appreciation via PayPal (to dougz@isotropic.org).

And if you’re interested in learning a new game, we already have a forum for Isotropic’s Innovation

Posted in Uncategorized | 15 Comments

Cornucopia: Fortune Teller

This article is written by HiveMindEmulator, originally posted on the forum.

Fortune Teller

Dominion: Cornucopia

Fortune Teller is one of the more underrated attacks in the game. The problem is that it’s a deck top attack, which is subtle if you’re not paying much attention (particularly online where you don’t actually have to physically discard cards or click anything). You don’t have to discard cards from your hand, and you don’t get a big purple card in your deck to catch your attention. You may just feel like you’re getting worse draws than usual. But this isn’t a matter of draw luck, it’s the attack at work.

Attacks are very often the most important cards in a given kingdom. You have to be aware of the type of deck that the attacks thrive against. If your opponent’s deck doesn’t have much need for treasure, then treasure attacks like Thief, Pirate Ship, and Noble Brigand are not going to be useful, but if they’re going for a high density of big treasures, then they will be. The big impact of Noble Brigand is not that it is a must-buy attack every time, but rather that it disables big money strategies, which means you have to consider building a deck to avoid it when you’re planning out your strategy.

So what does Fortune Teller do? It skips some of their cards and leaves a (usually) useless one on top of the deck. There are two key parts to the attack: the cards skipped, and the junk left. Leaving junk means that their next hand (or this one if they draw) will have at least one dead card, which is slightly less painful than having them have only a 4-card hand. This doesn’t seem like much, but for decks that rely heavily on Silver and Copper, it makes it really hard to hit $8, since you need the average coin value among the 4 cards to be $2. The other part of the attack, the skipping cards, is a little more complicated to understand and causes a lot of confusion. If you’re scared of math, maybe you should skip the next paragraph…

Consider a deck with N cards that sees an average of M cards per turn. Then the probability of seeing any given card on a given turn is M/N. When attacked by Fortune Teller (assuming there is a victory card or Curse to leave on top), the probability of seeing a given card is something like (M-1)/(N-1). Since M<=N, this second quantity is smaller than the first, and the percentage difference is much greater for small ratios M/N. Consider a deck with no drawing (M=5) and N=20 cards. The probability of seeing any given (non-victory or curse) card is 5/20 = 0.25. When attacked by Fortune Teller, it is 4/19 = 0.21. This means you see your good cards (0.04/0.25=)16% less often! On the other hand, if you draw M=10 of your N=15 cards every turn, you go from 10/15 = 0.67 to 9/14 = 0.64, which is a decrease of less than 5%. The impact could greater, since your drawing cards will show up less often, thus decreasing the numerator by more than 1, but this is still a long way from the 16% figure for the larger deck without drawing.

Of course just computing these average doesn’t tell the whole story. In reality, you must see each card an integer number of times, your turns are not independent and your deck changes over time. But the main takeaway still holds true. When you’re attacked by a Fortune Teller, even though you shuffling more, you seeing your good cards less often! The benefits of the cycling are generally more than counteracted by the skipping good cards. You also get a sense of the trend in terms of deck size and drawing. In the early game when your deck is small or in situations where you have a good draw engine set up, the attack is only mildly annoying, but it can become very powerful against a slog-type deck. Also note that this analysis doesn’t depend on the number of good or bad cards in the deck, just the total number of cards and the average number drawn per turn.

So where does that leave us in terms of strategy? The key idea is that you want to avoid the types of decks that Fortune Teller will be strong against. A heavy drawing strategy utilizing Fortune Teller should dominate a slog-type strategy or a strategy that relies heavily on Silver and Copper. If you can’t build an engine to consistently play Fortune Tellers, they can still be useful in slog vs slog. Now the interesting thing is that if you’re both going for the engine strategy, you may not want to bother using a terminal action on a Fortune Teller, since the impact will be small, but the presence of the card in the kingdom is still of importance since it made non-engine strategies less effective.

Counters

In addition to building decks which draw a good percentage of the deck, there are a few other ways to deal with the Fortune Teller attack. If you build a deck with no victory cards or Curses, the attack just discards your deck and can’t leave you with a junk card. So you can go for strategies which trash Estates and green late or focus on VP tokens. There are also direct counters to deck top attacks like Jack of all Trades, Farming Village, Scrying Pool, Golem, Sage, Oracle, Native Village, Lookout, Chancellor, Scavenger, Adventurer, Venture, and Scout. It is also important to note that unlike Rabble, the wording of Fortune Teller is such that it does not skip dual-type victory cards. Nobles and Harems can be drawn more often rather than less often since the Fortune Tellers seek them out. You can also go for cards that like to have VP cards in hand like Baron, Crossroads, or Tournament.

Combos

There are a few specific combos that can take advantage of the deck-top attack of Fortune Teller. You can combine it with Jester to give guaranteed Curses, though you lose the normal effect of the attack unless you play a second one. You can also use to to target down VP cards to trash with Saboteur. When followed by a Minion, it essentially forces a 3-card hand. It can also be used to mitigate the potential benefits your opponent could get from your plays of Margrave, Council Room, Vault, or Governor for cards by ensuring the card your opponent draws is junk. Then of course there’s the anti-combo with other deck top attacks. You can only make the top of their deck so bad. If your other attack already put a victory card on top, Fortune Teller won’t do anything.

Swindler can be used in conjunction with Fortune Teller to destroy Victory cards .  Although it usually doesn’t work well with Provinces (since you would just give them another Province), it can be devastating against alt-VP like Dukes or Gardens.

Example games

In Obi Wan Bonogi’s engine vs my HP+Salvager:
http://councilroom.com/game?game_id=game-20120613-234441-e6aae5cf.html
Here I figure that with Hunting Party and Salvager, this game should go pretty quickly, but Obi Wan has other ideas. He picks up a Fortune Teller which he proceeds to play nearly every turn, slowing me enough that he’s able to hold me to 3 Provinces in 16 turns.

Against lespeutere’s Silk Roads
http://councilroom.com/game?game_id=game-20130123-075538-d2f6ab16.html
Lespeutere goes for Nomad Camps and Silk Roads, which is countered quite strongly by my Apprentice + Fortune Teller. The constant attack delays his collection of Silk Roads and then makes it difficult to afford Duchies.

In a Sea Hag slog with Rabid:
http://councilroom.com/game?game_id=game-20120731-101955-5cbeb2bc.html
With Sea Hag giving Curses and no handsize inceasing other than Moat, this game is bound to be a slog. Rabid opts for a second Hag to win the Curse split while I prefer to get an early Fortune Teller to provide economy while still allowing me to attack. (Note that the immediate impact of both attacks is nearly identical: skip card(s) and leave junk on top.) I do end up losing the Curse split, but my deck builds up much faster, and by the time I take my sixth Curse, it’s turn 17 and I already have a Platinum. You will also notice that even before that point, he draws just as many dead cards as I do. I have a little luck hitting one of his Hags with mine on turn 6, but I’m pretty sure the strategy is still better.

Against qmech’s Embassy big money:
http://councilroom.com/game?game_id=game-20120716-110717-71cd22f0.html
Nobles + Vineyards probably indicates engine here anyway, but qmech decides to go for Embassy big money. I counter by adding a Fortune Teller which helps to make sure he can’t end it too quickly. This one ends up not being close enough that the Fortune Teller really won the game, but if there are Gardens instead of Vineyards or something it might matter.

Good with:
– lack of drawing (at least in opponents deck)
– opponents large deck size
– draw engines that allow repeated play

Not as good with:
– opponents heavy draw engines
– opponents decks with no victory cards/Curses
– dual-type victory cards
– cards that want victory cards in hand (Baron, Crossroads, Tournament)

Posted in Cornucopia | Tagged | 21 Comments