Hinterlands: Tunnel

This is a revised version of an article by Insomniac and HiveMindEmulator, originally posted on the forum.

Tunnel

Dominion: Hinterlands

Introduction

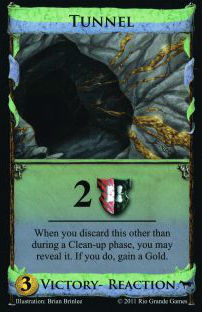
Tunnel is a Victory/Reaction card, worth 2VP, costing $3.  But the victory portion of this card isn’t usually the reason to pick up Tunnel — the reason you pick up Tunnel is for its lovely Gold-gaining reaction.

There are 2 main reasons to go for Tunnel: for the cheap VPs and for the reaction. The cheap VPs are nearly self-explanatory — just get them in the late game or use it as a pile to empty in a cheap-VP rush along with Gardens or Silk road. The reaction is a little more complicated. It may not be immediately obvious, but you need 3 things to make the Tunnel reaction really work for you:

  1. A way of discarding cards — this is the obvious one.  It’s not enough to hope that your opponent buys Militia and makes you discard.
  2. A way of making sure that Tunnel is one of the cards you discard — it doesn’t help you to discard 2 cards every turn with Oracle or something if you never actually get to discard Tunnels.
  3. A way of leveraging the Golds you get into something good — this is the most subtle, but still very important. If you’re buying Tunnels, your deck is going to have more Golds and VP cards than usual, and fewer Silvers and action cards. You don’t have a high density of good cards, but rather a high variance in card value, and you want cards that leverage this, like sifters.

There are a few cards that give you all of these functions in one, and thus make good two-card combo strategies with Tunnel:

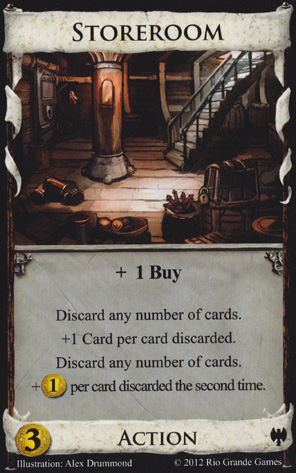
– Heavy sifters: Warehouse, Embassy, Storeroom. These cards are perfect because they meet all three criteria.  They discard from hand (1), help get Tunnel in a postition to be discarded by drawing before the discard (2), and offer sifting to help collect the Golds together while dumping the excess VP cards (3).  Storeroom in particular even adds a (4): with all the Golds, you might have some very rich hands, and its +Buy lets you make use of it.

– Vault. The key is that while it’s a little weaker at (2) than the heavier sifters, it’s much better at (3), which makes up for it.  One Gold in a 5-card hand with Vault gets you a Province, guaranteed, and so Vault and Tunnel love each other.  Interestingly, the strategy sort of counters itself — you can discard Tunnels to your opponent’s Vaults.

– Young Witch. Young Witch goes about accomplishing (3) in another way. It’s not great at turning Golds into Provinces, since you need 2 Golds and 2 Coppers in 6 cards which will likely also include Tunnels and Curses, but since it drags the game out with the Curses, you can often still get to that point. Of course, if you can find a better way of accomplishing (3), like Remodel or Salvager, that can definitely help.

The example of using a late-game TfB card with Young Witch brings us to the next idea: using multiple different kingdom cards to cover all your needs. Here you get (1) and (2) from Young Witch, and add in Remodel or Salvager to provide/strengthen (3).

An illustrative example is using the Horse Traders/Tunnel “combo”. At first glance, you might think that Horse Traders + Tunnel makes a good strategy. It certainly covers (1). The problem is that it’s pretty bad at (2) and terrible at (3) — you need to draw HT and TWO(!) Golds in a 5-card hand to buy a Province, which is no easy task. But clearly there’s a synergy here. You can turn this into an actual strategy by adding something like Stables or Lab. By providing non-terminal draw, they help get Tunnels in a position to be discarded (2), and by increasing handsize, they make it easier to turn Golds into Provinces (3). In a six-card hand, you just need a HT, a Gold, and 2 Coppers, which is much more easy to manange. The strategy should thus be something like opening HT/Silver to hit a few early 5s to get your Stables/Labs, then start buying up Tunnels.

This is an example of the more general strategy of going for hand-size increasing + discard from hand. The discard covers (1), and the hand-size increasing covers (2) and (3). You can do this with 3-card-combos like HT+Stables+Tunnel, or you can take it more to the extreme and build a full-on deck drawing engine for the hand-size increasing, and use a discarding engine piece (Cellar, Hamlet) for discard.

Other cards provide multiple functions, but need some help to complete a strategy. Examples include Cartographer (1,3), Minion (1,2), etc.  Golem/Tunnel is a particular example of this —  — if you only have a single Action for the Golem to find, then it will repeatedly cycle your deck and discard all your Tunnels.  The problem is what your deck is doing when that’s not happening — you have hands full of Tunnels, some Golds, and once in a while your Golem.  You need a really good pair card for the Golem to consider this.

Trash For Benefit

Sometimes you run into the First World Dominion Problem of just having too many Golds.  This is a more serious problem than it seems — a hand of five Golds is not really better than a hand of three if you only have one Buy.  Trash for Benefit cards are very useful, therefore, in Tunnel games because they can trash your extra Golds for various benefits.  Remodel gives you a Province straight-up; Apprentice gives you 6 cards (comboing nicely with whatever you’re using to discard Tunnels); Salvager gives you +$6 and a +Buy; Bishop gives you 3VP for the Gold.  In an engine where you draw your deck every turn this can be your method for greening given the right TfB, or it can be an integral part of your draw engine (Apprentice). Even in a Big Money deck it can help you hit the 2 Province turn if you can remodel a Gold and still have G/G/S or G/G/G in hand.

Works With

  • Sifters (Warehouse/Storeroom/Cellar)
  • Other discarders, provided they meet (1)-(3) above
  • Trash for benefit

Conflicts With

  • Lack of above
  • Colony games, since Gold is less helpful for Colonies and Tunnels count less with Colonies available
  • Cursers/Looters
Posted in Hinterlands | Tagged | 15 Comments

Dark Ages: Rats

This article is written by werothegreat, originally posted on the forum.

Rats

Dominion: Dark Ages

Rats is my favorite Dominion card.Donald X.

Rats!  When we saw this card for the first time we all thought: “Wow, that’s thematic!  Why would I ever buy that?”

Rats, like most Dark Ages cards, require more finesse and thought than we’re used to dealing with in Dominion.  In most other expansions, the thought goes into which cards to gain at what time.  Once they’re in your hand, it’s a pretty simple decision in what order to play your cards (+Actions, +Cards, everything else), unless you have clashing Terminals.  But cards like Fortress, Death Cart, Junk Dealer and Rats all make you think: “Do I really want to play this now?”  And that’s good, right?

The Point

So what is the point of Rats?  Contrary to popular belief, it’s not just to be Donald X’s favorite card.  There are several instances where you really want Rats.  So what are they?  Well, first we need to establish what Rats does.

Rats replaces cards in your deck with Rats.  More generally, Rats replaces cards (typically of a low cost) with $4 Action cards (which you don’t want to use too much).  The point of Rats is to replace low-cost junk with higher-cost junk.  Very quickly, I might add.  If you buy one Rats in the first two turns, and use a Rats every time you see it, you should see a hand of five Rats within 10 turns.  Obviously, you want to stop before you get to this point.

So Rats trashes junk to give you other junk to feed to a Trash for Benefit card (“TfB” hereafter).

“Well, why didn’t I just buy the TfB card in the first place?”

Well, it depends on what kind of TfB we’re talking about.  TfB cards that don’t care about cost don’t benefit very much from Rats.  These would be cards like Moneylender, Spice Merchant, Jack of all Trades, and Altar.   These either can’t trash Rats in the first place, or derive minimal benefit from doing so.

But we have TfB cards that DO care about cost, and here Rats shines.

What Rats is best with

The Big Three

The top three that should come to mind are Salvager, Apprentice and Bishop.  All three of these convert the cost of a card into some resource – Coins, Cards and VP, respectively.  All of these cards are rather bad at getting rid of your starting Coppers and Estates, and are even worse with Shelters, though Bishop would be the best of these three, since it actually gives a resource when trashing a $0 cost card.  So why not trash this $4 card instead?  That way, instead of +$0, +0 Cards or +$1/+1VP, you’ll get +$4/+1 Card, +5 Cards or +$1/+3 VP/+1 Card.  That’s a lot better.

Remodel-style cards

Even cards like Remodel and Remake benefit.  Do you want to trash two Coppers and get nothing, or trash two Rats and get two $5 cards?  Rats turn Upgrade into a less limited Lab/University mashup.  Since all of these cards are better when used on higher cost cards, they all do better with Rats.  Even lowly Develop, oft derided as slow and cumbersome, gets a boost.  Rather than getting nothing for those Coppers you trash one at a time, get a Silver and a $5 card right on top of your deck, after drawing a card!

Other synergistic trashers

Junk Dealer does well with Rats.  Not as well as the Big Three, given that Rats and Junk Dealer fill similar roles.  But getting a +1 Card along with the rest of Junk Dealer is a pretty nice addition.  Forge might have you thinking to turn two Rats into a Province, which is a cute trick, but if you’re ready to green anyway, that $7 might be better spent on a Gold.  Also, that whole trick becomes much harder to pull off with Colonies.  Perhaps the greatest combo here is with Death Cart – turn all those Coppers and Estates/Shelters into Actions you’re absolutely glad to get rid of every time.

Reactions

We have three Reactions so far that deal with trashing and/or gaining, and all of them work well with Rats.  If you have a Watchtower in hand, you can trash the Rats you gain when you play a Rats, and get +1 Card to boot.  So you’re cleaning up your deck, and depleting a pile.  With Market Square in hand, you can lessen the damage of having to trash a non-junk card to a poor Rats play by gaining a Gold.  Even if you’re trashing junk, gaining the Gold is awesome.  Finally we have Trader.  Now, why didn’t I include it in the Big Three?  It’s the other trasher that cares about card cost.  But the Action for Trader is really more of a facilitator for Big Money, and if that’s what you’re going for, you shouldn’t really be getting Rats in the first place.  However, turning a Rats into four Silvers can be a nice supplement to whatever engine you have going on.  The Reaction is also nice, replacing your junk with Silver instead of Rats, though this undermines the whole purpose of Rats, at least with regards to the Big Three or Death Cart – again, this would be a supplement.

Non-trashing options

Which expansion heavily emphasizes Actions?  Alchemy, that’s who!  And Alchemy has two cards that go well with a card that fills your deck full of junk Actions.  First is Vineyard.  Turn all those Coppers and Estates into Rats, and now all those Vineyards are worth at least 3 points more!  Just don’t trash any Vineyards with them.  That would just hurt.  Second is Scrying Pool.  Scrying Pool works best if you can get rid of your Estates and Coppers and go for a money-less deck.  Rats can do just that.  Once you’ve Rats’d away all those starting cards, your Scrying Pools should draw your entire deck, except when snagging on Potions.

It is therefore no accident that one of the Dark Ages recommended sets (“Infestation”) is Dark Ages/Alchemy.

Another interesting strategy might be to use Rats to clear out your Coppers for use with Venture or Adventurer.  The biggest weakness of these two cards is drawing Copper instead of your better Treasures.  If those Coppers are Rats instead, they’ll be skipped.  Likewise, Poor House in practice can only work if you trash all your Coppers, so you can use Rats to quickly de-Copper yourself into a monster Poor House engine (ideally involving Council Room and/or King’s Court).

Piling Out

This section is written by jomini

Another tactical component to Rats is the opportunity they give to autopile out.

If you have 2 Rats and an empty discard/draw deck (or 1 Rat in hand and 1 Rat in discard), you can autopile the Rats pile. Play a Rats, draw a Rats, gain a Rats … lather, rinse, repeat. So if two piles are already gone, you can bang out the Rats for a surprise ending.

But doesn’t that eat all your VP? Not necessarily. Rats can only chew on cards that are in hand, deck or discard. This means that anything elsewhere is immune to Rats. For instance, cards on islands are safe from being overrun by Rats. Likewise, cards that have been saved with Haven or Native village are also safe from the Rats onslaught. Another fun shot are dual-type cards already in play. Got all of your Nobles or Great Halls into the play area? Great, Rats can’t touch them this turn. Played out your Harems with a Black Market? Great, rats can’t eat them. Additionally, any VP bought in your final buy phase are safe. A final protective measure is Fortress, just keep using the Rats on the Fortress (which returns to hand afterwards) and keep churning the rats, this can allow you to have a full hand of green, and still autopile on Rats.

So if you can protect VP out of deck/hand/discard, you need to be very careful about emptying two piles. Your great bridge engine may well lose if the opponent can get two Rats going and win with 5 nobles after you’ve emptied the nobles and village piles. You’ve depleted the Island and Fishing Village Pile, great, but now he can autopile with Rats any time he has more points on his islands than you have in your deck (even if you are about to start hitting triple colony turns).

Likewise, with chip setups, you need to be careful as two Rats can allow for autopiling whenever the one guy can win. For instance, let’s say we are mirroring on Goons and building up to engines (say Council Room/King’s Court), we empty a pile and I then buy two Rats and end my turn. Now you face a problem – you can cash out your Goons engine by buying scads of copper or you can keep building. If you cash out, I just keep building (more Goons, more buys, whatever) and cash out later for the win (you will have real trouble lining up all your Goons if over half your deck is Copper). If you don’t cash out, then I play all my action cards, then auto-play through the Rats pile, and buy out the Estates (Curses or whatever) and spam buy Coppers. Unless you had a huge lead (very hard to come by in a Goons mirror), you just lost. Even if you buy two Rats now, I can still cash out and then Rats autopile for the win.

Without a Goons engine, it becomes harder to generate the action-cash/buys needed to empty pile two (the third being Rats), but the concept is the same, have two Rats in hand and an empty draw deck/discard and you can force game end if you are winning and two other piles are empty.

Any time you have a lean deck and two piles are going to empty before you start buying big VP can make Rats a surprise game ending move. Island, Fishing Village, Minion, City, Curse givers in big draw engines, etc. can allow for a two Rats autopile to end the game and let you win 6 – 3 or better. This, of course, is stronger if you have card gainers built into your strategy that can add the Rats on the fly. For instance, say you are playing University/City/Familiar. The curses will pile quickly and the cities may go before you buy any provinces. If you have three Unis and two Familiars you may well be able to pile Cities, curses, and then gain two Rats to drain all 3 piles in one turn. Buy a duchy in your buy phase and win by a point or so.

Rats as a Defense

If all your junk is Rats, certain Attacks suddenly become less painful.  Fortune Teller and Rabble clear out all those Rats from your next hand.  Saboteur and Knights are suddenly both improving your deck and increasing your next hand.  But Rats can also be used to mitigate Curses.  Even as the only trasher, it’s better to have a Rats in your deck than a Curse.  Sea Hag is most vulnerable to this, given that you’ll know that the next card you draw with Rats will be one you want to trash.

However, do not use Rats to clean up after Looters.  Unless you have a Big Three, it would be much better to have a Ruins (which gives a marginal beneficial effect) than a Rats.  Ruins do not effect your score, unlike Curses, so don’t feel the need to get Rats if they’re the only trasher.

Also, what hand would you most want Possessed?  A hand of five Rats!  Then your Possessor can’t do anything without giving himself Rats, and you’ll (hopefully) have a better hand for your turn.

If you’re going to use Masquerade with Rats, remember to only send a Rats to your opponent if he did not play the Masquerade; otherwise, he’s just going to trash it and draw a card.

When not to buy Rats

What if there are only straight trashers on the board, like Chapel?  In that case, you should probably just go with Chapel.  Chapelling Rats would draw you some cards, but it would be faster to just Chapel everything away, and spend your $4 on something that will build your economy.

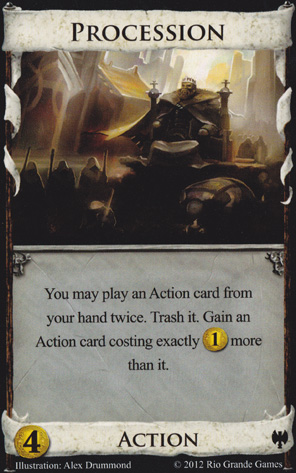
The one TfB card that cares about cost that you DON’T want to use on Rats would be Procession.  Sure, you get a $5 cost card, but you also get two Rats, and have to trash two cards in your hand, which, by the time you get both a Rats and a Procession, you may not want to do.

Rats/Ambassador defeats the whole purpose of Rats.  Consider Ambassador to be a straight trasher, like Chapel (in a loose sense).  If you’re going for that, you don’t want Rats anyway.   If your jig is to buy junk to send to your opponent, Curses are much cheaper and will hurt him much more.

What if there are no other trashers on the board, outside of the options listed above?  DON’T BUY RATS.  Let me repeat that.  DO NOT BUY RATS IF THEY ARE THE ONLY TRASHER (outside of the aforementioned cases).

So I’ve bought Rats, specifically to trash it.  When do I?

Buy the Rats within the first two turns, and use a Rats every time it’s in your hand with stuff you want to trash.  At the first opportunity, buy your TfB card.  Every time it’s in a hand with a Rats, use it on the Rats.  Once you have your TfB card, only use Rats if it’s in a hand without that TfB card, and with remaining junk.  In the highly unlikely event that you trash your last Rats before all of your junk is gone, don’t worry.  You’re leaps and bounds in the right direction anyway.  You should only ever purchase one Rats.  All your other Rats come from playing a Rats.

What about those non-trashing cases?

Use Rats whenever you have junk to trash.  Be smart with the Rats.  If you don’t have anything you want to trash to them in hand, don’t play them.  It’s highly unlikely that the next card you draw will be one you want to trash (unless you’ve Spied ahead earlier), so just regard it as junk for that turn and ignore it.  Remember: you don’t have to play a card in your hand.

P.S.  The Rats pile has 20 cards in it.  Don’t forget that.

Works best with:

  • Bishop, Salvager, Apprentice

Works well with:

  • Remodel-style cards
  • Death Cart
  • Junk Dealer
  • Vineyards
  • Scrying Pool
  • Watchtower, Market Square, Trader
  • Adventurer, Venture
  • versus trashing Attacks
  • versus Cursing Attacks
  • versus Possession

Conflicts with:

  • Boards without trashers
  • More efficient trashers (Chapel, Steward)
  • Ambassador
  • Treasure-specific trashers (Moneylender, Spice Merchant)
  • versus Looting Attacks
Posted in Dark Ages | Tagged | 28 Comments

Dark Ages: Storeroom

This is an article by Qvist, originally posted on the forum.

Storeroom

Dominion: Dark Ages

Secret Chamber + Cellar – Reaction – 1 Action + Buy = Storeroom … End of Article?  No, it’s not that simple. At first glance it seems like a boring straightforward card. But I think it offers more than it seems.

I make no claim that this article is complete, I just wanted to point out some observations that I made about this “seemingly innocent card”.

Storeroom is more like an upgraded Secret Chamber (without its Reaction) than an upgraded Cellar.  The lack of +1 Action is what makes Cellar a decent addition to any engine, but in engines with strong terminals Storeroom hurts more than it may help.  It’s also bad on boards with discarding attacks because – like all discarders – it needs big handsizes to be really useful.

So, what is it good for?

1.) Discarding
You discard two times in a row, so cards that profit from discarding combo really good with Storeroom.

1a) Tunnel
That was the most obvious combo after the release of Storeroom. You only need 1 Tunnel in 8 cards if you discard your whole hand with the first discard option. That makes it one of the best Tunnel enablers. The +Buy also makes it possible to pick up 2 Tunnels soon after you got the first few Golds. With 2 Storerooms, a lot of Tunnels, you get a lot of Golds and can easily switch to Provinces afterwards. Also – because of the discard option – the high variance in your deck caused by lots of Golds and lots of green doesn’t really hurt you at all.

1b) Tactician
That’s not different to Secret Chamber or Vault. It’s also better to find your second Tactician more easily when you discard 9 cards and draw 9 new cards. You can then discard 7 cards for $7, and play your second Tactician. This is not enough to buy a Province and it needs a little support. With a non-terminal drawer (Laboratory, Stables, also Crossroads, …) or cantrip money-generating card (Market, Peddler, Treasury, …) you can buy a Province easily each turn. With support this is one of the most reliable Double-Tactician combos so far. You really don’t need a third Tactician as backup. 2 Tacticians and ~4 Storerooms + support should be enough to guarantee a Province each turn.

1c) Enabling Big Draw
Menagerie needs hands with different cards. Storeroom lets you discard all duplicates and gets even money for them. So you can even discard Coppers for $1 and don’t lose anything. But you need villages to enable this combo, but Storeroom lets you find your villages more reliably and as soon as this gets rolling you also have the needed buy to buy multiple of this cheap engine components. Draw up to X cards like Watchtower and Library can even draw more than 3 cards, but you need more villages to set this up as they are terminal.

2.) Guaranteed $4 each turn
In games where you don’t want to go for Provinces, Storeroom is a good supporting card. In games without discarding attacks you have $4 with every hand containing a Storeroom.

2a) Gardens
Secret Chamber isn’t the best Gardens enabler, but Storeroom’s +Buy makes it way better. You can even open Double-Storeroom and have a higher chance to have a Storeroom in turn 3 in hand. When those collided, discard all cards for +Cards and in turn 4 you already trigger the reshuffle and will see one Storeroom soon again. If they didn’t collide, discard only for $4 and you probably see the other Storeroom in turn 4. So you can go for Gardens (with Copper buys) very soon and can later 3-pile Gardens, Storerooms and Estates – because each Storeroom also guarantees a Double Estate buy.

2b) Other Alternative VPs
Alternative VP strategies will have many dead cards in your deck. Storeroom really helps here by discarding your dead cards and drawing e.g. Silver. The +Buy allows it to buy extra Coppers on the way. Storeroom isn’t the best supporting card for alternative VPs other than Gardens, but in combination with Silk Road or Duke and few more Silver buys it’s a reliable strategy.

3.) Potion cards
The best use for Storeroom are the combinations with Potion cards. The problem with Potion is that you want to see it often early in the game but don’t want to clog your deck with 2 Potions. Also your Potion(s) are dead cards later in the game. Strategies with Potion cost cards also need +Buy for cases when you hit $5P or better. Your supporting card also should cost less than $4 that you can open Potion+X. All this solves Storeroom. You always want to open Storeroom + Potion and discard all 4 cards when you don’t have a Potion in hand. The probability is high to draw your Potion which guarantees you $3P which is enough for 8 out of 10 Potion cards. If you miss your Potion you should have at least $3 to buy a second Storeroom.

3a) Scrying Pool
Like written above you should easily get a Scrying Pool each turn. In turns where you didn’t get your Potion in hand pick up a cheap village or other cheap cantrips or non-terminal trashers. Your Scrying Pools should give you 6-7 cards hands very soon where you can pick up a Scrying Pool + X to pile up on action cards. Later when you draw your whole deck you can even discard your Action cards with Storeroom for money and draw them all again with Scrying Pool (if you played at least one village). You can then easily buy 2 Provinces. Storeroom + Scrying Pools isn’t good on its own, but with a cheap village and/or non-terminal trashing, this is a really powerhouse.

3b) Philosopher’s Stone
Storeroom may be even better than Herbalist as a supporting card. Both have the much needed + Buy so you can pick up a lot of Storerooms and Coppers on the way and both have a mechanic to see the Potion often early in the game. But Storeroom can mostly discard 2-3 dead cards and Coppers which makes your Philosopher’s Stone 0.5$ worth more on average! When you have your first Philosopher’s Stone in hand, it should already be worth $3 and soon $4. That means: 2 Philosopher’s Stones and you can already buy Provinces.

3c) Familiar
Like written above a Storeroom and a Potion guarantees you a $3P hand, exactly the amount you need for Familiar. The probability is therefore high you can buy a Familiar in turn 3 or 4 with this opening. Storeroom also triggers the reshuffle more often which you need to play your Familiar as often as you can early in the game. The problem is that you can’t play a drawn Familiar because Storeroom is terminal, so take that into account.

3d) Other Potion cards
Storeroom isn’t a good enabler for University or Vineyard on its own. But on boards where University or Vineyard are an option, Storeroom is also a very good reason to go for them – for reasons written above.  Apothecary has often the problem to leave the crap on top of your deck. If you play a Storeroom at the end of your turn you can discard exactly as many Coppers as you need for drawing your crap and discard them again for the same amount of money. This can setup a next good turn. With villages you can even build an engine fast. With 1 Apothecary and 1 Storeroom you can often buy another Apothecary and Storeroom (or village or another engine component) and you can then quickly cycle through your deck as the Apothecaries now leave good cards on your deck which you can draw with your Storeroom.

On boards with good engine potential, where Golem is a good card, Storeroom lets you buy the Golem faster. When you play your Golem you’ll find your Storeroom for the needed buy and deck filtering. This accelerates the engine and mitigates the problem of Potion cards being slow. Seeing your Potion often is especially important with Alchemist. Storeroom lets you buy them faster and can put them more reliably on top of your deck. Storeroom being terminal isn’t a big problem here as you won’t draw Alchemists dead often.

4.) Treasure cards
The are other cases where your key card is a Treasure other than Potion. So the drawback that Storeroom is terminal isn’t a drawback anymore.

4a) Ill-Gotten-Gains
With a Storeroom/Silver opening you can quickly reach a level when you hit $5 nearly every turn. Just discard all cards other than Ill-Gotten-Gains and your opening Silver and you should be drawing at least one Ill-Gotten-Gains or Silver because you only need a 1 out of 8 probability. With 2-3 Storerooms you should be able to keep hitting $5 every turn and can then switch to Duchies.

4b) Fool’s Gold
Fool’s Gold is cheap and you want as many as you can get. Therefore you need +Buy. Check. You also want collisions, you want to draw 3 Fool’s Golds in the same hand. Therefore you either need draw or cycling. Check. Like written above, with a Storeroom in hand, you are guaranteed +4$ and 2 Buys, that’s perfect for picking up 2 Fool’s Golds. And with many Fool’s Golds it’s not that hard to have 3 of them in hand as you can either draw 4 when you didn’t have one in hand, 3 when you did have one and even 2 cards when you already had 2 FGs.

4c) Quarry
Storeroom + Quarry is no strategy on its own. But in games where Quarry is strong, Storeroom + Quarry is a very good opener. With a Storeroom in hand you likely draw them together and then you have $4 and all Action cards cost $2 less. So, you basically have $8 and 2 buys. Perfect for picking up 2 $4 key cards or your $5 key card with a $3 supporting card.

5.) Triggering reshuffles
All of the above combos and other engines where preparing the next turn by triggering or not triggering the reshuffle is important can benefit from Storeroom. Storeroom may be not the best X in Hunting Party + X because it often only gives you $1 instead of $2, but discarding exactly as many Coppers and Estates that you’ll have an empty deck while still getting money out the discarded cards is nice. The probability of having a Hunting Party in the next hand will be much higher. Triggering reshuffles may also come in handy if you want to prepare a good turn with Inn. So let’s say you’re building a Goons engine. So the +Buy from Storeroom is important, the cycling may give you more Double-Goons turns and you can time an empty deck and then buy an Inn for a Mega Goons Turn.

Summary

Storeroom isn’t a strong card on its own, but has its uses and can also shine in a few situations. Its strength is the heavy cycling to see the key Treasure cards (Potion, Philosopher’s Stone, Ill-Gotten-Gains, Fool’s Gold) more often, its support for Potion cards in general, its use for big hand sizes (Tactician, Scrying Pool, also Crossroads), the discarding option itself (Tunnel, also Grand Market) and as supporter where you don’t want expensive cards (Fool’s Gold, Alternative Victory cards, especially Gardens). It’s not a great Big Money card, skippable in boards with strong terminals and especially weak against discarding attacks.

Posted in Dark Ages | Tagged | 4 Comments

Hinterlands: Farmland

This is an article by Brando Commando, originally posted on the forum, incorporating analysis from many other forum members.

Farmland

Dominion: Hinterlands

Farmland is the kind of card that is unusual enough that it’s hard to imagine what other card would take its place. This means it can also be hard to strategize around.

Is There a Bigger Strategy with Farmland?

There’s some disagreement whether Farmland is worth thinking about in your overall strategy. It certainly can’t hurt, though. Here are some reasons (2-4 courtesy of HiveMindEmulator):

1. Buying a Farmland at $6 on lets you buy what amounts to a $6 Province later on if you trash the first Farmland to remodel it into a Province. More on this later.

2. There are more total VPs on the board to buy, so “you need more than 44 VPs to clinch a win. So it may make Big Money rushes less effective.”

3. If there’s no other way to trash an Estate or a juicy Dark Ages trash-benefit card, this might be pretty good, relatively.

4. It enables a lot of end game tactics where you can do stuff like getting 5 VP without draining a Province, or get 8 VP with one buy. (Discussed further below.)

You’ll notice, these are not game-busting issues, and I’m not sure they even qualify as “strategy.” To my mind, Farmland works strategically if it happens to do something worthwhile both with its on-buy trash benefit and afterward, when it’s in your deck ready to be trashed for benefit or remodeled into a Province. So the thesis of this article is that if you are considering a Farmland buy, you probably want to get advantage from it both coming and going. This, in effect, is strategy, since it asks how your Farmland fits into the larger game and not just the hand you happen to have.

Question 1: What are you going to trash by buying Farmland?

Keep in mind, you’re probably forgoing a Gold when you buy a Farmland, which is a big hurdle.

a) You’re not trashing anything, but you can gain a Gold with Farmland through Hoard or Market Square. 

This is probably superior to anything that follows.

b) You’re trashing nothing.

Surely you can do better than this with your $6.

c) You’re remodeling a Gold into a Province.

This could well be a strong move, but it really just invites the question: can you get that many Golds to begin with? This especially might be a good move if you aren’t going to have +buys to convert them into anything else later or in late game when you won’t see the Gold again anyway.

d) You’re remodeling a previously bought Farmland into a Province.

Sounds great: a net 6 VP for $6. The real trick is only that you need to have bought Farmland in the first place, back when you didn’t have one. This, indeed, is a bit of strategy. If Harem isn’t out, then you might think of it as a Harem that can only buy a Province. (Think about it: You only need to get to $6 in hand and you can Farmland your Farmland into a Province for 6 VP. Special thanks to WheresMyElephant for these observations.)

The other reason to do this, of course, is if you’re not planning to buy any more Provinces and just plan to remodel the rest of your deck into whatever you can get it to — that is, you’ve given up on improving economy and are, most likely, in the home stretch trying to get as many points as possible.

But remember, using Farmland like this might be more trouble than it’s worth. As ecq put it: “Buying a Farmland and trashing a Farmland for a Province only nets 6 VP.  Any time you do that, you could have just bought a Province if you had any other source of $2 instead of a Farmland.  Further, other sources of $2 aren’t nearly as bad to have in your hand as Farmland when you only have $5.”

So that Farmland you have in hand? Maybe it should just have been a Gold, unless you’re so full up with Gold you can pull off both a Farmland and Province in a single buy (by remodeling a Gold into a Province when you buy a Farmland).

Also, another important warning: If you’re cycling Farmlands like this, and especially if your opponent is too, you have to watch the Farmland pile carefully, since (absent Remodel, etc.) you’re only going to be able to pull off this trick with future Farmlands if there are still Farmlands to buy.

e) You’re remodeling Silver for a Duchy.

This might be a good idea. As ftl notes, “The Farmland and the Duchy together are 5 VP — a province is 6 VP. It’s one dead card more and one VP less, but it seems like a pretty solid PPR play. Especially if the $3 card you’re trashing isn’t a silver but something that wouldn’t have given you the +$2 that would have let you buy a province.”

So, in sum, this might work late game when you’re hitting the wall. Think on it.

f) You’re remodeling a <$5 card into something better.

One more bit of strategy: If Farmland is in the kingdom, decide early if you’re going to make use of it later, because a bunch of $5 cards in your deck are not going to be very useful with it.

Trashing Coppers and Shelters into $2 or $3 cards:

Stop. Do not pass Go. Do not collect a $2 card. A general rule of thumb is that remodeling or expanding Coppers or Shelters into cards to improve your economy is too slow in most kingdoms. Even if you use an Expand, the differential between a Copper and Silver is just too little to justify the economy and time that goes into swapping the Copper for a Silver. So this isn’t a strong reason on-buy use of Farmland.

Trashing an Estate into a $4:

This is more likely, especially if you plan to get to a point where you’re just using Farmland on itself and can generate $6 in order to turn a Farmland into a Province.

“Trashing a Curse into a $2 card, especially a late-game Estate.” 

…as ecq put it. “Buying a Duchy gives you 3VP, +1 dead card.  Trashing a Curse to, say, a Lighthouse is 3VP, +0 dead cards.
Trashing a Curse to an Estate is 4VP, +1 dead card.”

Trashing $3 or $4 cards into better $5 or $6 cards. 

This can be a way to set yourself up for the endgame when you aren’t yet hitting $8 but have already developed infrastructure/economy and want to start cashing in by getting VP.

There are any number of cards that work well in the early game but not so well later, and these are your ripest targets for trashing.

  • $4 cards that want Coppers or Estates in your hand/deck:
    Baron, Moneylender, Remake, Spice Merchant, Rats. (This might include more Dark Ages cards when we figure out which ones are weakest  in late game.)
  • $3 cards that want Coppers or Estates in your hand/deck:
    Masquerade, Lookout, Loan.
  • Attacks that are less relevant mid to late game:
    Sea Hag, Young Witch, Cutpurse, Ambassador.
  • Low-grade gainers (better for building mid-game economy than buying Provinces):
    Trader, Jack of All Trades, Bureaucrat, Ironworks, Workshop, Talisman.
  • Miscellaneous cards that are better in early or mid-game:
    Smugglers, Potion, Quarry, Tunnel.
  • Cards you shouldn’t have bought in the first place:
    Sometimes you have a dud card in your deck that’s not synergizing the way you thought it would, or maybe it’s just not doing much in this hand, maybe a dead Throne Room, dead Conspirator, or dead Nobles.

Question 2: What are you going to do with that Farmland now that you’ve trashed something with it?

Here’s the rub: Now you’ve got this lame green card that isn’t going to do much and is only worth 2 VP. If it’s not interesting to you now that you’ve gotten the trashing benefit out of it…then you probably shouldn’t have bought it. Like Border Village, you probably shouldn’t buy Farmland just because it gives you a fun on-buy effect. So which of these are you going to use it for?

a) Remodel the Farmland itself into a Province

This is more or less covered above. With regards to trashing Farmland itself, however, the big note is that this use of Farmland only gets better when you have actions that can do that so you don’t even have to spend the $6 to get the benefit, like Remodel, Expand, Governor, or Rebuild.

b) Use the Farmland for its greenness. 

An unlikely case. You might be using some combination of Crossroads and Scout, which sounds pretty bad to begin with, but Farmland would slow your deck down a little less this way. More plausibly, you’re doing Silk Road, in which case it really comes down to the math.

c) Just use it for the 2 VP, absent any other advantage listed here.

This might be fine if your on-buy advantage was big and you’re really going for the green. Consider its effects on your game position, especially relative to the PPR.

d) Remodel/expand it into a nice fat $7 or Platinum 

Look for this combo mid-game, especially with a Remake, Upgrade, or Develop. First, use the Farmland for one of the answers to Question 1 above, then turn it into a good $7.

e) Trash it for benefit.

One of its best uses. Asklepios puts it this way: “When a card has some of its benefit on buy/gain (or just on buy in Farmland’s case), then once it’s in your deck it’s less valuable to you than a card of its price ought to be. This makes it a good target for trash-for-benefit like Apprentice or Bishop.” Or Salvager, for that matter.

Sounds great, right? But you need to be able to draw that Farmland and your trasher together, so you’ll be wanting a deck that draws a lot of itself on a given turn to get your Farmland together with something that can trash it.

Thanks to everyone quoted, but also to everybody who participated in my original thread post on Farmland and other threads, which I’ve taken a lot of these ideas from.

Posted in Hinterlands | Tagged | 3 Comments

Dark Ages: Procession

This article is written by DG, originally posted on the forum, incorporating analysis from jomini.

Procession

Dominion: Dark Ages

This is the devil’s card. You will see someone play it wonderfully and empty the provinces in 10 turns. You’ll try it out the next game for yourself and it’ll make a complete mess of your deck. I’ll try to explain how that happens.

The Plus Side

Procession is great because you can play it your wonderful action card twice and then trash it to get an even more wonderful action card to replace it. If you can draw through your deck you might be able to play the gained card the same turn as well. You get the benefits of a throne and the benefits of an upgrade put together. Your deck can power through with action cards and accelerate through higher cost action cards. Wonderful indeed.

The Minus Side

So why is it so bad? How about a hand of {Pearl Diver, Copper, Copper, Grand Market, Procession} where you’ll probably play Procession on the Pearl Diver and trash it for something like a Great Hall. Firstly you’re not getting the double play from the Grand Market and you’re probably wasting time with the Pearl Diver and Great Hall.  Secondly, you’re going to get more bad draws with the Procession even than you would with a Throne Room since there are some actions in your deck that you don’t want to process. Let’s remember at this point that Thrones often do draw badly, so get worried about a card that is even more reliant on the draw.

That’s not the end of the problems with Procession. You need a sequence of action cards in the supply at different costs to give yourself card gains. Unfortunately, you actually need a good sequence of action cards in the supply at different costs since you always want to be getting better cards from the trashing rather than just expensive cards. If the action cards are really good though you might also find that your opponents empty a key pile and leave you with nothing useful to gain for processing the Actions already in your deck. This is going to be more of a problem with more players.

Procession can also destroy the balance of your deck if you are repeatedly trashing one card from a combination without taking a similar replacement. A Village/Smithy deck might be working nicely until Procession turns it into a Smithy/Smithy deck. You can buy more Villages but wouldn’t you rather be buying Provinces? Some of the good partners for Procession are likely to be cards that can replace themselves when processed. Bridge, Border Village, Ironworks, and Fortress can do this in different ways.  Ironworks in particular gives you some good combinations: open Chapel/Ironworks, gain a second Ironworks, gain two Procession, then play Procession -> Procession -> Ironworks-> Ironworks to grab an Ironworks, another $4 and three $5’s).  Graverobber also lets you convert other Graverobbers to Provinces or to restock Graverobbers from the trash.  (And of course Graverobber/Rogue lets you reclaim good cards that you previously trashed.)

I should probably also mention the cards that rely on actions being in play, such as Goons, Highways, and Peddlers. These cards all work well (indirectly) with Throne Rooms but have obvious problems with Procession.

Specific Uses

If we get back to the positive, we can find plenty of good situations to trash Action cards. Using Procession to trash Ruins might be worthwhile when you consider the small bonus from the playing the Action twice. You might also be able to tidy up after a Swindler or trash redundant cards like a Chapel, but Procession could easily be the wrong card for the job unless you have controlled/assisted drawing for your deck. You still need a deck that would be suitable for a Throne Room.

Some actions can remove themselves anyway (Island, Mining Village, Death Cart) so Processing them gives the card gain without a trashing penalty. Many Dark Ages cards can give benefits when trashed. Some action cards can provide a lot of benefit from an instant double play but provide less benefit as the game progresses, so it isn’t a disaster for them to be trashed even with no replacement.  This is very true for Cursers, especially the $4 Cursers, but it also holds true for Chapel, Ironworks, Moneylender, Mine, and Swindler. If you’re not going to shuffle your deck again you probably don’t mind which action cards you trash in the search for VP.

In Summary

If you put together the plus points and stay clear of the minus points then we roughly have

– action heavy decks with good drawing to give choice of cards to process
– good sequences of cards through cost 4-5-6-7 to give power and acceleration
– actions cards that are flexible, genuinely useful, and disposable
– ability to regain cards that you process
– tricks in gaining/trashing cards to get extra benefit or limit losses.

Posted in Dark Ages | Tagged | 18 Comments

Seaside: Explorer

This article is written by gman314, originally posted on the forum.

Explorer

Dominion: Seaside

Explorer is fine, why do people even complain about Explorer. They can’t all be the best $5 ever.  Donald X.

Explorer has two different abilities: the first is that it can gain a Silver, the second is that it can gain a Gold.  Of course, the second ability is strictly better than the first, which is why it’s a conditional benefit.  But even when you get it with a Province, it’s basically just +$3, right?

Wrong. A straight +$3 card would cost somewhere around $5. So, if Explorer is only +$3 at the best of times, it looks pretty silly at $5. The real point of Explorer is that it gives you $2-3 every time you go through your deck. And, since you gain the money in hand, you get the benefit starting immediately.

Comparing Explorer to other cards

There are two cards which seem quite obvious as comparisons for Explorer. The first is Mine. Mine is the only other card (I think) which gains you cards in hand. Similarly, Mine adds $1 to your deck every time you go through it (without extra treasures, that is) while Explorer adds $2 or $3.

The other difference being that while Explorer adds extra cards to your deck, Mine only replaces cards, which means that in a long enough game you’d see your Mine more than you’d see your Explorer.  But that also means that Mine runs out of useful things to do (when you don’t draw it with Copper or Silver in your hand) before Explorer (which is good until the Gold and Silver both run out).

Another reason that Mine really is an apt comparison for Explorer is because neither of them are particularly great $5s. What makes these cards weaker? The simple fact that getting a whole pile of money won’t be competitive most of the time. On most boards, some sort of engine should be able to dance all over Big Money and that’s exactly what all your treasure leads to. You generally don’t want much treasure in an engine if you can avoid it, and while Mine just refines what you have, Explorer adds cards to your deck.

The other comparison for Explorer is Tournament. This is because both want you to match them with a Province. However, they play very differently because of the difference between Gold and Prizes. That being said, ideas from Tournament do carry over to Explorer, particularly deck drawing and the value of trashing, as will be discussed below.

More subtly, you can compare Explorer to Hoard and Haggler.  Both of them really illustrate the weaknesses of Explorer; they give you +$2 but provide much better options.

Types of Explorer Decks

Explorer’s role, and the type of deck you stick it in, really depends on which of its abilities you use it for most of the time. The most basic ability of Explorer is to gain Silver. This ability is generally looked down upon simply because Silver isn’t really that great. Silver gets you to $5/$6 and then your $5s and Golds get you to Provinces. And in a Colony game, Silver doesn’t get you very far at all. Unless…

The Alt-VP approach

In most alt-VP strategies (Silk Road, Gardens, Duke, Feodum, etc.), money is good. Especially Silver! Even if you never get a Province, you need some money to keep your strategy going. You’re filling your deck with green and so you need to add some money to actually keep buying your green.  But you want to use your buys on your alt-VP and the Silver is unlikely to run out. So use Explorer to gain Silver instead of buying it! Since you get in your hand, there’s not a downside to having the Explorer this turn, because the Explorer means you get to both gain and play the Silver. With the extra Silver from a few Explorers, you can keep your Gardens/Silk Road/Duke/Feodum strategy going strong.

The Big Money approach

Another case where boatloads of money is a good thing is Big Money. Just play your Explorers for Silver and when you get lucky, get a Gold. Just as with alt-VP, the power of gaining Silver outside the buy phase helps you green. The problem is that there are a lot of helpers for Big Money that do the job a lot better than Explorer does, and especially at the $5.  Explorer helps Big Money, but your buddy with the Wharf-Big Money deck will stomp all over you.

Worth mentioning here is the opening of Explorer/Chapel. Get rid of your deck, get some Silver, get a Province and get a whole pile of Gold. But, this is just a special case of the next case which is….

The Engine Approach

Finally, we have the very strange case of Explorer in an engine of some sort. Just like Tournament, Explorer is at its best when you can get it with a Province.  Perhaps you can set up a particular engine that can draw the Province/Explorer every turn.

This can be a good way to get some money into your deck, especially if you are running some kind of trash-for-benefit engine.  Consider Apprentice.  You need good cards to trash, but as you trash them, your deck gets worse and worse and you run out of appealing targets.  And you certainly don’t want to trash all your Golds, such that you can draw your whole deck but not have enough money for a Province any more.

Explorer is a great pairing here.  Apprentice trashes the Golds, so that you can draw the Explorer with the Province, so that you can gain more Golds to buy the Province this turn and to be fed to your Apprentice next turn.  Similar principles work for Salvager, Bishop, and Remodel.

The other case of an Explorer engine is the general case of Explorer-Chapel. In many Chapel openings, it’s possible for your engine to accelerate ahead of your cash flow. You find yourself drawing your deck with 3 Buys, 5 extra Actions and hardly any money. Solution: Buy an Explorer! It builds the money into your engine! You gain money on your action phase so you can keep buying Engine parts or Provinces, and it’s in hand, so you added +$2 or +$3 to your current turn! And if you keep drawing your deck, you’re gaining nothing but Gold! It’s spectacular!

And a final note on that automatic engine-creation card: King’s Court. Setting up KC-Explorer is not a great move on its own, because playing it decreases the chance that future KCs will hit useful stuff.  But in a pinch, it can be used to add money to your deck; suppose you have a lot of Quarries and Action-card-gainers, but no actual money?  KC your Explorers and add a ton of your money to your deck at once, for the final turn buyout.

Attacks

As always, something needs to be said about what attacks do to the card. The damage of Cursers depends on what you’re trying to do. If you’re relying on matching with a Province, you’re going to have a bad time if there’s Curses in the game. But if it’s a slog where your deck is full of Curses and you can’t seem to hit $6 no matter what you do, Explorer is a reliable way to slowly improve your deck.  This really applies to any case where the pace of the game is just knocked down, which can also happen if there’s too many Militias or Minions flying around. Hand size decreasers only hurt as much as they hurt the type of deck you’re building, because Explorer probably isn’t really the key card, but rather a helper. If you’re trying for some sort of Explorer/Warehouse combo, a Militia hurts because it hurts Warehouse. Alternatively, a Library engine can easily withstand Militia. Probably the most damaging attacks for Explorer are Thief, Pirate Ship and Noble Brigand because of all that money you have. With them you definitely have to think carefully about buying Explorer.

A fun note about Possession: If a player possesses an Explorer, the Possessing player gains the treasure, but not in hand. So, the primary value of Explorer (gaining in hand) is lost.

Works with:

  • Most Alt-VP (Gardens, Silk Road, Feodum, Duke)
  • Big Money
  • TfB engines
  • Big draw engines which need treasure
  • Trashing
  • Non-terminal draw
  • Sifters / Haven

Conflicts with:

  • Opponents’ cursers (sometimes)
  • Faster strategies
  • Colonies
  • Most engines
  • Cards which provide +$
  • Menagerie/Harvest/Fairgrounds
  • Handsize attacks (Sometimes)

http://forum.dominionstrategy.com/index.php?topic=3353.0

Posted in Seaside | Tagged | 13 Comments

Cornucopia: Remake

This article is written by DWetzel, originally posted on the forum, and includes analysis from many other community members.

Remake

Dominion: Cornucopia

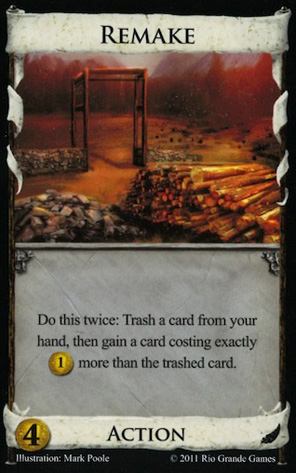
Remake is a powerful early game trasher that lets you turn your Estates into something useful (Silvers, if nothing else) while getting those pesky Coppers out of your deck — two things you normally want early in the game.  However, there are some special situations in which Remake can be useful for much, much more than that.

The most important part of Remake is the “exactly $1 more” clause.  If there’s nothing that costs exactly $1 more than the card you’re Remaking, you simply trash it.  That’s a great thing when you’re using Remake to trash a Copper or a Curse (sorry, Poor House lovers).  However, it also means on many boards that you can’t use Remake to get to Provinces, because a card costing $7 won’t be there.  And you can’t plan on Remaking anything into a Colony if those are on the board.

Remake has two powerful advantages over other cheap, early game trashers.

First is that you are gaining something.  The strength of this is not immediately apparent, but there are very few cards in the game that allow you to thin your deck and improve it at the same time.  And those tend to be very strong: see, e.g., Masquerade.  At worst, Remake lets you Remake your Estates into Silvers.  At best, you get wonderful Actions like Menagerie and Fishing Village.  (More on Menagerie later.)

The second is that unlike Remodel and Bishop (both of which also gain you something with the trashed cards), you get to trash two cards with it.  Early in the game that’s wonderful — if you bought Remake on Turn 1, and draw it on your next shuffle, there’s an excellent chance your hand looks like Remake-Copper-Copper-Copper-Estate, and you get to trash an Estate for a useful $3 card, AND remove a Copper from your deck, AND remove an Estate from your deck.  If you’re lucky enough to draw two Estates with Remake, it’s time for your happy dance, since you get to remove two dead cards from your deck and replace them with two good cards.  That’s a very very powerful turn early in the game.  (If you draw Remake and four Coppers, no happy dance will be forthcoming, but usually the best move, as usual, is to trash a couple of Coppers while probably wishing you had a Steward instead.)  Of course, regardless of what you drew, you’re probably doing nothing with the remaining two cards in your hand — but that’s the downside of almost all powerful early-game trashers anyway, and not a huge deal since your Remake hopefully gained you something.

In a Big Money setting, Remake is decent enough to turn those Estates into Silvers while slightly pruning the Copper out of your deck.  The problem is that once you’re done with Estate removal, Remake itself can become a dead card in your hand.  (You can’t trash Silver or Gold into anything useful, and if you’re doing it right you bought the Duchies about the time you actually need the points anyway and don’t want to turn them into Gold.)  Another light trasher/upgrader (Remodel is great for this) can help remove that Remake and maybe turn it into something useful.  On balance, turning Estates into Silvers and removing Coppers is a useful but not terribly exciting move.  As mentioned above, Remake can remain far more useful in a setting with a card like Bank or Expand (or another $7 cost card) — in these instances, Remaking a Bank into a Province late in the game can be a game-decider.

In an engine setting, Remake is far more useful.  In the early game, instead of turning your Estates into Silvers, you can potentially turn your Estates into valuable engine parts like Villages or Menageries, letting you save time and focus your buying power on the other parts of your engine.  Just remember to save enough Copper to buy those other parts.  Mid-game, you can turn those cheaper engine parts into better ones. A typical example: a hand of Remake-Village-Silver-Copper-Estate.  You could “go fish” with the Village, but it’s probably better to Remake your Estate into a Village, your Village into that Smithy you always wanted, and buy another Village with the remaining $3 in your hand.  We removed an Estate from our deck, replaced it with a Smithy, and added a Village as well.  That’s even better than just buying a Smithy and a Village in one turn, because we’ve also removed the dead card (the Estate) from our deck.

In general Remake is most strong when there are good $3 cards.  Fishing Village, Village, Oasis, Scheme, Warehouse are all great cards for Remake, and you rarely have to worry about having too many of them.  But Menagerie is the king here, because Remake’s trashing happens to be one of Menagerie’s great enablers by killing all your duplicate Estates and Copper.

Trashing two cards each turn gives Remake some problems, similar to what you would see with Trading Post where you don’t have two cards in hand to trash, and similar to what you might also see with a Steward where playing the action only leaves two cards from a five card hand. So Remake is improved in the early game by having cheap useful cards in the kingdom such as Lighthouse or Haven to buy with your 2-card hand. Remake is improved in the mid game by larger hand sizes that give more choice of Remake targets. Remake can be improved in the end game by having $4 cards in your deck that can be trashed for Duchies (sometimes other Remakes).

Remake is far worse for shelter games, which goes back to the point about the strength of its openings being the silver/component gain, not just the trashing of the garbage. With shelters, you get to remake them into $2 cards, which are often just not as exciting as the $3’s.

Remake can do well with cards that can mass $4’s, particularly those that don’t need +action: Talisman and Ironworks can supply a steady supply of Remake fodder. To be worthwhile you need a really strong engine, something to slow down the other guy, or some other power $5 combo (e.g. Remake/Talisman/Venture can quickly bounce you up to Provinces and let you nab the odd Duchy at endgame).

A few miscellaneous combos with Remake:

Border Village

This one is extremely fun.  Take your $5 card (let’s use Torturer as an example for maximum fun).  Remake it into a Border Village.  Border Village lets us gain a card costing less than Border Village.  Hey, look, my $5 card costs less than Border Village — I think I’ll gain a new Torturer.  Presto, free Border Village, albeit at the cost of not using our terminal action.  That cost isn’t so bad, though, because we probably had colliding terminals anyway, and now we have a Border Village so we won’t have that problem next time.

This works with, really, any good $5 card, but is especially effective with terminal drawing $5 cards like Torturer and Rabble.  This is a powerful trick that lets you quickly build a strong engine.

The other side of this trick comes in the late game, when that Witch or Torturer has run out of curses to give, and you really don’t need it any more.  Remake your Witch into a Border Village, and instead of gaining a Witch back, gain a more useful card late in the game – a Duchy.  Remaking a pair of Witches as a late game surprise to grab an extra 6 VP can be a game-deciding move, and an opportunity worth looking for.

Cursers

Remake trashes your Curses, but Remake can also trash your Cursers.  Cursers often are somewhat meaningless after you run out of Curses.  Remake can turn them into much more useful cards after they have outstayed their welcome, and is especially good for the $4 Cursers (Sea Hag and Young Witch), which can become Duchies.

Haggler

Haggler lets us gain a card costing less than the card we just bought.  That’s a nice ability in itself.  If nothing else, in a Big Money setting, we can buy a Gold in the middle game and gain another Haggler.  Well, that’s great to a point, but at some point you’ve got four or five Hagglers in your hand and nobody can get a word in edgewise and the next thing you know you’re wondering why you have to take a Copper with that Silver you just bought.  Remake can solve this problem nicely — turn those extra Hagglers into Gold.

More seriously, in a setting where Haggler helps you pick up less valuable engine pieces, Remake is great at turning them into better pieces quickly, and adapting your deck.  Finding yourself a little low on actions?  Remake that Smithy into a Festival.

Hoard

Hoard is a wonderful addition to most decks — who doesn’t love to gain a Gold every time you buy a victory card?  The downside to this benefit, of course, is that sometimes we find ourselves without enough money to buy something good, and find ourselves looking at $5, or maybe $6, and wondering whether we should really be buying that Duchy so early in the game.  Remake says “wonder no more” — splurge on that Duchy, gain the Gold, and later turn that Duchy into something useful.  Maybe a Dr. Zoidberg?  No, silly — maybe another Hoard.

Similarly, in an engine with +Buy, it’s easy to use Hoard multiple times in a turn, and Remake the less useful VP cards — into more coins if nothing else.

Highways (and other cost reducers)

We touched briefly on the idea that trashing a Copper or a Curse removes them from our deck because there aren’t any $1 cards to gain.  Well, I lied, sort of.  Highways change that rule, reducing the cost of all cards — but not to less than $0.  That means that it’s possible to turn any card — yes, even Colony — into a $1 card with enough cost reduction.  Now, if you can play 10 Highways in a turn, you probably don’t need my help to figure out what to do — but let’s look at a more typical situation.

In a typical midgame setting, we’ve built a deck with a few Highways and not a lot else (because we’ve used Remake to clear our some of the chaff from our deck).  Let’s say we can get two of them into play.  Now both Estates and Coppers cost $0, and cards (like Silver) that used to cost $3 now cost $1.  Remaking our Copper will now give us a Silver, or another $3 card.  So will Estate, but that didn’t change much.  Still, turning the Coppers into Silvers is a pretty good thing — that’s comparable to Expanding two cards at once.

With four Highways, we’re really in business.  Copper and Estates cost $0, but cards that were $5 now cost $1.  Like, say, Highway.  Well, I don’t know about your, but Remaking a couple of Estates into a couple more Highways is a great use of eminent domain as far as I’m concerned.  Highway + upgrading cards can really snowball quickly for this reason.

With seven Highways (and we can see how we might get to seven Highways quickly), now Provinces cost $1.  It’s a fairly simple matter to play a pile of Highways, toss a Remake jauntily on the table with two Coppers, and get a quick 12 VP.  Oh, and then buy a Highway or something with the $0 you have left.

One special danger with this trick is worth noting though: ONE Highway can be detrimental to your Remaking efforts.  It doesn’t help with Estates, because all the cards that cost $1 more than Estate still cost $1 more than Estate — but now Estate itself costs $1 more than Copper, and that means Remaking your Copper will just throw an Estate back in your deck that you don’t want.

I’ve used Highway in these examples, but Bridge can work as well in principle.  Bridge and Remake are both terminal actions though, so if you want to try these tricks with Bridge you’ll need to make sure you’ve got a source of actions available.

Fortress

Remake your first Fortress into a $5.  Your Fortress pops back into hand.  Remake the same Fortress into another $5.  Your Fortress pops back into hand.  Note that Remake works with Fortress, but Mercenary doesn’t.

Cultist

Make a thin deck. Spam the other guy with ruins. Remake out the ruins in your own deck. Then remake two cultists into golds and draw them now. This works extremely well in engines where you can line up double cultist shots and have the +action/+buy to take advantage of your new golds and +6 cards.

Bishop

You can pick up 3 silvers easy and start dumping copper. Once you get Gold/Silver/Silver, you can trash down with Remake or Bishop and eventually Bishop the Remake, buy a Province. From here on out you have a solid golden deck.

Market Square

Open Remake/Market Square. Remake Estates into Market Squares. Burn Coppers for Golds. Use Market Square’s cantrip +buy to take advantage of heavy Gold hands to either make a simple engine or to get some strong late game pay outs (e.g. Province + Duchy or Duchy + Duchy).

Rats

Turn your Coppers and Estates into Rats, and Remake the Rats into strong $5’s (e.g. Venture, Laboratory, Festival/Library).

Posted in Cornucopia | Tagged | 15 Comments

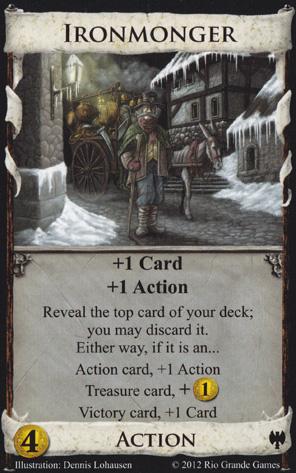
Dark Ages: Ironmonger

This article incorporates analysis from mischiefmaker and DrFlux.

Ironmonger

Dominion: Dark Ages

By itself, Ironmonger is surprisingly strong.  Solo play suggests that straight Ironmonger-Money is about equivalent to Smithy-Money: 14-17 turns to get to 4 Provinces and some Duchies.

In a more diverse deck, Ironmonger is sort of like three different cards, depending on what it hits:

Treasure: +1 Card, +1 Action, +$1, could discard Copper.  This card is like a Lab in a way: you are drawing the Copper and discarding it, but you still get the +$1.  If you aren’t drawing Copper, then it’s about equivalent to Peddler, but with some info about your next card.  On its own it’d probably cost about $4-$5.

Victory: +2 Cards, +1 Action, can discard a Victory card.  This is strictly better than a Laboratory, since it’s sort of like +3 Cards / +1 Action with the discard.  So on its own it’d cost at least $5.

Action: +1 Card, +2 Actions, could but probably won’t discard an Action.  This is a Village, and probably not enough bonus on top of the Village to differentiate it from a typical vanilla $3 Village.

In a vacuum, Ironmonger is at its best when it’s discarding Victory cards, and at its least helpful when it is hitting Action cards.  But of course, a Village is a Village, and if you need a Village you’ll still be happy to pay $4 for it.

The key, though, is that although Ironmonger never hurts your deck, you shouldn’t try to set expectations for it.  If you read “Ironmonger is at its best when it’s discarding Victory cards” and conclude that you should do nothing but buy Victory cards and Ironmonger, well, you run into the same problem you do with Crossroads: you are constantly drawing a lot of cards, but they are just all green cards anyway!  And if you try to use Ironmonger as a Village, it’s not really as reliable as just a simple $3 vanilla Village.

What Ironmonger really is is a kind of weakened-but-more-reliable Tribute.  You can’t really count on what it’s going to do for you, but you can count on the fact that it won’t screw you over.  No matter what you’ll get something decent.

Ironmonger and dual type cards

Of course, like Tribute, Ironmonger gets way better with dual-type cards.

Victory/Action: +2 Cards, +2 Actions
Victory/Treasure: +2 Cards, +1 Action, +$1

Both of these are strictly better than Lab.

Ironmonger and opportunity cost

So Ironmonger is always good for your deck.  That means you should always be buying it, right?

Not really.  Consider Spy — it’s a decent card, can’t really hurt your deck, but you won’t win the game buying nothing but Spies.  Like the Looking Glass, you can’t just stand still in Dominion: if you aren’t moving towards the finish, you may as well be moving backwards. The opportunity cost of Ironmonger is passing up a chance at Bridge, or Throne Room, or some other powerful card that is pushing you towards endgame.

That being said, Ironmonger tends to be a bit better than most other spammable cantrips, because early in your engine build, Ironmonger is likely to hit Copper and Estates, cycling your deck a bit and giving you the more powerful effects; later, as you trim your deck, set up filtering, and/or increase action density, Ironmonger gives you the +Actions you need.

The basic takeaway, though, is that Ironmonger in an engine works much better with a gainer, so that you’re not giving up the opportunity cost of buying a different $4.

Works with/Conflicts with

In addition to the above, Ironmonger works well with cards that care about the top card of your deck. Mystic is the obvious choice but there may be others (Lookout, perhaps).

Like Tribute, Ironmonger does not work well with Cursers, since hitting a curse reduces Ironmonger to a straight cantrip (which is worse than Vagrant, a $2). It’s a mixed bag with Looters; hitting Ruins is a Village plus Ruins filter, which isn’t bad for a $4 but it isn’t great. More important is that in most cases you’re likely better off just going for the Looter (Marauder/Cultist) or ignoring it (Death Cart, unless of course there’s a Death Cart enabler on board) than comboing it with Ironmonger. That being said, Ironmonger is a strong choice if you are building an engine that ignores the available Looter attacks.

Posted in Dark Ages | Tagged | 11 Comments

Dark Ages: Scavenger

This article is written by sffc, originally posted on the forum.

Scavenger

Dominion: Dark Ages

Scavenger is a card whose power may not be obvious at first glance.  It looks a whole lot like the card Chancellor always wanted to be, similar to how Noble Brigand is like the card Thief always wanted to be.  So, what makes Scavenger worth having its own article?

Scavenger’s power arises from the fact that it lets you search essentially your entire deck, finding exactly the card that you want, and topdecking it.  This is actually pretty awesome.  If Scheme is the card that lets you save an Action that you played this turn, Herbalist is the card that lets you save a Treasure that you played this turn, and Haven is the card that lets you save something that you could have played but didn’t, Scavenger is the card that lets you save something that you never even saw this turn.  Better yet, unlike Scheme and Herbalist, it works on non-actions as well as actions.

Early in the game, you can Scavenge cursing attacks like Sea Hag and Witch to win the curse split.  Later in the game, you can Scavenge your Platinum, Goons, or other power card, depending just on the frequency that you draw a Scavenger.

Scavenger also helps put together unrelated combos.  For instance, consider Tournament.  If your only Province is in your discard pile and you know you have Tournaments coming up soon, Scavenge it to the top of your deck.  If you have +Actions, you can even Scavenge a Province that you revealed this turn in order to gain multiple Prizes at once.  If you have lots of Scavengers and even more +Actions, you can topdeck more complicated combos together.  For example, play a Village followed by two Scavengers, topdecking your Talisman and your Quarry.  In an engine, Scavenger increases reliability by being able to topdeck key components for next turn.

In a similar manner, Scavenger rewards you for diligent deck tracking.  Yeah, you can just dump your whole deck into the discard and pull out the power card, but if you are already going to play it next turn (or at worst the turn after), you may get more by just top decking from the cards already in the discard. On the flip side, some cards like altar can be so powerful that it is worth it to dump the deck every time they aren’t in hand in order to play them ASAP.

However, Scavenger really shines when it is part of its own combo.  Below, I point out a few of the most notable.

Combo: Scavenger/Stash

Requirements: 2 Scavengers, 3 Stashes

This is one of the first combos that was documented in Dark Ages.  It is pretty straightforward: every turn, play Scavenger, put your deck into your discard pile, and topdeck your other Scavenger.  During cleanup phase, you draw the second Scavenger, and when you reshuffle, put all three Stashes on top.  In the absence of handsize-reduction attacks, you are now guaranteed a Province every turn.

Some players might be more comfortable with having 4 Stashes instead of 3 to guard against the possibility of drawing both of your Scavengers in the same hand.  However, the probability of this happening before you buy your fourth or fifth Province is quite low, and if it does happen, the combo is quick to get going again.

Works With: Cursing attacks, Looters

Conflicts With: All handsize-reduction attacks, Minion, Pillage

Combo: Scavenger/King’s Court

Okay, what card besides Counting House doesn’t combo with King’s Court?  I am pointing out this combo because it is extremely resilient, and it guarantees a Province or Colony every single turn.

Requirements: 2 Scavengers, 2 King’s Courts, 2 Silvers (or 2 Platina for Colony games)

Here’s how it works.  Draw King’s Court, Scavenger, Silver, and two other cards.  KC the Scavenger, don’t discard your deck, and instead topdeck the KC, Scavenger, and Silver that are in your discard pile from last turn.  Play the Silver.  Buy a Province.  Draw 5 Cards.  Rinse and Repeat forever.

What makes this particular combo worth noting is that it is immune to Militia, Goons, Margrave, and Ghost Ship.  In fact, the only cards that could normally mess up this combo are Minion, Pillage, and (immediately after a reshuffle and with bad shuffle luck) trashing attacks like Rogue and Thief.

Works With: Handsize-reduction attacks and most other attacks

Conflicts With: Minion, Pillage, faster King’s Court combos, Masquerade in the presence of handsize-reduction attacks

Combo: Scavenger/Golem

Requirements: 1 Scavenger, 2 Golems, exactly 1 other Action

This is similar in principle to Golem/Scheme.  Play your Golem, making it find your Scavenger and any other Action card of your choice (say, a powerful attack).  Play the wildcard Action, and then play the Scavenger, discarding your deck if necessary and topdecking your other Golem.  Rinse and Repeat.

Counting House fits extremely well in the wildcard spot, even better than it did in Golem/Scheme.  Let your Golem find your Scavenger and your Counting House, play the Scavenger to discard your deck, and play the Counting House to draw all of your Copper.

Works With: Strong attacks, Counting House

Conflicts With: Minion, Pillage, Looters (for ruins are actions), Necropolis, Masquerades that give you action cards

Combo: Scavenger/University

Requirements: At least 1 Scavenger and 1 University; the more the better.

Watchtower is a powerful cards because it lets you topdeck something you just bought or gained, enabling you to play it an extra time than you normally would have been able to before the end of the game.

Scavenger can work in a similar manner to Watchtower for Action cards that gain something.  Gain your card, then Scavenge it for next turn.  Unfortunately, most card-gainers are terminal.

University not only lets you gain a card costing up to $5, but it also gives you actions.  So, you can play University to gain a $5 Action and then immediately Scavenge it.  If you have a cantrip in hand, you can even draw and play the $5 Action from University on the very same turn that it was gained.

Works With: Good $5 Actions, Cantrips

Combo: Scavenger/Reactions

Requirements: At least 1 Scavenger and 1 or 2 Reactions

Scavenger comes to the rescue when you blow out your birthday candles and wish, “if only there were a way to ensure that I always have my Trader, Tunnel, or Watchtower in hand when my opponent plays an attack.”  Since Scavenger doesn’t require that you actually draw the card from your discard pile right away, if Scavenger is your last Action, you can ensure that your Reaction is available between turns.

Works With: Strong Reactions in the presence of Attacks

Conflicts With: Minion, Pillage

Combo: Scavenger/Scavenger

Requirements: 2 Scavengers

With 2 Scavengers in your deck, you can simply Scavenge a Scavenger every turn to ensure that you always start with at least $2.  Nifty!

The guaranteed $2 is useful in many situations, but especially in Alternate VP games, when your money density becomes exceedingly low.  With a guaranteed $2, you just need $2 out of the other 4 cards in order to get your Silk Roads or Gardens; that’s a $0.5 average card value.  For contrast, you woud normally need a $0.75 average card value to consistently purchase $4 AltVP.

Scavenger/Scavenger works especially well in the presence of Throne Room.  Throne your Scavenger, topdecking your other Throne Room and Scavenger.  You are now guaranteed $4 every turn.  Just one Copper and you have your Duke (requiring $0.33 average card value).

Scavenger/Scavenger and especially Scavenger/ThroneRoom are also resilient to most attacks, including handsize-reduction attacks.

Works With: Most attacks, Throne Room

Conflicts With: Minion, Pillage, faster non-AltVP strategies

Posted in Dark Ages | Tagged | 10 Comments

Hinterlands: Fool’s Gold

This article is written by A_S00, originally posted on the forum.

Fool's Gold

Dominion: Hinterlands

“Chapel is the most powerful Dominion card relative to its cost, and I’m unlikely to make another card that powerful (relative to its cost).” –Donald X. Vaccarino

“Oops, I did it again.” –Britney Spears

—–

Fool’s Gold is pretty great.  And, like Minions, Hunting Parties, and sex, the more of it you have, the better it gets.  Play one FG in a turn, and it’s a Copper.  Play two, and each one is a Silver-and-a-half.  Play three, and each one is a Gold.  Play four or more, and they’re better than Gold.  Pretty snazzy for a $2 card.

It should follow from the above that you want to buy as many copies of Fool’s Gold as possible.  And, indeed, you can do worse than buying nothing else:  Big Money Ultimate on Geronimoo’s simulator loses to an equivalent strategy that just buys Fool’s Gold instead of Gold and Silver 25%-67%.  The Fool’s Gold strategy averages 4 Provinces in 15.5 turns.  But sometimes (a lot of the time), you can do even better.

—–

What does Fool’s Gold like?

There are three things that Fool’s Gold loves almost as much as other Fool’s Gold, and sometimes it’s worth dipping out of Fool’s Gold to pick up one or more of them.  Those three things are:

  • Trashing:  The less cards you have in your deck that aren’t Fool’s Gold, the higher your chance of drawing lots of Fool’s Gold at once.  Thus, Fool’s Gold loves trashers (but only some…more on this later).
  • Card Drawing:  The more cards you have in your hand, the more of them are likely to be Fool’s Gold.  Thus, Fool’s Gold loves drawing cards.
  • +Buy (or gain):  The only thing better than buying a Fool’s Gold every turn is buying more than one Fool’s Gold every turn.  This accelerates your game if you’re going for it and your opponent is ignoring it, and gives you the chance at a favorable split if you end up racing for the Fool’s Golds.  And more importantly, with all the money you’re getting from your Fool’s Golds, you don’t want to just settle for a single Province per turn.  Thus, Fool’s Gold loves +buy.

Even better than getting just one of those, though, is getting multiple.  So, with that in mind, let’s consider some specific cards that go well with Fool’s Gold.

Mint:  A special case for a 5/2 split, Mint/Fool’s Gold is currently the 6th best opening, according to the councilroom.com rankings.  Mint’s on-buy effect provides excellent trashing, and its on-play effect then goes on to effectively provide +buy, getting you lots of Fool’s Gold fast.  It’s probably not worth picking up later unless you get a lucky 5-Copper hand (don’t trash any Fool’s Gold for it).

Wharf: Wharf/Fool’s Gold is one of the best two-card pairs in the game, what with the killer card draw and +Buy.

Council Room:  Huge draw and +buy to go with it.  Council Room/Fool’s Gold is an excellent opening if you’re lucky enough to get a 5/2 split, but even if you’re not, picking one up with your first $5 hand is worth it.  Buying a single Council Room as soon as possible increases Fool’s Gold’s margin over BMU to a whopping 90%-7%, and beats Fool’s Gold head-on 71%-23%.  It also beats the optimized Council Room bot 76%-19%.

Margrave:  Card drawing, +buy, and an attack to boot.  Smells like victory.  Like Council Room, Margrave is worth picking up with your first $5 hand even if you don’t get a 5/2 split.  One of these babies will let Fool’s Gold beat BMU 92%-5%, and beats straight Fool’s Gold 69%-25%.  And on the flip side, keeping your best three cards out of six is not as bad in a Fool’s Gold deck as in most decks.

Salvager:  A trasher tailor-made for Fool’s Gold.  Get rid of your Estates and Coppers, accelerate your Fool’s Gold purchasing with +$ and +buy, then have the option to rush the end game by trashing Provinces if you get ahead (doubly beneficial to a Fool’s Gold deck, since Fool’s Gold hates greening).  Buying a single Salvager on turn 1/2 increases Fool’s Gold’s margin over BMU to 81%-16%, and beats straight Fool’s Gold head-on 60%-37%.

Spice Merchant:  In mirror match-ups, ends up being a slightly less good version of Salvager in Fool’s Gold games, but still worth picking up if it’s the best option on the board.  If your opponent ignores Fool’s Gold, it’s even better.  You can use the +$/+buy option early to pick up extra Fool’s Golds, or the +cards option if you get an unlucky hand like 2xFG, 1xC, Spice Merchant, Province, hoping to draw an extra Fool’s Gold.  Picking up a Spice Merchant as an opening increases Fool’s Gold’s margin over BMU to 86%-10%, and beats Fool’s Gold head-on 54%-37%.

Masquerade:  Gives a little card drawing, along with light trashing.  Masquerade is a good card, and its strengths line right up with what Fool’s Gold likes, so no surprise that they go well together.  Masquerade/Fool’s Gold beats BMU 81%-15%, and beats straight Fool’s Gold 57%-38%.  It also beats the optimized Masquerade bot 55%-39%.

Bridge:  Gives +buy for cheap.  The cost reduction also minimizes the chance of unlucky turns where you get your +buy but don’t have enough money in hand to buy two Fool’s Gold (a problem with some of the weaker +buy cards), and gives you a decent shot at double Province or Province/Duchy turns late game (FG/FG/FG/C/Bridge is P/D, FG/FG/FG/FG/Bridge is P/P).  Buying an opening Bridge bumps up the margin against BMU to 88%-9%, and beats straight Fool’s Gold 67%-27%. Also beats the optimized Bridge bot 83%-13%.

Envoy:  It’s good for BMU, and it’s good for Fool’s Gold.  It beats BMU 76%-18%, straight Fool’s Gold 50%-4-%, and the optimized Envoy bot 51%-41%.

Smithy:  No surprises here.  Beats BMU 78%-18%, Fool’s Gold 55%-36%, and the optimized Smithy bot 53%-38%.

Thief:  An interesting case, and one of the few types of games in which the card is actually useful.  In a mirror match-up, Thief acts as +buy, letting you pick up extra copies of Fool’s Gold, while killing your opponent’s copies (of course, you still run the risk of getting unlucky and just trashing his Copper for him).  With a single Thief as an opener, it beats straight Fool’s Gold 63%-30%, but it’s worse against BMU than straight Fool’s Gold is (though it still wins 64%-29%).

Venture: Stronger than Gold if you have been working the Fool’s Golds into your deck.

Pawn: Cheap non-terminal +Buy, it can often help with an early $4 / 2 buys hand to get two Fool’s Golds.

Sifters: Cards like Warehouse and Cellar help you find your Fool’s Golds easier.

Cards to help you win the Fool’s Gold race:

Nomad Camp: A nice opener.

Remodel: Usually remodeling your Coppers into $2 junk is not worth it, but with Fool’s Gold, it totally is.

Smugglers: Especially good for P2.

—–

What doesn’t Fool’s Gold like?

As good a card as Fool’s Gold is, there’s a number of things that don’t go along with it very well.  Some of them are expected, but some are surprising (at least to me).  Here are a few of them:

Cursing attacks:  Just like having less crap in your deck makes you more likely to draw your Fool’s Golds together, having more crap makes you less likely to do so.  Thus, if you’re going to be eating a lot of Curses, you should probably stick to Gold and Silver which at least retain their value in crappy hands, rather than turning into so much Copper.  Mountebank is the worst of the lot, of course, since it gives you two cards that aren’t Fool’s Gold every time you get hit.  When Cursers are on the board, I’d probably just avoid Fool’s Gold altogether.

Swindler: Ordinarily Swindler turns your good cards into other Action cards: not the ones you wanted, but still decent.  Swindler turns your Fool’s Golds into Estates.  That’s bad.  Real bad.

Fast megaturns:  Fool’s Gold strategies can be pretty fast…but not necessarily the fastest thing on the board.  If you think your opponent can probably pull off some kind of KC/Bridge monstrosity on turn 12, you should probably try and contest him on those grounds, rather than plodding along with your Fool’s Gold strategy.

Chapel:  Despite my assertion above that Fool’s Gold loves trashing, it turns out not to get along with the king of trashers, Chapel.  Straight Fool’s Gold beats Chapel/Fool’s Gold 59%-38%.  Without any +buy to make up the turn you lose buying Chapel, you’re probably only going to end up with 4 Fool’s Gold in your deck when they run out, and with no copper to back them up, that’s not going to stand up to any greening whatsoever.  It may be viable to work Chapel into a Fool’s Gold strategy that also gets some +cards from somewhere, but I suspect that’s going to be too slow and lose the Fool’s Gold race.

Moneylender, Steward:  Good as these cards are, they both fall prey to the same problem as Chapel.  If you waste a turn buying them, you lose the Fool’s Gold race, and the deck thinning and +$ they provide isn’t enough to make up the difference.

Colonies: With Colonies in play, you need four Fool’s Golds in hand, not three, to get a Colony, and that is way harder.  You’re going to need to do a bit more to get that set up.  A better approach than pure Fool’s Golds is to use them to leapfrog into Platinums (which are easy to get): as good as Fool’s Golds are, even they are nothing compared to Platinum.

—–

Other stuff

Should I buy Gold and Silver after the Fool’s Gold runs out?

In a word, yes.  It’s not going to matter against a player who’s not going Fool’s Gold (by the time they run out, you’re going to be buying Provinces and Duchies anyway), but in a mirror match-up, a player who buys Gold and Silver after the Fool’s Gold runs out beats one who doesn’t 85%-10%.  Just do it.  But not before it runs out.

When should I trash my Fool’s Gold to top-deck a Gold?

I have no idea.  Geronimoo’s simulator doesn’t have a way of controlling the bot’s behavior for this, and I don’t know my way around rspeer’s well enough to answer this question with it.  However, there are a couple things I think are probably important when deciding whether or not to trash:

  • Can you already buy a Province?  If so, don’t trash.
  • How did the Fool’s Gold split go?  The better it went for you (the more Fool’s Golds you got), the less you should be inclined to trash.
  • Do you have more than one Fool’s Gold in hand right now?  If so, probably don’t trash.
  • Given what you know about what’s left in your deck, are top-decked Golds likely to let you buy a Province next turn?  If yes, might be a good idea to trash.
  • Is the game far enough from over that a VP card next turn is as good as one this turn, or are you really down to the wire?  If the former, you might consider trashing; if the latter, probably best to just buy buy buy.

Should I try and incorporate Fool’s Gold into engines?

This is a tricky question, and in my experience, the answer is generally “no.”  It’s easy to see why you would want to:  Fool’s Gold rewards big hands with lots of buys, and the best way to get that is a big, fancy engine.  The problem is, fancy engines take time to set up, and Fool’s Gold is always a limited resource.  So, if you try to get your engine set up first, your opponent has time to buy up all the Fool’s Gold, making your ability to draw your whole deck useless.  On the other hand, if you buy up the Fool’s Gold first, you’ve probably spent enough turns on that race that it’s too late to start building an engine; your opponent already has enough Fool’s Golds to be buying Provinces.

There may well be some exceptions to this, but in my experience, Fool’s Gold and engines don’t mix especially well.

What kind of decks feature Fool’s Gold best?

  1. Decks where you use +buy or gain to get a lot of FGs really fast (which really only works in 2-player, since you need to have 5+ to really get a good enough density).
  2. Big Money decks with +cards, where you only need maybe 3 of them, and just take advantage of the fact that with large hands you will draw 2 of them +$3 from other sources often enough.
  3. Decks where you trash down to get a really high FG density even with 5 or fewer FGs.

Keep in mind that in a multiplayer game, the first two work much less well since you are no longer assured of getting 5+ Fool’s Golds.

—–

Works with:

  • +Buy
  • Trashing (if it gives +buy)
  • +Cards
  • Thief

Doesn’t work with:

  • Cursing attacks
  • Trashing (if it doesn’t give +buy)
  • Fancy engines
  • Colony games
Posted in Hinterlands | Tagged | 22 Comments