Combo: Travelling Fair / Counting House

This article was written by Polk5440. The combo potential of Counting House and Travelling Fair was first suggested by gamesou and discussed in this forum thread. The article below is based on posts and comments from that thread.

Counting House is usually a pretty weak card. It’s strength comes from drawing Coppers out the discard pile, but it’s usually difficult to construct a good deck that always has a lot of Coppers in the discard pile. Travelling Fair solves this problem.

The idea of using Travelling Fair with Counting House proceeds in two stages. Stage 1: Get a Counting House. Stage 2: Once you draw a Counting House with enough Coppers in your discard pile,  use Travelling Fair to consistently topdeck a Counting House, Coppers, and Provinces turn after turn without ever shuffling your deck.

Basic Strategy:

  • Never buy anything beyond Travelling Fair, Copper, Counting House, and Victory cards.
  • Buy Travelling Fair to fill your deck with Copper. ($3 -> Copper x2, $4 -> Copper x3)
  • Buy one Counting House on your first $5+.
  • Strategically and selectively use Travelling Fair’s top-decking ability. For example,
    • Top deck Coppers to guarantee $5.
    • Keep track of your Estates to see if it’s worth top-decking Coppers.
    • If you have $7+, buy and top-deck a Counting House.
    • When waiting to draw a Counting House you bought, only top deck enough cards to guarantee the Counting House is drawn without triggering a reshuffle (and thus, ending up with an empty discard pile).
  • When you hit a turn with $13, you can buy Travelling Fair x4, one Counting House, and Copper x4 and top-deck everything. This guarantees that your next hand will be a Counting House and 4 Coppers and all your other cards will be in your discard pile.
  • Now, as long as there are Counting Houses to be bought, every turn after can be started from this state (a Counting House and 4 Coppers in hand and everything else in discard) and you will no longer shuffle. Every turn there will be more and more Coppers in your discard pile meaning every turn you can buy more and more in addition to Travelling Fair x4, one Counting House, and Copper x4.
  • With your increasing buying power, buy Victory cards and Coppers (using Travelling Fair to buy more buys as needed).
  • You can top-deck these Victory cards instead of the four Coppers, if needed, as well. Just make sure you are always topdecking four other cards with Counting House so you do not trigger a reshuffle.

Note that the final endgame state of never triggering a reshuffle can be achieved with less than $13 and topdecking fewer than 5 cards if you have a cushion of cards on your deck. The key is that there will be a tipping point where you will no longer shuffle for the rest of the game.

If no one else goes for a Counting House-Travelling Fair strategy, there will be enough Counting Houses and Coppers to empty the Province pile.

Counting House-Travelling Fair is a resilient strategy that is not slowed down much by junking attacks. In fact, in the endgame, it’s not slowed down by them, at all, and Mountebank arguably helps it out. While the basic strategy can be interrupted by someone triggering a reshuffle (e.g. Scrying Pool, Oracle, Rabble), taking over your deck (e.g. Possession), or discarding key cards or your hand (e.g. Pillage, Minion), this can often be played around. For example, the Counting House player can leave more than 5 cards on the draw deck to prevent a reshuffle. Even if an opponent manages to trigger a reshuffle, the Counting House player can get back into the groove of the combo or have some lucky big turns if the game lasts for a while.

Except in the face of the most disruptive attacks, Counting House and Travelling Fair is a dominant strategy in most kingdoms in which it appears; it takes an extraordinary counter-strategy to beat it.

For more information and a demonstration of the combo in action, check out this video by RTT:

One final note: We will be publishing another Counting House combo in the coming weeks! The next article will feature Night Watchman, as a less potent but surprisingly strong enabler.

Posted in Articles, Combo of the Day, General Strategy, Uncategorized | Leave a comment

Dominion Online Championship 2018

For the second year in a row, ShuffleIt is hosting and sponsoring the Dominion Online Championship. Last year’s tournament had over 360 participants! You can learn more information and register for the large tournament on the ShuffleIt forums.

Some details:

  • The first round begins on September 17th; signups close September 10th
  • A Gold subscription is required to play
  • Cash prizes from a 1000€ pool will be awarded to the top 4 finishers
  • Single-elimination format; “best of 6” (first to 3.5 wins advances)

Best of luck to all Dominion players participating in this event!

Posted in Uncategorized | Leave a comment

Five Ways To Get More Out of Your Turns

This article was written by Titandrake, with minor adaptations for the blog. Interested in writing for the blog? Check out this F.DS thread for details.

I like to model Dominion gameplay as two broad categories: strategy, and tactics. Strategy is your plan for the entire game, and tactics is your plan for this turn. In this article I’m going to focus on just one aspect of the tactics: how to play your hand. This is the nitty-gritty of Dominion optimization – it’s easy to autopilot your hands, but you can get surprisingly large gains from tightening your play. These small edges can add up to 1-2 turns of speedup, which can be enough to decide the game.

1. Watch Your Shuffle Timings

If you only get one thing out of this article, it should be this.

shark_bait’s Deck Control article is 7 years old, but still holds up well. Whenever you run out of cards in your draw pile, you reshuffle your deck. All cards in play and in your hand will miss that reshuffle. If you can control when you reshuffle, you should try to do so when your discard pile has good cards and your hand has bad cards. If you have a lot of good cards in play and a lot of bad cards in your discard pile, you may not want to reshuffle at all.

Whether you want to reshuffle or not is very context dependent, which makes it hard to give general advice, but I’m mentioning it because it’s that important to keep in mind.

2. Draw Cards First

Most gainers gain cards to your discard pile, which influences your next shuffle. If you want to draw the card you’re planning to gain, you want to play these gainers before reshuffling, since that will let you play it sooner. Conversely, if you don’t want to draw the gained card, playing the gainer after the reshuffle guarantees you can’t draw that card for 1 cycle through your deck.

In either case, you should play the gainer as late as possible – right before the shuffle if you want to make the shuffle, or at the end of your turn if you don’t want to make the shuffle. Delaying the decision gives you more information – depending on what you draw, you may decide to gain a different card than you intended.

For cards that trash from your hand, play them later rather than earlier. It doesn’t matter when you trash your cards, because you’ve already drawn them. Trashing them now won’t retroactively save the draw you spent. The only thing that matters is that they get trashed before you finish your turn, so that you can stop spending draws on bad cards.

This is most important for Junk Dealer and Upgrade. These cards are cantrips, which makes it tempting to play them as soon as you draw them, but unless you need that card now, you should play your other draw cards first, to see if you can find a better trash target.

3. Card Revealers and Shuffle Timings

Consider Wishing Well. It both draws a card and reveals a card, which triggers a reshuffle if you have fewer than 2 cards in your deck, even though it may only draw 1. Let’s say your hand has a Peddler and a Wishing Well, you have exactly 2 cards in your draw pile, and you don’t want to trigger a shuffle. To get the +$1 from Peddler, you need to play Wishing Well first, wishing for a card you don’t have, then play Peddler to draw the 2nd card.

Similar principles hold for Sentry (reshuffles with < 3 cards), Cartographer (reshuffles with < 5 cards), Patrol (reshuffles with < 7 cards), and others.

4. Unintuitive Discards

If you get hit with a discard attack like Militia, you have to choose the best 3-card hand. Note this may be different from the 3 individual best cards in your hand.

Let’s suppose you’ve built a deck that can usually draw itself every turn. Your hand is:

Village, Smithy, Smithy, Gold, Gold

If you get hit with a Militia, you should discard the two Golds. Sure, Gold makes a lot of money, but if your deck is consistent enough, keeping the draw cards will let you draw through your deck until you redraw the discarded Golds.

Here’s a real world example. It’s early in the game. My draw pile has 2 cards left. My hand is:

Warehouse, Copper, Copper, Estate, Estate

My opponent plays a Militia. I decide to discard the 2 Coppers.

Why? I’m not going to buy anything that costs $2, and because it’s early, it’s unlikely I draw many good cards from my Warehouse. I also know that playing my Warehouse will trigger a shuffle. If I keep my Estates, I can make both Estates miss the shuffle. Sure, the Warehouse misses the shuffle too, but that’s worth it. This was a scenario where the best hand was actually one that had Estates in it.

5. Saving Your Throne Rooms

Some cards are better to copy than other cards. You always want to double the Action that gives you what you’re lacking the most. If you need draw, then Throne Room a Smithy. If you can comfortably draw your deck, save it for a card that gives +$ or +Buy. If you need Actions, then save your Throne Room for a card giving +Actions.

In all these scenarios, it is better to hold onto Throne Room until you know what you need this turn. If you draw poorly, you may need to double a +Cards action. If you draw well, you’d rather double an Action that gives +$.

If you draw a hand of Throne Room and 4 other Actions, then playing Throne Room first is probably wrong. You want to play your other Actions first, to see if you can draw a better target for Throne Room, and then play Throne Room only when you’re at-risk of running out of good Throne Room targets. (Either because you are running low on Actions, or because you are drawing too many Throne Rooms and not enough non-Throne Room actions.)

This logic is especially important for King’s Court – the best target for King’s Court is almost always another King’s Court. Saving King’s Court to the last second gives you the best chances of tripling a King’s Court.

Throne Rooming a Throne Room is usually correct, because it let you play a Throne Room twice while using only 1 action. However, if you have plenty of actions, it’s better to play your Throne Rooms individually. If you do TR-Action1, then TR-Action2, you still get to play Action1 twice and Action2 twice. However, splitting the Throne Rooms gives you more flexibility if you want to play another Action in between the two doubled Actions.


It takes a bit of practice to keep these tactical decisions in mind, but there’s no reason not to do them. With some practice, many of these choices become second-nature, leaving you free to focus on the important strategy questions.

Posted in Articles, General Strategy, Uncategorized | Leave a comment

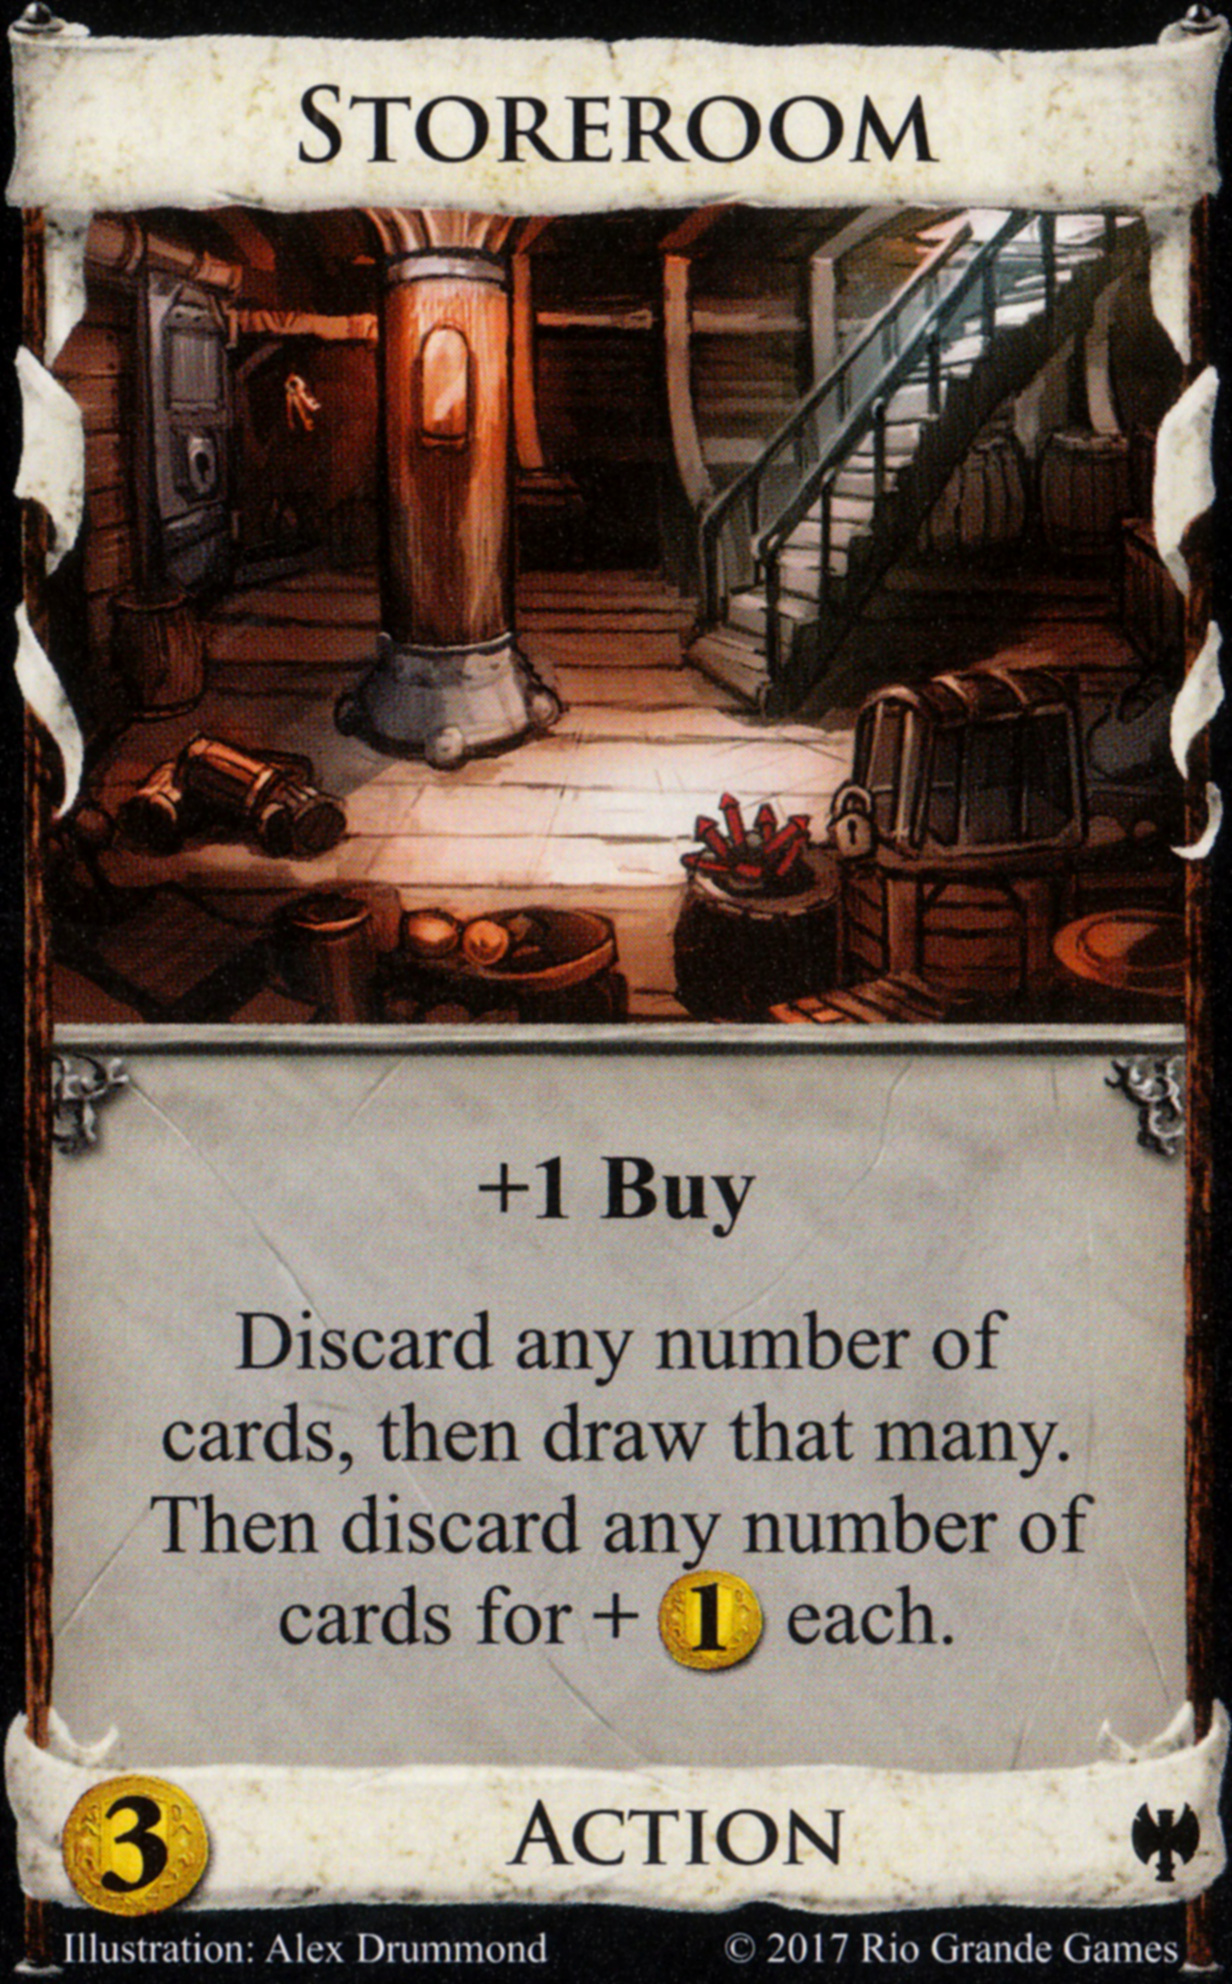
Cursed Village / Storeroom

Cursed VillageStoreroom

How does it work?

Essentially, Cursed Village and Storeroom are a complete engine in themselves – Cursed Village provides the actions and the draw, and Storeroom sifts and provides payload in the form of +Buy and economy. You start with a Cursed Village to get a 6 card hand with +2 Actions, then play Storeroom. Discard to draw cards to ensure you have at least a Cursed Village in hand, then discard everything except one Cursed Village (rarely, also a Storeroom) to get +$4 and +1 Buy. Then you can play Cursed Village to draw 6 new cards, repeating the cycle until you’ve got a ton of Buys and money.

In a theoretical two card kingdom, you’d open Silver / Storeroom, grab Cursed Village whenever you can, and then otherwise grab Storeroom, perhaps adding a second Silver if you’re having trouble getting Cursed Villages into play. It does take a little while to get going – this won’t win any races against Governor, but it’s flexible and resistant to greening. Because of this, the strategy can delay greening until the game state calls for it and win in the long haul. If your opponent starts to green too early, just be patient and let them choke on their stop cards while you sift past them.

Cursed Village followed by Storeroom for full draw lets you see up to 11 cards, making it quite easy to find your next pieces. Because of this large search space, it’s really no problem at all to discard excess Cursed Villages and Storerooms. If you’ve been disciplined about buying several Storerooms, you can discard down to just Cursed Village as you’ll most certainly see another Storeroom on the draw. Your deck ends up shuffling every cycle or two, so those cards you discard for benefit are seeding your next cycle.

There are a bunch of small upsides to this combo that make it work reasonably well. First, you don’t need to be very thin, though modest thinning can help with reliability. Another advantage to this strategy is that it is resilient to most attacks. Discard attacks help it out as Cursed Village draws more on the first play, thus allowing you to see more cards. Trashing attacks are cushioned by the junk cards your deck still has. Junking attacks can hurt after awhile, but the deck is somewhat more resistant to junking than many other strategies. One more small plus is that the Hexes which Cursed Village makes you take are very rarely a big problem – most of them don’t really affect you negatively except Deluded, Bad Omens, or War – and these won’t totally ruin your game necessarily either.

The strategy is helped with support but as payload it mostly stands alone. You can certainly add other terminal payload if the board calls for it, but I would consider another Village for each one of those – you really want to be using Cursed Villages for full draw and Storerooms for full payload, so any Cursed Villages you use to play that Monument or whatever are wasting the card’s draw potential.

What are some pitfalls to watch out for?

As emphasized before, this strategy is not the fastest, so you need to make sure you have time to set it up and keep it going. If something else on the board is better supported, particularly fast strategies, you’re just not going to have the time to get off the ground. The combo unsupported is just okay, not world-breaking or anything.

The easiest play error to make is to force awful shuffles. Remember that you should expect to shuffle about once every 1-2 Storeroom/Cursed Village pairs. This means discarding components for the coin benefit in order to make sure they are in the next shuffle. Once you are using the last of your Cursed Villages, you will want to keep careful track of your deck – you don’t want Storeroom to draw too many cards and force a terrible shuffle. Remember how many Cursed Villages and Storerooms you have to work with, and adjust your decisions as you reach the end of your supply of those cards. All of that said, keep in mind if you’re still buying Cursed Villages, a few of those Hexes mess with the top of your deck, so don’t be afraid to keep a card or two there. It pays off to keep track of the Hex stack and to note when those top-of-deck hexes have or haven’t shown up yet.

How do you support this strategy?

You do want to support this strategy with the other parts of the kingdom, it is certainly not a monolithic strategy and gets much better with certain kinds of support. Here are a few examples – these aren’t meant to be an exhaustive list, just something to get you thinking:

Scheme – Just one Scheme effectively guarantees this combo works out unless you have an extraordinarily fat deck (in which case, two will work) – topdeck Cursed Village, or Cursed Village and Storeroom.

Light trashing, especially nonterminal – Lookout, Loan, Forager, Raze, Ratcatcher… all of these things help. You don’t need to get extremely thin for this combo to work, so you buy fewer than you normally would, but having fewer opportunities to whiff and a smaller handsize for a Cursed Village play are both nice. Even terminal trash-for-benefit like Butcher or Replace can help.

Summon – Summoning a Storeroom guarantees a $5 hand at least, and if you manage to find a Cursed Village in that 10 card search space, you can start off your turn with $4, a Buy, and a Cursed Village ready to draw up.

Artificer – An early Artificer lets you topdeck a Cursed Village or Storeroom and then immediately draw it with a Cursed Village in hand, ensuring you get another cycle.

Tunnel – Get just one on the opening, and you won’t have trouble hitting $5 for Cursed Villages after a few shuffles. Tunnel / Storeroom almost guarantees a Gold gain early on. Don’t get too many Golds.

Alt-VP – These extend the game by giving you more sources of points, and your ample +Buys help with picking up multiples of Silk Roads, Dukes, Castles, etc. The strategy is at its best when you can green for an extended period.

Other sources of virtual Coin – Cursed Village works great with other virtual Coin sources, particularly if they also do something better than what a Storeroom cycle would do. Mystic is particularly nice since it is nonterminal and not a huge problem if it doesn’t draw.

Other Villages – These can be hard to incorporate as they usually compete at cost with Storeroom or Cursed Village, but splashing a Village in or two can help you incorporate other payload, making your engine more well-rounded.

Posted in Articles, Combo of the Day, General Strategy, Uncategorized | 2 Comments

Dominion: Renaissance announced

k0rdril

Dominion: Renaissance, the 12th expansion to Dominion, has been announced. Check out the following announcement blurb from the Rio Grande Games’ website:

It’s a momentous time. Art has been revolutionized by the invention of “perspective,” and also of “funding.” A picture used to be worth a dozen or so words; these new ones are more like a hundred. Oil paintings have gotten so realistic that you’ve hired an artist to do a portrait of you each morning, so you can make sure your hair is good. Busts have gotten better too; no more stopping at the shoulders, they go all the way to the ground. Science and medicine have advanced; there’s no more superstition, now they know the perfect number of leeches to apply for each ailment. You have a clock accurate to within an hour, and a calendar accurate to within a week. Your physician heals himself, and your barber cuts his own hair. This is truly a golden age.

This is the 12th expansion to Dominion. It has 300 cards, with 25 new Kingdom cards. There are tokens that let you save coins and actions for later, Projects that grant abilities, and Artifacts to fight over.

This expansion is currently expected to be released in early October, both physically and online, with previews in late September. As always, previews will be posted to the Dominion Strategy blog when released, so check back here for details as the game’s release approaches.

Discussion on this announcement on the Dominion Strategy Forums

Posted in Uncategorized | 1 Comment

Q&A kickoff and world national tournament

We’d like to start a new type of content here at the DS blog where we take questions from readers and give them to the community to get some answers. We’ll summarize them and post the answers here on the blog. Give us any Dominion-related question and we’ll answer them all to the best of our ability.

If you’d like for your question to be credited to you, you may provide your name. But if you’d rather stay anonymous, no worries; feel free to leave that field blank.

Click here for the question form.


Dominion World Masters at GenCon 2018

For the last several years, the publisher of Dominion, Rio Grande Games, has held a World Masters tournament at GenCon in Indianapolis. This year will be no exception, and the $1000 prize for the winner will remain for this year as well.

Most of the day on Thursday and Friday (August 2-3, 2018) there will be qualifying rounds in the RGG room in the Indianapolis Convention Center — they are free events that you can just walk into and play: if you fare well you could qualify for the later rounds of the tournament and make your way towards the largest prize competitive Dominion has to offer!

Posted in Uncategorized | Leave a comment

Settlers/Bustling Village

This article was written by DeepCyan

The Settlers/Bustling Village split pile is a strange set of cards. To a new player, they seem strong, albeit a little gimmicky. However, once a player gains more experience in building a consistent deck, it’s easy to regard the pile as unreliable and lackluster. While it’s true that the Settlers/Bustling Village pile is highly situational, and quite often a waste of resources to go for, the pile sometimes has its uses. In the presence of the right cards (or more importantly, when certain cards are absent), the Settlers/Bustling Village pile can be the key to creating a consistent, powerful deck in kingdoms that could otherwise not sustain one.


Weaknesses

To understand the Settlers/Bustling Village pile’s inherent failings (and how to work around them), one must simply evaluate the two cards at face value. First, Settlers: on its own, it’s a useless cantrip. With a copper in your discard pile, it becomes a cantrip that gives you money – going off of Poacher’s value as $4 with a condition, albeit a usually negative one, an activated Settlers is, at first glance, a $4 card bought at $2. Not bad, right? Then there’s Bustling Village: on its own, +1 card,+3 actions, the same effect of playing two villages consecutively. Useful, but somewhat mediocre for a 5 cost. If Bustling Village picks up a Settlers, it becomes +2 cards, +3 actions – an even stronger variant of Lost City, which itself is a major power card for any action-heavy deck. If the subsequent Settlers picks up a Copper, then you have +2 cards, +3 actions, +$1, which appears utterly absurd for a mere 5 cost card. In a vacuum, these cards seem perfectly strong, albeit unreliable, but simply buying out the pile brainlessly comes with 2 fatal flaws.

1) To maximize the potential of the pile, you need to keep Coppers in your deck. One of the most important things you can do for your deck is to remove your Coppers and Estates as quickly as you can, though doing so removes Settlers’ only potential benefit to your deck, rendering it a useless cantrip. While this drawback only affects Settlers, which Bustling Villages can still pick up for an effective +1 card, this leads us to problem number 2.

2) The Settlers/Bustling Village pile only reaches its full potential off a filled discard pile. With a thin or empty discard pile, both Settlers and Bustling Villages are rather underwhelming cards. Sure, when you draw all your Bustling villages with a discard pile full of Settlers, your deck will work fantastically, but that’s hardly something you can rely on happening consistently. Furthermore, if you’ve made a deck that regularly draws itself, you’ll likely start your turns with an empty discard pile most of the time, making the pile an even weaker option.

So, knowing these weaknesses, why would this be a pile you’d ever want to go for?


I really need the +3 actions!

On boards with incredibly strong terminals and no other villages, it can sometimes seem tempting to drain the Settlers pile just to get those all-important +3 actions, discard pile benefits be damned. While this is certainly a viable reason to drain the pile, be very careful when going for this. In order to get to the Bustling Village pile, you first need to gain 5 Settlers which, for the most part, will rarely help your deck on their own. While you spend your buys and economy on the Settlers pile, your opponent can happily spend the time simply building up their own deck in anticipation. If you’re not prepared, your opponent can simply buy out the Bustling Villages with his superior deck once you’ve revealed them, giving them free reign of the terminals and leaving you with an incredibly lackluster deck. Because of this, you should usually avoid focusing on piling out the Settlers/Bustling Village pile without the ability to gain settlers both quickly and with minimal expense to your deck quality. Multiple gains are the easiest solution to this, through either +buys or action gainers such as Ironworks.


I can’t trash my coppers…

The Settlers/Bustling Village pile excels in boards with no trashing options. In these scenarios, Settlers permanently retain their Copper-collecting benefit, and you’re more likely to be unable to draw through your deck quickly, letting the Settlers/Bustling Village take cards from the discard pile more often. Sifters such as Warehouse make a trash-less Settlers/Bustling Village board even stronger. Not only can you use Settlers to pick up the Coppers that sifters discard, but you can also pick up Coppers with Settlers, then use Warehouse to effectively swap them for cards you actually want in your hand. Through this, Settlers can help negate the hand-size decrease that most sifters cause. Discard-for-benefit cards such as Artificer and Storeroom are also less costly to play, as you can pick back up the Coppers you discard. A special mention goes to Stables – through Settlers, you can effectively reuse Coppers discarded by Stables through picking them back out of your discard pile, letting you play multiple Stables while mitigating its potential drawback to your economy.


I can’t even draw half my deck…

Being able to consistently draw your deck is hardly a guarantee. In games with junking attacks, bad or no trashing options, and/or no reliable draw or good cantrips, you may end up in a slog – games with slow cycling, bloated decks, and weak economy. In these games, the Settlers/Bustling Village pile will simply be far more consistent, as a filled discard pile means that your Settlers and Bustling Villages are more likely to hit. Sifting cards are also sometimes strong in slogs, which can also work to your benefit since sifters synergize quite well with the Settlers/Bustling Village pile, as discussed earlier.


What if none of the above is true?

Well, the Settlers/Bustling Village pile will hardly be a power card in these sets, but it will almost never be a pile to stay away from. As a cantrip, Settlers can’t necessarily hurt your deck, so if you hit $2 and don’t have anything better to grab, there’s no shame in picking one up. If nothing else, a Settlers and a little bit of luck can definitely be a nice boost in the early game, letting you pick up Coppers from the discard pile as a temporary economy boost or just for more efficient trashing. In 3 or 4 player games, sometimes the Settlers pile will simply run down passively if every player picks up 1 or 2 copies on a dud turn.

In this case, it’s best to treat Bustling village as a somewhat value-for-money village purchase, and a nice pickup if your deck is heavy on terminals. Unless you’re talking about Rats, Dominion is rarely an all-or-nothing game – if you think a Settlers or Bustling Village will be handy and have the buy/economy to spare, you might as well grab a couple.


Conclusion

Overall, the Settlers/Bustling Village pile is an outlier for understanding Dominion boards. Unlike most situational power cards, which require specific combinations of cards to be worthwhile, the Settlers/Bustling Village pile (quite thematically) thrives off of Kingdoms in which basic action types – villages and trashers – aren’t there. Because of this, understanding both when and how to drain the Settlers/Bustling Village pile, and when to ignore it entirely, will make and break the games in which this pile is present.

Posted in Articles, Empires, General Strategy, Individual Card Analysis, Uncategorized | Leave a comment

Overdraw part 2: building around overdraw

In last week’s article we visited the concept of overdraw and explored the most common situation where it is useful — when you can gain a card and play it on the same turn. We’ll finish this two-article series with this week’s addition.


To review, overdraw is the situation where you would draw a card, except your deck and discard are already empty because all of your cards are either in play or in hand.

Drawing your deck is great, especially if there is a particular card you want to make sure to draw and play every turn — Mountebank, Miser, Travellers, etc. It’s great enough that whenever it’s possible, you’ll seriously have to think about going through the trouble to make it happen consistently.

At first glance it appears that if you keep adding cards to your deck that draw nothing, this is inefficient because if you had a card to draw, your turn might be better. While this is true, and you don’t just want to overdraw your deck by a lot without a good reason, there are many good reasons why overdraw can be useful.

The reality is that unless the cards you need to draw are in exactly the right positions every shuffle, a deck that can draw itself exactly without any overdraw will not draw every card on every turn. Adding one or two cards that draw nothing on a perfect draw (i.e. overdraw) is one way to add consistency to you deck so you draw everything more often. This is especially true in decks that have consistency issues to begin with, like draw-to-X decks.

Extra consistency is also a big deal include when you’re being attacked: if I drew my deck this turn, but I’ll get hit by a Militia next turn, the overdraw was wasted now but it might not always be that way. The consequences can be even worse when your opponent plays a junking attack on you repeatedly and you lose control of your deck because you couldn’t stay on top of things. Overdrawing is a great way to prevent yourself from falling behind while you’re being attacked, and can also make sure you play your own attacks consistently. This is especially true in games with more than two players.

You may also run into the situation where you’re overdrawing your deck if you just drew your deck for the first time and trashed your last Estates and Curses. This situation is pretty good, but be careful that you don’t get to this point by trashing Coppers too fast. If you trash some Coppers but continue to overdraw your deck, you may have been better served by keeping the Coppers around to spend for a few turns before getting rid of them. In this situation, you’ll want to plan your next few turns, making sure you can still draw everything and hit the price points you care about to build your deck the fastest.

If you find yourself winning the game by a lot, either due to a lucky draw or maybe a strategy you think is much better than your opponent’s, you may build your deck more conservatively because the main way you can lose from your position is to have too many stall turns — turns where you have a bad draw and are unable to do much of anything. Building your deck to overdraw in this situation, even if you deviate from what you think is the best build path, can be the right play.

Overdraw can be OK in some situations where you plan to add some VP cards to your deck and you would still like to consistently draw your deck.

As long as you have at least one good reason to build a deck that overdraws itself, it’s usually a good idea to do so. Knowing why you’re building for overdraw can help you identify the situations where you want to go for it, versus the times where just drawing most of your deck sometimes is perfectly OK.

Posted in Articles, General Strategy, Uncategorized | Leave a comment

Overdraw part 1: Gain-and-Play

This article was originally written by Titandrake, and was later adapted for the blog. Next week we’ll have the second article in this two-part series.


What is overdraw?

Overdraw is the situation where you would draw a card, except your deck and discard are already empty because all of your cards are either in play or in hand. As an extreme example, consider a deck of 5 Laboratories, nothing else. Your starting hand will be 5 Labs, and none of them will draw any cards, because there are no cards left in your draw or discard. A less extreme example is a deck with 5 Labs, 3 Coppers, 1 Silver. This deck is guaranteed to play all 5 Labs. The first 2 Labs will draw cards, and the remaining 3 Labs won’t draw cards. Both of these decks are overdrawing.

You can calculate overdraw carefully if you want to, but usually you can figure it out on the fly. On a given turn, if you’ve drawn your deck and have extra draw cards left over, you’re overdrawing. You can easily see much you’re overdrawing by looking at the remaining draw you have in hand at this point.

The core principle of overdraw is simple: any time you could have drawn a card but didn’t, you’re wasting a draw. If there’s a way to avoid wasting that draw, you can use it to get more out of your turns. Gainers are the simplest way to do this, because it adds a new physical card to your deck, but there are also other ways to convert extra card draws into resources.

Examples

With the right setup, you can do some explosive things. Here’s an example from a game I played about two weeks ago. At the start of my turn, I had 2 Stonemasons, a Bandit, and tons of overdraw and actions thanks to several Lost Cities and Encampments.

  • Played Bandit, gaining a Gold.
  • Drew Gold with overdraw. Stonemason trashed Gold into Bandit and Plunder.
  • Drew Bandit and Plunder with overdraw. Played Bandit to gain Gold.
  • Drew Gold with overdraw. Stonemason trashed Gold into 2 Plunders.
  • Drew Plunders with overdraw.

So, to recap: in a single turn, I gained and played a Bandit and 3 Plunders, which gave me an extra $6 that turn (not to mention 3 VP). From here, I ran away with the game.


Plaza can convert a draw of a Treasure card into a coin token. If you draw your entire deck, you can repeatedly draw and discard a single Copper to multiple Plazas. letting you get several coin tokens.

Tournament is another big example. With overdraw, a single Province can be discarded to multiple Tournaments, to gain multiple prizes in one turn. It helps that the Prizes you gain can themselves help with triggering the reshuffle needed to get the Province back into your draw pile. I once played a game where it was clear Followers was the most important prize. My opponent got to Province first, and gained Trusty Steed first. I thought this was a mistake, right up to the point where he redrew Province and played a 2nd Tournament to gain Followers too. Gaining Steed first simply minimized the chance he would run out of actions to play the rest of his deck.

In these examples, we are not always using our overdraw on newly gained cards to our deck. Instead, we are using our extra draws to draw existing cards multiple times, and using other card effects to make this useful. This principle applies especially to Market square in games with enough draw to reveal and draw the Market Squares multiple times in one turn.

I’ve focused on the flashy examples in this article, but that doesn’t make the less flashy examples useless. Whenever you’re in a position where you’re about to waste card draw, take a moment, and see if you can gain a small edge by making use of your overdraw. Trust me: it adds up.


There are many other considerations related to overdraw, revolving around the consistency of your deck and when you would want to build to overdraw your deck or not. These will be addressed in next week’s article.

Posted in Articles, General Strategy, Uncategorized | 1 Comment

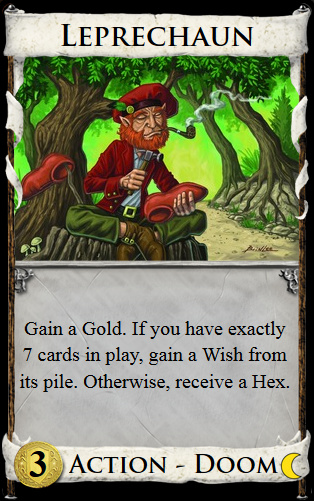
Leprechaun

This article was written by vsiewnar

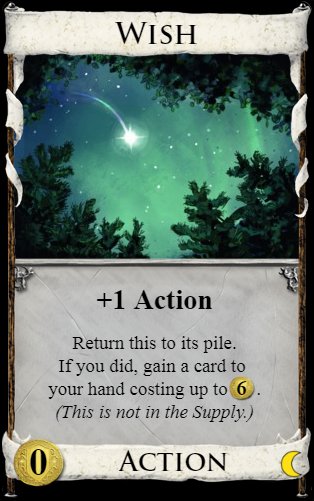
LeprechaunDigitalWishDigital


Reading into the card

Wish is a strong card that is often worth satisfying the exotic condition printed on Leprechaun: you need to play it as the 7th card to gain a Wish (and a Gold). Generally, Wish is the more preferred of the two. However, let us first look at some of the implications of this exotic condition that we divide into 3 parts:

  • Necessary (action) cards
  • Deck control
  • Surplus Actions (different from action cards)

The first implication tells us that we need to have the prerequisite action cards in your deck before even dreaming of gaining a Wish. The simplest example of this is that you need to first have at least 7 actions (one of which is Leprechaun) in your deck. As a trivial example, you need to have 6 Vagrants and a Leprechaun in your deck before you can gain a Wish.

However, there are a few action cards that allow treasures in play (e.g. Storyteller) during the Action phase which often makes Wish gaining easier. Villa also deserves mention here because of its unique ability that gives the player enormous flexibility for putting cards in play.  

The second implication suggests that you also need enough control over your deck to be able to play Leprechaun as the 7th card. Deck control here refers to the ability to both find Leprechaun and to play it as your 7th card. Trashing obviously improves your deck control by both decreasing its size (making finding Leprechaun easier) and increasing the chance that you play 6 cards (and no less or no more) prior to Leprechaun. Thinner decks gain Wishes easier; consider the case where your deck consists of only 6 Vagrants and 1 Leprechaun.

There are other contributing factors to deck control such starting with a large hand (e.g. via Tactician), saving cards for future turns (e.g. Haven, Save) and sifters (e.g. Warehouse, Forum). It is worth noting that even with trashing and having the necessary action cards in your deck, there are some decks that may not have much control over when you play Leprechaun. Examples of these can be found in Herald stacks or decks that use Golem.

The final implication with the 7 card condition is that you often want to play more than 7 cards per turn. For example, you don’t want to forgo playing Laboratories to play a Leprechaun. The way to circumvent this restriction is to create extra Actions (not action cards) prior to the Leprechaun play. The simplest example for this is to play a Village (+1 Card, +2 Actions) prior so that you can play your Leprechaun as the 7th card and continue your turn.

Satisfying all 3 of these implications often means that you will generally be able to gain Wishes and make good use of them.


Tips to gain Wishes

Some action cards are more useful than others when gaining Wishes. From the first implication above, we can construct an example with Storyteller. Using 2 Storytellers with 2 treasures on each one opens up the window for gaining Wish. We only needed to buy 3 action cards here (2 Storytellers and 1 Leprechaun) instead of the usual 7.

Duration cards can be helpful for gaining Wishes since they stay in play for 2 turns. However, if you have too many Duration cards in play, it can make Wish gaining tricky or even impossible. Consider 7 Hirelings in play as a purely instructive example that makes Wish gaining impossible. On the other hand, 2 Caravans both increase your opening hand and give you a head start on playing Leprechaun as the 7th card. Similarly, most Reserve cards can be used to help make Leprechaun be played as the 7th card by calling them at the right time. On the other hand, cards that disappear from play like Madman, Encampment and Wish do not contribute to the number of cards in play. This property can also be helpful in Wish gaining.


Gain Golds/Hexes

There are instances when you may want to use Leprechaun as a Gold gainer. One instance is that the board simply does not have a better strategy on it. Another instance that comes to mind is to quickly get out of debt on a Donate board since most Hexes do not negatively affect you soon after buying Donate. In general, Hexes do not hinder decks as badly when you have good deck control.

However, surrendering to the whims of the Hex pile will often be to your detriment more times than not and you should be prepared for the worst (Poverty, Delusion, Envy are often among the worst) if you plan to consistently play Leprechaun for only Gold.


Conclusions

  • You should only buy or gain Leprechaun for Wishes when you are quite sure that you can gain Wishes with it and not before. This often means satisfying at least the first 2 implications above.
  • Using Leprechaun only for Gold gaining may not be as glamorous as it sounds unless you are very well prepared for the Hexes.
  • Wish is a strong card and often worth the trouble.

Time for Wish

Time is an extremely important resource in Dominion and it is measured in turns. When we play, we try to do as much as possible in as little time (turns) as possible. Gaining Wishes often requires a few turns of setup both through buying action cards and increasing your deck control i.e. it is a time-intensive process. Consequently, fast strategies such as those involving Rebuild, Governor or Butcher may simply outpace your attempts to build a deck that gains Wishes consistently.

In games where there is enough time to gain Wishes, you will probably find yourself in either the mid-game or the endgame. During the endgame, you will probably use your Wish for cards with an immediate payoff like Duchy or Gold. During the mid-game, you will probably wish for cards that will give a greater payoff than Duchy or Gold over the remaining time left in the game. Examples of these are gainers (e.g. Artisan), attacks (e.g. Militia, Jester) or cards that help consistency (e.g. Village, Smithy).


Gold flood

There is also the issue of the Gold injection into your deck everytime you play Leprechaun. As you may know if you have played with decks that use Jack of all Trades (Silver injection) frequently, the treasure flood needs to be addressed. You can either build your deck with enough draw or trashing to account for the extra Gold or be prepared to deal with an increasingly inconsistent deck that will stall on treasures (ideally Golds). Dealing with an inconsistent deck isn’t necessarily bad; however, it helps if you are able to anticipate this and plan accordingly.

An additional drawback of the decrease in deck consistency is that it makes less likely to gain Wishes in subsequent turns. Even if you are able to draw all of the Gold from Leprechaun, you have to deal with a deck that is becoming increasingly large. This means that finding your Leprechaun to play as card 7 becomes more difficult. Using cards like Forager or Butcher for trashing the Gold seems to be the best way to deal with the Gold flood if you want to maintain your Wish gaining consistency.


Gain and play

In general, Wish is a very good card and needs the exotic condition on Leprechaun to balance its power. Wish highlights the strength of gaining and playing a card in the same turn which is regarded as a powerful ability of Dominion decks. In most cases, it is possible to gain and play the Wish in the same turn which is an even stronger effect.

Wish is powerful for a couple of reasons; the first is its flexibility. Wish can be used whenever you opt to use it mostly because it does not cost an Action to play. It can be used at the beginning of your turn to ensure that you have a full turn. It can be used midway through your turn to ensure that you make it through the rest of your deck. It can be used at the end of your turn to gain whatever you feel best (attacks, gainers, points, treasure etc.).

The second reason is that the gained card from the Wish is immediately put into your hand for use; you don’t have to draw the card from your discard pile or even from the top of your deck i.e. you don’t have to spend any additional resources to put the gained card into your hand.  

You usually gain only one Wish per turn barring Throne Room and its variants. This means that Leprechaun will usually gain at most 2 cards when thinking about ending the game on piles.

A final note on Wish is that cost reduction makes it possible to gain Provinces or even Colonies.


Conclusions

  • Assess whether there enough time to build a deck that gains Wishes. If you can, you may find yourself in either the mid-game or the endgame with some Wishes.
  • The Gold gain affects your deck’s consistency which includes your ability to consistently gain Wishes. Trashing the Gold is the best remedy.
  • You usually only gain one Wish per turn so it is easy to track the number of gains both you and your opponent have.
Posted in Articles, General Strategy, Individual Card Analysis, Nocturne, Uncategorized | 5 Comments