The Penultimate Province Rule

ProvinceThe most important — and the most dangerous — Province in the supply is the second-to-last one.  Many games have been lost by buying this Province instead of a Duchy.  Yes, you read that right.  A Province instead of a Duchy can often be a mistake.

How is this possible?  Let’s take a look at the simplest (and most common) scenario involving this rule: a 2-player game between Alice and Bob (Alice being Player 1) that’s coming down to the Province split.  Assume (for now) that there are no +Buy cards, and no Remodel/Workshop/etc. cards that would allow a player to gain multiple Victory cards per turn.

The Provinces are 3-3 thus far.  On Alice’s turn, she gets a nightmarish draw and is only able to purchase a single Estate.  Bob jumps for joy: he’s drawn $8 and can buy the second-to-last Province to go up by 5.  But doing so would be a critical mistake.  It allows Alice to end the game with a win by buying the last Province on her turn.

Instead, Bob’s correct move is to take a 2VP lead by buying a Duchy.  Now Alice is in the same position as Bob was last turn: forced to buy a Duchy instead of possibly letting Bob split the Provinces for the come-from-behind victory.

Note that this rule didn’t apply to Alice on her Estate turn.  In a tied single-buy game, when you are able to buy the second-to-last Province, you always should, because you are then almost guaranteed not to lose.  In order for your opponent to win, he’d have to counter with an unanswered Duchy, and then the last Province; even if you don’t grab the other Province, the odds that you can’t match your adversary one-for-one with the lesser Victory cards are very low.

Note also that if Alice had gotten a Duchy on her Estate turn instead, meaning Bob can only tie Alice with his Duchy, then he should buy the Province instead.  Intuitively, this can be rationalized by the fact that if Bob chooses to tie Alice, he is at a significant disadvantage: in tie games where Alice goes first, Bob normally only can win if he can get both of the last Provinces, since it’s unlikely that he can take a lead going into a 4-4 split.  In other words, he’s a little more likely to draw, but much less likely to win; he may as well take advantage of his $8 and hope Alice can’t finish him off.

To summarize, the Penultimate Province Rule states:

If you are trailing, do not buy the second-to-last Province if you can instead purchase lesser Victory card(s) to take the lead.

Naturally, like all rules, the PPR is subject to exceptions.  Understanding these is key to successful 2p endgame play.

First, note that in practice the PPR operates slightly differently for Alice and Bob (P1 and P2).  On Alice’s turn, if she buys the second-to-last Province when both players are tied, she is essentially inviting a draw.  But if Bob buys the second-to-last Province in a tie game, he is actually close to forcing a win: Alice cannot buy the last Province for a draw because she will lose on turns.  It’s an extremely powerful move, and as Alice you should seek to avoid such a situation (perhaps via +Buy cards, as below).

Second, the PPR also depends on your relative deck strengths.  Against an opponent whose deck has more future potential than yours, you should not avoid the penultimate Province and prolong the game, but rather take advantage of the full power of your deck now.  For instance, if you have been Salvaging and Remodeling your Golds into Provinces, and your opponent is running a Hoard/Vault/Trade Route deck, then avoiding the second-to-last Province dooms you to a battle of attrition you cannot possibly win.

Third, as briefly analyzed above, when the only chance you have of winning (or drawing) is to claim both of the last two Provinces, you should absolutely just go for broke.  This includes situations where you can only tie your opponent by avoiding the penultimate Province.  Here, you must take the gamble that your opponent won’t win the game next turn, since if your opponent can buy her fifth Province she will almost certainly win anyway.  This commonly occurs when the Provinces have split 4-2, or when your opponent has such a substantial Duchy/Nobles/VP token lead that you will inevitably lose on a 4-4 split and must go for the 5-3 instead.

There is one exception to this “exception”: in Colony games, it is not necessarily true that you will always lose if your opponent gets 5 Colonies, since it is sometimes possible to win by establishing a major advantage in Provinces and/or Duchies.  For instance, in this game, on turn 20 I draw $11, but the Colonies have split 4-2 in favor of my opponent and the Provinces are 2-2 for each of us.  So I choose to buy a Province/Trade Route instead.  He (correctly) takes the second-to-last Colony, and on my turn 21 I stock up on Provinces/Duchies/Estates, such that I now trail by 9 points with one Colony left.  In the next two turns, we each get two Duchies, and on the final turn I take the last Colony for the win.  It was incredibly unlikely that I could pull it off (though I was helped by the fact that my deck had untapped future potential — as described above — and Trade Route), but my victory was even less likely if I had gone for both Colonies: the chance I could get both was low, and even if I did, he could buy Provinces in the meantime to win even if I got to the 4-4 Colony split.

Fourth, the PPR becomes rather more volatile with multiple buys and/or gains.  It isn’t sufficient to buy the second-to-last Province to take a slight lead; rather, you must buffer your lead against the possibility that your opponent is capable of multiple VP buys on her last turn.  For instance, although Bob can normally safely buy the second-to-last Province in a tie game (and in fact often force a win in a single-Buy game), if Alice has multiple Buys, she might be able to sneak out the win with a $10 Province/Estate buy.  There’s no really good way to defend against this except observing your opponent’s deck.  Past performance is usually a good indicator of future potential; see how many Golds (or how many +Buy cards) have gone by since the last reshuffle, and how many more can be drawn.  Certainly Duration cards (Tactician in particular) can give you a strong hint as to the power of the opponent’s next hand.

A special case of this principle is when both you and your opponent are capable of gaining 2 Provinces at once.  For example, with 4 Provinces left, if you are slightly behind, you might hesitate about buying the double Province if you believe your opponent is going to double Province for the win.  This is especially pertinent in Tactician games.

Fifth, the PPR becomes considerably more complex with Remodel, Expand, Forge, Salvager, or any trash-for-benefit card.  Similar to Tactician games, you have to watch out for double-Province gains: Remodel can turn a $11 hand into two Provinces, and it’s much easier to draw $11 + Remodel than $16.  But more importantly, it’s even easier to draw $8 + Salvager + a Province.  If, in our first example, Bob blindly follows the PPR to take the lead with a Duchy, Alice can simply buy one of the Provinces and use one of her Provinces in hand to trash Bob’s next Province out of the supply (metaphorically).  In other words, just because there are two Provinces left doesn’t necessarily mean you’ll get a shot at one of them!

Finally, the PPR is difficult to implement in games that involve substantial amounts of VP chips.  The ability to gain an extra 4-10VPs while buying the last Province places such games in the same category as +Buy games, except most +Buy games don’t feature players able to buy a Province + 3 Duchies at once.

The real takeaway from all of this is that endgame play is not simply about buying the biggest green card you can.  There’s usually a very limited number of ways the Victory cards can split; good 2p endgame play depends on being able to manipulate the game state such that the most likely possible endings are in your favor.

Sample games

A canonical example of the Penultimate Province Rule.  On Turn 13, I am down by 2VP with the Provinces split 3-3.  With $8 in hand, I go for a Duchy and Estate rather than a Province, and pull out the victory as a result.

An example of when buying the second-to-last Province is OK, since when I buy it (on turn 13) I hold the lead.  My opponent is forced to “Duchy-dance” with me for a while, which is inevitably unsuccessful.

An example of when I need to buy the second-to-last Province, because my only hope of winning or drawing is to get both of the last Provinces.  I already have a substantial lesser Victory lead so that when I do get to 4-4 Provinces, his lesser VP buys in the meantime aren’t enough to overtake me.

An example of when P2 errs in buying the second-to-last Province in a tie game: although it is a very strong play in single-buy games (because P1 cannot end in a draw without losing on turns), it is suicide in multi-buy games if P1 is able to buy something else along with the final Province.

Posted in Articles | 27 Comments

CouncilRoom.com: Popular Buys

We’ve added (and are continuing to refine) a major new feature on CouncilRoom.com: Popular Buys.

By default, it provides static stats about Isotropic’s population as a whole; you can see, for instance, that Fishing Village is the most popular* card in the game — even more so than Province or Colony!  In fact, Caravan and Nobles are both also more popular than any Victory or Treasure card.  At the same time, poor Chancellor wins the prize as the least popular card in the game.  Even Coppers and Curses are bought more often than Chancellor.

*To be precise, this ‘popularity’ is defined as the percentage of decks in which at least one copy of that card was gained. Technically, this is the number of players who bought or gained at least one Fishing Village in a given game divided by sum of the sizes of games where Fishing Village was available.

This “popularity” data is especially interesting when compared to “Buys”, which is a rough average of how many of each card each player buys.  Unsurprisingly, non-terminals and Victory cards top the list; the highest terminals are Goons, King’s Court, and Bridge, which makes sense, since they all thrive when combined with each other.

In addition, “win rate given buy” provides a rough proxy of a card’s strength.  Naturally, expensive cards tend to top the list, but so do many of the $5 attacks, as well as several Alchemy cards.  Interestingly, Copper and Curse also do well, since if you’re buying them, you usually have a pretty good reason.

Most exciting, however, is the per-player data on that page.  You can combine frequency of purchase, win rate given purchase, and win rate given availability to identify individual strengths and weaknesses; for instance, theory buys Lighthouse and Conspirator fairly often, but does quite poorly with them.  rrenaud‘s long and futile fascination with Talisman reflects on his page; Obi Wan Bonogi, the top player on the leaderboard, shows a similar weakness for Quarry.  Both, however, excel in sets with Vineyard, probably indicative of a love of Action-oriented games.

We hope you find all this data useful (and possibly educational)!  If you have any suggestions, please let us know either in the comments or on the CouncilRoom uservoice page.

Posted in Dominion Stats | 57 Comments

Guest Article: Annotated Game #6

The following guest article is written by Jeroen Aga (Geronimoo on Isotropic).

(Monday’s preview)

Loan, Watchtower, Bridge, Militia, Wharf,
Lookout, Workshop, Envoy, Thief, Harem

Annotated Game #6

(Click for enlarged link at dominiondeck.com)

This is a 2-player game played between me [Geronimoo] and crduemling. The log is available here (spoiler alert!). Continue reading

Posted in Annotated Games, Dominion Stats, Guest Articles | 68 Comments

Annotated Game #6 Preview

Below is a 2-player game (not played by me) on Isotropic, without Colonies or Platinums.  I will post the annotated game on Wednesday, March 23.  You’re welcome to comment on the set (how you think players should open, what cards to go for) and try it out for yourself.

After you’ve decided on a strategy, there’s a special bonus question for this game: suppose your opponent opens Thief.  How should this affect your play?  How should the Thief player play in order to optimize his strategy?

Loan, Watchtower, Bridge, Militia, Wharf,
Lookout, Workshop, Envoy, Thief, Harem

Annotated Game #6

(Click for enlarged link at dominiondeck.com)

If you have interesting sample games that you’d like to submit for annotation, we’d love to hear about them. Criteria for annotating games include:

  • Reasonably skilled play by both sides
  • An interesting set where the Kingdom cards are important (as opposed to Big Money Smithy games)
  • Diverging strategies taken by both players, especially in terms of openings
Posted in Annotated Games | 56 Comments

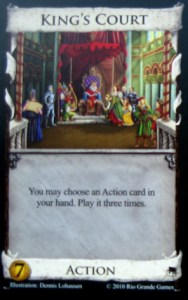
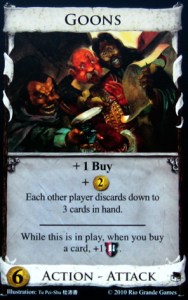
Combo of the Day #24: King’s Court/Goons/Masquerade

This is the nastiest combo in Dominion.

The key to the combo is that you trash down to a four-card hand of King’s Court, King’s Court, Goons, and Masquerade. Playing King’s Court – King’s Court – Goons reduces your opponent to 3 cards; now, playing a (Kinged) Masquerade forces him to pass you a card.  But since you have no more cards in hand, you can’t pass him anything, but you can still trash the cards he gives you.

Essentially, what this combo does is trash three cards out of your opponent’s deck per turn, while starting him with a 0-card hand each turn.  Played consistently, you can force your opponent into a 0-card hand every turn while you empty some non-terminal piles for VPs.  Eventually, all the cards in their deck will be trashed.

There are several things that can substitute for Goons.  Any discard-down-to-three attack will work, but Goons is the best because it allows you to score points without having to buy green victory cards .  With Militia, for example, the worst case scenario is that you’ll be “resetting” the game, though of course you have a massive advantage since you have cards in your deck and your opponent doesn’t.  Outpost is another way to get in enough plays of Masquerade to trash your opponent’s hand, and has the added benefit of being unblockable by reactions.

Note that your deck doesn’t have to be just those four cards: cantrips (like Caravan or Pearl Diver) are very helpful in this setup because they allow you to have some KC targets for explosive draw, are cheap, and are good Masquerade fodder (rather than being forced to pass away a King’s Court).

The combo, however, can be stopped cold in a couple of ways:

  • Reactions will stop the discard attack.  You still lose 3 cards per turn, but it’s nowhere as deadly.
  • The combo does not work in multiplayer, unless your idea of victory is to destroy the person to your left and no one else.
  • It is countered if your opponent can somehow hide his VPs on a Native Village mat or Island mat.
  • The cards of the combo themselves are often a counter.
    • King’s Court enables crazy explosive megaturns: by the time your pin is set up, maybe he’s already used KC/Bridge to empty the Provinces.
    • Goons slows the pace of the game, taking you forever to get those King’s Courts, and by the time you start getting it ready he might have already piled out and ended the game.
    • Masquerade itself is a counter: while you are trashing down to a small deck of very valuable cards, you are very vulnerable to being forced to pass a valuable card to your opponent.
  • Duration cards can help evade the pin: drawing only 5 cards from your Tactician is a bummer, but at least it gives you options.
  • And even though your opponent has a 0-card hand every turn, it’s still possible for him to buy out the Curses, and that might end the game on piles.

Really, this combo highlights the power of King’s Court more than anything else.  Just like King’s Court – King’s Court – Bridge – Bridge – Bridge, it’s a multiple-card combo that is devastating once pulled off.

Posted in Combo of the Day | 74 Comments

Annotated Game #5

(Friday’s preview)

Cellar, Moat, Masquerade, Mining Village, Quarry,
Courtyard, Pawn, Bishop, Monument, King’s Court

Annotated Game #5

(Click for enlarged link at dominiondeck.com)

This is a 2-player game played between me and DG. The log is available here (spoiler alert!). DG and I are relatively evenly matched; prior to this game, we were 8-8, and currently 14-14. Continue reading

Posted in Annotated Games | 19 Comments

Annotated Game #5 Preview

Below is a 2-player game I played on Isotropic (without Colonies or Platinums).  I will post the annotated game on Tuesday, March 15.  You’re welcome to comment on the set (how you think players should open, what cards to go for) and try it out for yourself.

Cellar, Moat, Masquerade, Mining Village, Quarry,
Courtyard, Pawn, Bishop, Monument, King’s Court

Annotated Game #5

(Click for enlarged link at dominiondeck.com)

If you have interesting sample games that you’d like to submit for annotation, we’d love to hear about them. Criteria for annotating games include:

  • Reasonably skilled play by both sides
  • An interesting set where the Kingdom cards are important (as opposed to Big Money Smithy games)
  • Diverging strategies taken by both players, especially in terms of openings
Posted in Annotated Games | 40 Comments

PAX East

I’ll be attending PAX East this weekend.  You’ll probably spot me at at least one of the Dominion tournaments, grumbling about having to play 4-player base Dominion.  Email me if you’re interested in meeting and playing some glorious pure 2-player games.

The blog schedule should (mostly) be uninterrupted; there’s an amusing Annotated Game coming up, with a preview tomorrow and the actual game probably sometime on Tuesday.

Posted in Uncategorized | 10 Comments

Basic Opening Probabilities

This post analyzes opening probabilities for Dominion.  It assumes that you purchase two cards that provide +$2 on Turns 1 and 2, classifying them into “Silvers” or “terminal Silver equivalents” (e.g., Chancellor, Cutpurse), and calculates the probabilities of various Turn 3 and Turn 4 combinations.  There is also a brief section on Chapel probability. Continue reading

Posted in Articles, Dominion Stats | 36 Comments

Building a +Actions/+Cards Engine

There’s two main ways to make your hand better in Dominion: either have good cards, or have a lot of cards.  +Actions/+Cards subscribes to the latter philosophy; it’s one of the fundamental strategies in Dominion.

In descending order of importance, a good +Actions/+Cards engine depends on the following ingredients in the set:

Good card-drawing

“Good” is usually defined as 3 cards or better.  Wharf is the primary exception: its +2 Cards on this turn and the next is simply too strong to ignore.  In addition, Ghost Ship and Witch are attacks so strong that you’ll usually want to play them as much as possible; in that case, adding a Village or two can be a nice bonus.  But you shouldn’t otherwise structure your primary strategy around a card that draws only +2 Cards; for instance, trying to build around Shanty Town/Moat just isn’t going to get you anywhere.

Only two cards do better than +3 Cards: Envoy and Council Room.  Both are quite good; Envoy just requires that you build some redundancy into your engine, while Council Room’s primary drawback is alleviated somewhat if your opponent is playing a similar strategy (giving one extra card is not that big a deal if they’re drawing their whole deck anyway).

Of the four +3 Cards, Nobles is usually the most popular because it doubles as both +Actions and +Cards (and gives 2 VPs to boot!).  On the other hand, Rabble and Torturer are much more powerful; Torturer in particular leads to extremely swingy games, since whoever gets their chain going first tends to dominate thereafter.  And as CouncilRoom graphs demonstrate, Rabble’s attack isn’t that great early on, but when chained it’s an incredibly mean late-game attack.

Library is a special case: since the point of most +Actions/+Cards is to chain them all together, it’s only good with disappearing +2 Actions, or some way of getting back down to a small handsize (e.g., Vault/Library). Otherwise, you’re limiting yourself to playing around one Library per turn, which can be good in a Big Money-esque strategy, but isn’t really much of an “engine”, so to speak.

Good +Actions

Most of the +Actions cards are pretty interchangeable.  You can split them into two categories: those that draw a card (City, Village, Bazaar, etc.), and those that don’t (Nobles, Festival, Native Village, University, Fishing Village).  Obviously, all else being equal, you’d prefer to draw a card over not drawing any, but the cards that don’t draw provide some kind of benefit (VP, +Buy, cheaper, gaining a card up to $5, or just being obscene).  The exception is Shanty Town, which is a pretty terrible source of +Actions for a +Actions/+Cards engine, since the whole point is to draw it with other Actions.

Though technically an ideal deck has about the same number of +Actions as +Cards, you typically want a bit more +Actions as a safeguard against drawing dead +Cards; it’s much better to draw a hand full of Festivals than a hand full of Smithies.  Moreover, in an Action-filled deck, you really can’t get away with playing a “blind Smithy”, since you’d be mostly drawing dead Actions rather than Treasure.  This is why Fishing Village is easily the best source of Actions for a +Actions/+Cards engine: though it doesn’t draw a card, its benefit lasts for two turns and basically guarantee that you won’t ever be lacking for Actions.  (Just be careful not to lose all of them in the shuffle, because of its unusual cleanup rule shared with other Durations.  For instance, if you needlessly trigger a reshuffle on the turn where your Durations are active, you lose the benefit of the FVillages for another deck cycle.)

+Actions that also give Coin are extremely helpful; one of the common pitfalls of building an Action-oriented engine is forgetting to buy Treasure as well, and ending up with a self-drawing deck that still can’t buy Provinces.  At the same time, over-investing in Treasure actually hurts your deck, because it clogs up your engine and reduces the likelihood of drawing the critical Actions.  (This is why Hoard is not a great choice for most +Actions/+Cards engines.)  So cards like Bazaar are nice for meeting two needs at once.

If you’re desperate for Actions, Throne Room/King’s Court can serve as an emergency source: either by playing them on a non-terminal, or by stacking them on each other, and then on a +Cards.

+Buy

The most often overlooked of the key ingredients, and the reasoning behind Council Room, Worker’s Village, Wharf, and Festival.  Massive draw engines take a little while to set up; by the time they kick into high gear, you’ll often end up drawing so much money that a single Province is a waste.  In addition, your engine cards are cheaper, and you’d rather stock up on them than buy a single large Treasure.  For instance, while constructing your deck, you’ll often prefer a Village and a Smithy over a Gold at $7.

Unfortunately, cards like Woodcutter are a bit of a liability, since any non-engine terminal has a tendency to clog up your deck.  This is where Worker’s Village, Council Room, Wharf, and Festival come in: they’re the only engine cards that simultaneously address the need for +Buy.  In their absence, Markets (as non-terminal sources of +Buy) are a good substitute, though each Market purchase does represent a missed opportunity for another engine card.

Trashing

Sometimes this isn’t necessary: see, e.g., games with Fishing Village/Council Room, where investing in trashing cards (like the Upgrade) only slows you down since you’re drawing your whole deck by Turn 8 anyway.  (This is especially true if Warehouse/Cellar is in the game, as they’re only useful if you have dead cards.)  But for all non-obscene +Actions/+Cards combos, an early Chapel greatly optimizes your engine by weeding out the useless cards. (Of course, you should be mindful not to over-trash; as noted above, it’s easy to focus so hard on Actions that you finally draw your whole deck only to realize that you don’t have enough money in your deck to do anything.)

Warehouse/Cellar

Or really, just anything that can deal with dead cards.  Vault/Secret Chamber are good options, and Coppersmith could be considered in this category as well.  But the ideal card is Warehouse: when your deck depends so heavily on a few critical cards, it’s definitely worth having one fewer card in order to make sure you draw what you need.  They’re invaluable early on if you have no trashing, and they’re the only things that can keep an engine deck running through the late game green saturation.

Throne Room/King’s Court

More optional than the other components, but it’s a natural fit.  Since the power of your deck comes from Actions, it’s only sensible that Action-multipliers would thrive.  Of course, it works best when your engine cards provide ancillary benefits: Throne Rooming a Smithy is not nearly as fun as Throne Rooming a Torturer.  And as mentioned above, Throne Room and King’s Court can serve as emergency sources of +Actions.

Other Factors

+Actions/+Cards engines are affected much more severely by Cursing attacks than handsize reduction.  This makes sense when considering the quality v. quantity dichotomy mentioned at the beginning; being Militia’d isn’t that big a deal when you only need a few key Actions in order to draw your whole deck, but clogging up your deck with Curses really gums up your engine and makes it nigh-impossible to chain your cards together.

Finally, +Actions/+Cards engines take a little while to really get going.  They often fall behind faster strategies while you try to draw your engine cards together; in these situations, it’s important not to overreact, since you’re giving up the biggest advantage of your strategy if you panic and buy a premature Province.  A good chain can often end up buying multiple Provinces at once to mount a comeback; just be careful not to fall too far behind, especially when against cards like Hoard or Vault that allow a Province-buying opponent to maintain reasonably strong buying power.

Posted in Articles | 18 Comments