The Five Best $4 Cards, 2011

Disclaimer: Dominion does a really great job of balancing its Kingdom cards.  Every card has some situations where it shines, and some situations where it doesn’t.  Nevertheless, some cards just end up being flat-out better than others, either because they are more useful more often, or just ridiculously good when they are useful.  Don’t expect this list to be objective.

Qvist has started a community card ranking project.  The community’s $4 card ranking can be found here.

The $4 cards have been getting better and better, with quite a few cards on this list from the most recent expansions.  As a result, many fine cards are excluded: Envoy / Smithy, Caravan, Militia, Gardens, Horse Traders, Salvager, etc.  But then again, this is the best list, not the fine list.  Onto the Honorable Mention:

Young Witch

Dominion: Cornucopia

Honorable Mention: Young Witch

Young Witch is the ideal Honorable Mention, because its power level is entirely based on the bane.  Sometimes you’ll end up with Develop as the bane, in which case Young Witch is nearly a Sea Hag (and sometimes better), and you ignore it at your peril.  And sometimes Scheme is the bane, in which case the Young Witch instantly becomes the worst card in the game.

Young Witch is incidentally a convenient illustration of why so many fan-made reaction cards are terrible: when you have a great reaction, what actually ends up happening is that no one buys the Attack in the first place.

As a bonus, it has nice synergy with Tunnel, and even itself (since you’ll have Curses to be discarding).

Monument

Dominion: Prosperity

5. Monument

Consistently underrated, the quiet Monument isn’t sexy like Tournament or obvious like Sea Hag.  But the power of consistently earning 1VP makes it a monster in non-engine games: in an average money game, you might end up shuffling around 4-6 times, and once you get to that 4VP threshold you’re essentially forcing your opponent to split the Provinces 5-3 in his favor.  Add in some method of repeatedly playing Monuments, like Hunting Party or Fishing Village, and Monument experiences a quasi-Goons effect, where your engine has to be designed to keep up in both green cards and VP tokens.


Remake

Dominion: Cornucopia

4. Remake

We have already commented on how strong early game trashers are when they also improve your deck, and Remake is no exception.  It ranks along with Chapel as one of the premier early game trashers: not only does it turn your Estates into Silvers (or Fishing Villages), it also has the added benefit of upgrading your other early game utility cards (usually $4’s) into more useful cards (usually $5’s).  No other card is faster at improving your deck’s average card value than Remake.

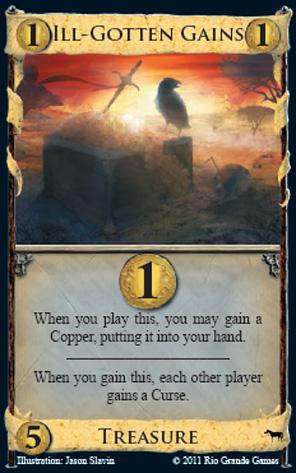
Remake tends to work really well with the later expansions: it encourages diversity, which powers up Menagerie and Fairgrounds, and it works quite well with many of Hinterlands’ on-gain cards, like Ill-Gotten Gains.

Tournament

Dominion: Cornucopia

3. Tournament

There are superb $4 cards (like Salvager), there are elite $4 cards (like Monument and Remake), and then there are transcendent $4 cards.  Tournament kicks off the A-list with probably the most unique power (however that may be defined) in the game.  It’s no coincidence that the five highest “Win Rate With” cards are all Prizes, since they are some of the best Actions in the game.  Winning a Tournament not only gets you one of these awesome Prizes, it denies it to your opponents, puts it on top of your deck, and heck, usually draws it for you to play right there.  Did I mention Tournament is usually also a $4 Peddler?  It’s like a Treasure Map that doesn’t suck when it doesn’t work.

The only thing that balances Tournament out is that its Prizes often come right around when you need to be buying green cards, so by the end you’ll just be taking the Duchy.  But winning an early Tournament is a massive advantage for someone who is probably already doing quite well.  You don’t always want to open with Tournament, but you ignore it at your peril if there is any kind of help for it.

Jack of All Trades

Dominion: Hinterlands

2. Jack of All Trades

Jack of All Trades debuts at #2 as the premier Big Money assistant.  DoubleJack reigns supreme over most other money strategies, especially when attacks are introduced.  Any set that doesn’t have a very strong engine setup is going to struggle to do much better than DoubleJack.  The fact that it trashes, sifts, fills you up to 5 cards, and gives you free Silvers makes it embarrassingly easy to do well playing just an algorithm.

The flip side is that, like most money strategies, it can be beaten by precisely constructed and executed engines.  And in those engines, you don’t want Jacks at all.  Smithy and Wharf and all the other Big Money assistants have some role to play in an engine; Jack actively hurts most engine setups.  It doesn’t integrate into an engine: it only works well on its own, in its one well-defined role.  Which is vaguely ironic for a card named Jack of All Trades.

Sea Hag

Dominion: Seaside

1. Sea Hag

Jack accelerates the game; Sea Hag sits on it.  It loses heads-up battles against Jack or Masquerade, but it’s a curser, and it’s the fastest cursing Action you can buy.  It really doesn’t get much meaner than slamming that Curse on top of your opponents’ decks.

$4 is as cheap as a cursing Action can probably get without leading to degenerate games, so Sea Hag looks like it will remain the primary early-game curser for quite a while.  It just goes to show how strong cursing attacks really are in Dominion: Sea Hag provides no benefit to your deck and is completely useless after the Curses are empty, but is nevertheless still one of the strongest cards in the game.

Posted in Rankings | Tagged , , , , , | 32 Comments

The Keys to Big Money: Money Density and Opportunity Cost

This is a revised version of a guest article by WanderingWinder, originally posted in the forum: Part I, Part II. WanderingWinder was a semifinalist in the 2011 DominionStrategy.com Championships.

In a big-money kind of deck, there’s really two concepts you need to be aware of: the first is money density, the second is opportunity cost.

Money Density

Money density is the average value in coin production of cards in your deck: i.e., Copper produces one, Silvers two, Estates and such 0. It’s important to keep in mind that, based on 5-card hands, you need a money density of 1.6 to buy a Province and 2.2 for a Colony. You need only 1 for Duchies or Dukes, and less for things like Gardens, Islands, Tunnels, whatever.

Calculating your money density is very simple if you know what’s in your deck: add up all the production values of the money, divide by the total cards in your deck. So for your initial deck, you have 7*1 for the Coppers +3*0 for the Estates, all divided by the 10 total cards for a money density of 0.7.

Branching out slightly, you probably want to buy at least one card that’s not a Silver or Gold or Province or Duchy, right? How do other cards fit in to money density? Well, the simplest are cards like Woodcutter. Woodcutter (at least, the first one) provides an obvious benefit over Silver in that it gives you a buy. But, for all intents and purposes, it still counts as $2 in your money density.

There’s another very simple, very common kind of card to deal with when making your money density calculations: cantrips. (I’m using ‘cantrip’ here to define any kind of card that always draws at least one card and gives at least one action back to you). Cantrips are what I call, for the purposes of money density calculations, ‘virtual cards’. What I mean by that is, because they replace themselves totally in your hand, they don’t count toward the total count of cards which you’re using as the denominator for your money density calculations. So, if you buy a Village and a Militia with your two starting buys (not, by the way, a good strategy), you have 7 Coppers, 3 Estates, 1 Village, 1 Militia, producing 7, 0, 0, and 2 money respectively and with a total of 7, 3, 0, and 1 cards to count against your deck total. Your total money density is therefore 9/11 = .818181…..

Further expanding on that, if you get a slightly more interesting (in this respect anyway) card, the Peddler, into your deck, you’ve increased your effective deck size by 0 (because it’s a cantrip), but because it produces $1 extra, you’ve increased your buying power by one. If you could add Peddler to your starting deck, you would have $8 total money in 10 effective cards for a density of $0.8.

Okay, once you get that down, you need to think about terminal collision. I think that most of you know that buying only Treasures and VP won’t get you very far in terms of success (or fun). So you probably want to buy some terminal Actions, and by the end of the game, you probably want to buy more than one. This creates some chance that your terminal Actions will collide. The big key to playing Big Money decks is weighing out the benefits that Actions provide you with versus the chances that they collide. Of course, with non-terminals, you don’t have to worry about that, but very often, you’re better served by taking the risk at some point.

Fortunately, calculating the chances for terminal collision isn’t too hard in general, you just have to remember to use your effective deck size rather than the actual number of cards in your deck. As for figuring out which benefits are worth it… well, I’ll let you guys work that out for yourselves. Just keep in mind that you aren’t optimizing your results in a vacuum, you have to beat another player. Which means, generally, that you have to count on yourself getting a little luckier than you should expect to on average, because in those really unlucky cases, you’ve probably already lost anyway. And the amount you have to count on yourself getting lucky, i.e., the amount of risks you have to take, increases more with the more players you add to the game. Villages will help to ease these wrinkles, but you have to get the Village together in the hand that the terminals collide in, which doesn’t happen so often as people think.

Of course, this leads us to the very important subject of terminal card draw (like Smithy). In general, by the time you’re mixing multiple terminal draws… you’re probably engine building*. And for engine building, things like getting your engine to be able to fire consistently and having a sufficient payload are far more important than the money density concept.

But even if you’re just running a Big Money + terminal card draw strategy, you probably still want multiple copies: with the big exception of Envoy, you probably want two Smithies, Courtyards, etc.  And lots of terminal card draw have ways of mitigating the collision; Vault, Embassy, Courtyard…

So for one to two terminal drawers, this money density look at things is still quite important. For your first terminal drawer, it’s a virtual card to your deck, once more, and then you have a percentage (based on the size of your deck) of having a larger handsize. After all, the reason why average card value is important is so that you can calculate the average value of your hand.

Let’s take Smithy; if I have 2 Silvers, a Gold, a Smithy, and my starting cards in the deck, that’s 13 effective cards, 14 total money, and you’ve got your chance of getting a 7 card hand rather than a 5. Calculating the exact probability is not as easy as you might think, given how reshuffles work. But you can come up with ways to approximate it.  As a guesstimate, you’ll have around 3 turns before a reshuffle, and two of those three turns will be 5-card hands and one turn will be 7 cards.  That works out to (roughly) $5.4, $5.4, and $7.5 per hand.  If you now add a second Smithy, you have a higher chance of getting your 7 card hand, but your money density has dropped from 14/13 to 14/14 (or $1).  (This seems pretty good, but its hidden cost is discussed in the next section.)

Understanding money density is also helpful in understanding how much your deck will stall out. A deck with 3 Gold, 7 Silver, 7 Copper and 3 Estates has a money density of $1.5. A deck with 1 Gold, 3 Silver, 2 Copper, and a Chapel has a money density of 11/7, or just over $1.57. But if we add two provinces to both decks… the first deck drops to an average money density of ~$1.364. The second drops to ~$1.222. So we can see that thinner decks generally require more padding, and/or choke more on green cards, whereas decks rich with Big Money are much more resilient.

In actuality, things are a little bit more complicated than this model would have you look at, because you don’t actually draw average hands. Dominion isn’t a game that’s continuous; it’s discrete. So there’s a difference between having two Silvers and having a Gold and a Copper, and it will be painfully clear to you when you are hit by Militia. Sometimes you want more variance, sometimes you want less.

Opportunity Cost

We may now be left with an interesting little question. The analysis of buying a second Smithy shows that it should be good for our deck pretty early on, right? Like, look at this deck: we’ve got 7 Copper, 1 Smithy, 3 Estates, and 2 Silvers. Our effective money density is around $0.917, we’ve got around a 40% chance of hitting a 7 card hand… adding a second smithy would decrease our effective money density to around $.846, it’s true, but significantly increasing the chances at getting two more cards in our hand is worth it, on the analysis, right?

Well, if the choice were between buying the second Smithy and buying nothing, you’d be right. But it’s not. Any time you can buy a Smithy, you can buy a Silver instead. And if you buy that Smithy, that stops you from buying a Silver. The correct play here is for the Silver, not so much because of the collision problem (though that makes putting a free Smithy in your deck barely worth it in the short term), but more because of opportunity cost, i.e. you have to consider what you buy in terms of what else you could have bought, not in a vacuum.

This is actually an important way of looking at all of Dominion, not just Big Money, but I think it’s easiest to understand in Big Money, because of the money density being available. So if you’re trying to decide whether or not to buy a Market, you can’t just look and see whether that’s good for your deck, you have to see if it’s better for your deck than the alternatives.

One nice little way to look at this is with Potion cards cards. Since whenever you buy a potion, you could’ve gotten a silver, it’s generally true that any time you have $X + a Potion, you could have bought something costing $X+2. For instance, if you buy a Possession, that could have almost always been a Province if you’d gotten Silver instead. Your Alchemists could have been Laboratories (hey, that actually makes a lot of sense), your Familiars could have been Witches, etc. Now, whether or not you should go for Potions for these cards has a lot to do with variance and the usefulness of the potion later in the game, but it’s a tremendous illustration of opportunity cost in action. The opportunity cost of buying a Potion is a silver (or any other $4 or less cost card), and that Silver could have gotten you a Province; instead you have Possession, which is sometimes better than Province early in the game but typically probably worse than just having the 6VP.

Perhaps the simplest, first way many players need to realize the importance of opportunity cost is with the ‘Village idiot’. Villages, like any cantrip, can’t possibly hurt your deck, since they replace themselves, right? This is the thought process a lot of people go through early on. This may be true, but that doesn’t mean you should just gobble up all the Villages you can; if you start of the game buying Village after Village, you’ll have a whole bunch of unused Actions lying around, with no Action cards to use them on.  More importantly, your deck won’t have any buying power, because the opportunity cost of buying a Village is a Silver. Your opponent that buys Silvers will be far ahead of you.

Another great card to look at through the lens of opportunity cost is Hoard. Hoard could have been a Gold. So any time you buy a Duchy with Hoard, you could have bought a gold instead. Now you are gaining that Gold as well, it’s true, but you have to look at when in the game you are… do you want a ‘free Duchy’ in your deck yet? Maybe so, maybe not. To say nothing of the times where the opportunity cost of going Hoard over Gold knocks you down from $8, buying a Province, to $7, settling for a Duchy and another Gold.  Yes, I’m saying that Hoard is overrated and misused.

The concept of opportunity cost extends beyond just once through the deck as well. That Silver that your Village cost you is going to hurt your buying power now, and on the next reshuffle, and on the next reshuffle…. Furthermore, the buying power reduction that you feel now is going to make you have to buy something worse now, which is going to further hurt you on the next reshuffle, and then that further reduction on that reshuffle will hurt your buying power even more on the next reshuffle… this compounding effect is why the early turns are generally more important than the later ones.

And you can further extend this paradigm to what I call implied opportunity cost. If I buy a Chapel on turn one with $3, there are lots of costs to me. I have:

  1. the $2 that I spent for it, which could have been another 2- or 3-cost card (e.g., Silver) instead
  2. the cards that will no longer be in my deck once I use the Chapel
  3. the turns that I’m using Chapel, on which I probably won’t be able to buy things
  4. Chapel eventually being a dead card.

Now, the second one of these, getting rid of the Coppers and Estates you’re trashing, is probably actually a boon more than a cost. And very often, especially in engine decks, it’s a really big boon. But it does take the turn you’re buying the Chapel, plus probably two full turns of trashing things, plus another turn which is partially hampered by trashing, plus all the times you have a worthless Chapel in your deck. Which is all to say, Chapel, strong as it is, is not actually all that great for a pure Big Money deck.

Conclusion

A good way of appreciating the in-game impact of these calculations is with the simulators.  Both Geronimoo’s and rspeer’s simulators provide graphs of the average money generated per turn.  For instance, you can see the significant improvement in average money on the crucial first few turns by comparing Big Money and Big Money/Smithy.  (I use rspeer’s only for ease of linking; Geronimoo’s is generally a stronger “player” and has more cards implemented, but requires a download to run.)

Posted in Articles | 8 Comments

The Five Worst $4 Cards, 2011

Disclaimer: Dominion does a really great job of balancing its Kingdom cards.  Every card has some situations where it shines, and some situations where it doesn’t.  Nevertheless, some cards just end up being flat-out better than others, either because they are more useful more often, or just ridiculously good when they are useful.  Don’t expect this list to be objective.

Qvist has started a community card ranking project.  The community’s $4 card ranking can be found here.

The common theme uniting the bad $4 cards is tempo.  In an infinitely long game, each of these cards would serve some useful purpose.  In practice, you only have five cards in your hand, and usually less than twenty turns to accomplish something useful.

Spy

Dominion

Honorable Mention: Spy

Spy is the one card on this list that isn’t situational.  Unlike the terminal $4’s, Spy’s presence almost never hurts your deck.  Your Jester flips over an opponent’s Spy?  Sure, why not take it!  Your opponent Swindles your Caravans into Spies?  Not a huge deal.

The flip side of this, of course, is that there is never a situation that you need Spies.  Its own attack is pathetically weak, and its sifting power is too limited and too uncertain.  It certainly combos well with deck-inspection attacks like Jester and Thief, but it costs too much tempo and resources to build up elaborate Spy-Spy-Spy-Jester chains.

So in that sense, Spy had to be the Honorable Mention.  It doesn’t overtly hurt your deck, but the opportunity cost is too much.

Pirate Ship

Dominion: Seaside

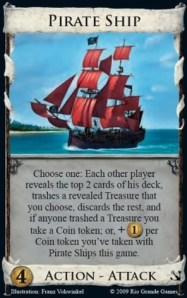
5. Pirate Ship

Every Dominion player tends to pass through four distinct and recognizable phases with respect to Pirate Ship, otherwise known as the What, Wow, Why, and Hey … phases.

  1. What is the point of this card?
  2. Wow, this card is unstoppably strong!
  3. Why do I keep losing with Pirate Ship?
  4. Hey, Pirate Ship is actually pretty bad …

The final analysis is that Pirate Ship tends to help your opponent(s) more than it helps you.  In certain rare Kingdoms, where you can’t generate money from Actions and Villages proliferate, Pirate Ship remains the best answer.  More commonly, you get your Pirate Ships up to about $3 or $4 before your opponent’s engine kicks into gear, thanks to you trashing their Coppers.  Many engines that are otherwise too slow to set up get a big boost thanks to opposing Pirate Ships.

Coppersmith

Dominion: Intrigue

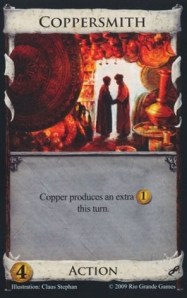
4. Coppersmith

Coppersmith is the archetype for all situational $4 cards.  When it shines, it really shines; when it is bad, it’s really bad.

Unfortunately, the latter is more common than the former.  What Coppersmith needs is big draw coupled with lots of Coppers.  In practice, you can’t get that much reliable draw with many Coppers in your deck.  Aside from edge cases like Tactician/Coppersmith/Warehouse, most of the time, Coppersmith either lacks the handsize for its Coppers, or lacks the Coppers for its handsize.  And so it’s situational, but its situation happens to be inherently contradictory.

Add to the fact that it’s terminal, and you find yourself with a big liability if it doesn’t work out.  Sure, on Turns 3 and 4 you might get away with a +$3, but as the game goes on you never match the same level of Copper density, and Coppersmith becomes “Spend an Action for +$1”.

Talisman

Dominion: Prosperity

3. Talisman

Talisman is a fine card in theory, but stumbles simply because it can’t keep up tempo-wise in modern Dominion.  There’s a limit to how many $4’s you want or need before you move onto the $5’s and $6’s.  Losing a buy cycle to get a Copper that helps you with getting more $4’s means you need some kind of special game plan built around a deck of non-Victory cards that cost $4’s or lower.  Good luck with that.

It does combo with Quarry and other cost-reducers, but then only works when you have enough +Buy to make up for the lost tempo.  Even Workshop, its close cousin, is better because at the cost of an Action, Workshop allows you more flexibility in what you buy.  The dilemma of drawing $5 with your Talisman is one that Talisman has never been able to solve satisfactorily.  It takes too long to set it up for cards that you usually only want in the early game anyway.

Scout

Dominion: Intrigue

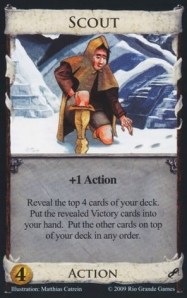
2. Scout

Like Menagerie, Scout is one of those cards that is best when played with the set it was released with.  Unlike Menagerie, Scout has significantly worse otherwise.  In Kingdoms full of mixed Victory cards (like Nobles, Harem, and Great Hall), Scout serves a nice useful role by reliably and consistently drawing multiple useful cards at once, like a mini-Scrying Pool.  But this isn’t true of most Kingdoms, where Scout is crippled by the fact that it doesn’t always draw a card to replace itself, and that it won’t be drawing anything that helpful.

Its deck-reordering is even worse.  Scout/Wishing Well/Wishing Well is one of those combos that seems like it would work well the first time you try it, before you realize that you’ve spent way too much time setting up what is essentially a single Menagerie.

Perhaps the real reason Scout suffers is that right when cards like Scrying Pool shine (the engine buildup phase) is when you have the lowest proportion of green cards in your deck.  Scout is never part of an engine, only as part of cleanup.

Thief

Dominion

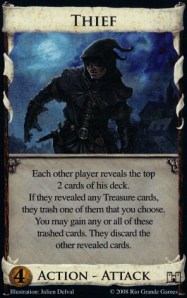
1. Thief

By popular demand, Thief is in its rightful spot at #1.  How bad is Thief?  It is the only card to have been directly upgraded in a later expansion by another card at the same cost.  And while the jury’s still out on whether Noble Brigand is actually effective (preliminary thoughts are no), you’d really have to be grasping at straws to justify purchasing a Thief but not a Noble Brigand.

Not that this is bad for the game.  You needed some kind of Thief in the base game, and Noble Brigand did not belong in base Dominion.  And it’s probably better to address balance issues than to just ignore the problem and hope it all goes away.

But still.  Thief is at best a situational card in multiplayer games, and a severe liability in just about every 2-player game.  Originally considered or intended as a counter to Chapel, it’s simply too slow to catch up with thin decks.  Stealing Treasures is too much of a delayed benefit for your own deck, so in practice Thief’s main benefit is killing your opponents’ buying power by wiping out their Treasure.  But this is only really effective if you have an abundance of Actions and Throne Room/King’s Court, and these are exactly the kind of Kingdoms where you probably don’t want Treasure in your deck anyway.

Posted in Rankings | 60 Comments

Hinterlands: Scheme

This is a revised version of a guest article by jonts26, originally posted in the forum. jonts26 was the overall #1 seed in the 2011 DominionStrategy.com Championships and unofficially holds the record for the highest legitimate level (48.965) ever attained on Isotropic.

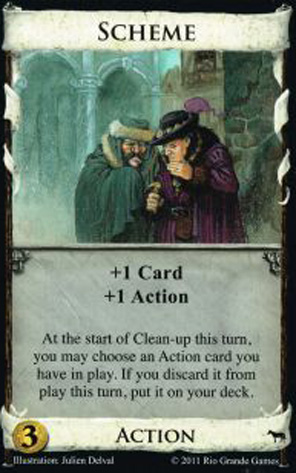
Muwahahaha. Your nefarious plans are finally coming together. The pieces are in place and now it is time to execute them. But what’s this? Everything fails to come together at the right time? That contemptible hero has thwarted you yet again with nothing more than dumb luck and a stupid face. AND he gets the girl. Where is the justice in this world? If only your nefarious plans had been nefarious … schemes. Then your plans would be impervious to blind chance.

Scheme

Dominion: Hinterlands

Scheme is, quite simply, awesome. It’s basically like the stage crew for a rock band. It’s never standing in the limelight, and really isn’t anything special on its own, but it works to let the main players do their job. Without it the band has much less time to rock out and compose killer riffs and snort coke and … I think this analogy got away from me. Anyway, Scheme is very often worth a pick up as it lends itself very well to most engines and can be used for several very clever plays.

The Reliable Engine

We’ve all had games where we play a Torturer only to draw 3 Villages you can’t use. Well Scheme gives you all the benefits of a complex engine, while reducing the variance of shuffle luck, sometimes to zero. Being able to top-deck a Village/Smithy pair or a couple of Hunting Parties or whatever else it is that makes your engine go is an amazingly useful ability. Almost any engine can benefit from the addition of some Schemes.

Of course, there is a balance to strike. Every time you buy a Scheme, you aren’t buying another engine component. So in a sense, Scheme sacrifices raw power for reliability. Normally this is a good thing, but it can be taken too far. If you find yourself returning way more actions than you need to draw your deck or the Schemes themselves because you don’t have enough other things to return, you’ve likely over-invested.

Scheme is therefore best when you drop to $3 and can’t afford an engine part.  It is easy to buy Scheme over Silver in most engine games, but more of a dilemma picking Scheme over Fishing Village.

The Non-Colliding Terminals

In Big Money type decks which only buy a few actions, Scheme can, essentially, act like a second copy of whatever flavor of terminal action you’re using.  Instead of Witch/Big Money, you can simulate Witch/Witch/Big Money without the risk that the second “copy” of Witch will collide with the first. This, however, comes at a price. Whenever you draw your Scheme after your terminal, you only get to play the terminal once that reshuffle. Had the Scheme been an actual second copy of the action, you’d have gotten two plays. Over the course of a game, the double terminal deck gets more plays of the terminal action than the Scheme/terminal deck. So typically, you favor a second terminal over a Scheme.

However, when a card is more important to play early, where the chance of collision is higher, Scheme/terminal becomes the better option. Specific examples of terminals which benefit from a Scheme include Jack of all Trades, Sea Hag, and Witch.

King’s Court Abuse

King’s Court is definitely the king of Scheme combos and deserves its own section.  Ordinary Schemes can be used for reliability, but King’s Court takes it to the next level and pushes Scheme to the point of abusiveness.  The key is that a KC Scheme lets you return three cards to the top of your deck, including the KC and the Scheme itself.  So technically, you don’t even need anything else: KC/KC/Scheme/Scheme/Scheme lets you start every turn with 9 cards, guaranteed.  But there’s no reason not to push the envelope.  Replace that third Scheme with just about anything, and you can create ridiculous games:

  • Possession: KC/KC/Scheme/Scheme/Possession is a war of attrition.  For every turn your opponent takes, you take three with his deck.  No matter how he builds his deck, there’s not much he can do to overcome the fact that you’re playing four times as many turns as he is.
  • Saboteur: Saboteur is a weak card normally, but KC/KC/Scheme/Scheme/Saboteur just obliterates your opponent’s deck far faster than they can replace it.  A triple Saboteur every turn can overcome quite a bit.
  • Most other attacks: KC/KC/Scheme/Scheme/Mountebank is not quite as deadly as Saboteur, but that will be of little comfort to your opponent.  The problem with such attacks, though, is that the attack’s presence makes the combo a bit more difficult to set up.
  • Bridge: We all know that KC/KC/Bridge/Bridge/Bridge is game over because it reduces costs by 9 and gives enough buys to buy out all the Provinces in one turn.  Adding Scheme both helps set up the engine and makes it easier to set up the final death blow.  This game by Mean Mr Mustard (with an Apothecary added in) is a good demonstration of how to set up a KC/Scheme engine.
  • Vault: KC/KC/Scheme/Scheme/Vault leads to a 12-card discard and a guaranteed Colony every turn.

Other Good Combos

Even without KC, almost any action in the game could find some benefit from Scheme in the right engine. I could spend all day listing them, but I’ve just highlighted a few particularly interesting or powerful uses.

  • Conspirator: Normally, the correct way to play Scheme is to top-deck your other actions. In a Scheme/Conspirator deck you want to put back 2 Schemes every turn. This guarantees that every Conspirator you play is activated, and basically lets you buy $4 Grand Markets.
  • Outpost – Scheme/Outpost needs a third card to work, but Scheme effectively neutralizes the typical drawback of Outpost by ensuring your 3 card hand has what you need in it.  Menagerie and Scrying Pool are particularly outstanding candidates.
  • Hunting Parties – Hunting Parties let you set up some really fast combos that can reliably get a Province per turn, until, of course you don’t draw a Hunting Party. Then your deck with a single gold and a ton of green can’t do much of anything. And since you really only need one silver in your deck, there is no lost opportunity cost for picking up a scheme when you fail to hit $5. Scheme turns the already reliable and fast Hunting Party stack into a true juggernaut nearly immune to greening.
  • Remake – open Remake/Scheme and trim your deck super fast while still building up economy by consistently turning Estates into Silvers. Then as you transition into an engine, you already have a Scheme to help smooth it out.
  • Double Tactician – These kinds of decks, when properly set up can do some amazing things and lead to extremely fast games. But if you fail to draw a Tactician to play, you can easily find yourself playing catch up. Scheme will thoughtfully place that old Tactician right back on top for you to keep it going.
  • Golem: Golem/Scheme/X, once set up, will, with high probability, allow you to play the same turn every game.  Replace X with a killer attack and this is a good substitute for the abusive KC combos described above.  Alternatively, Golem/Scheme/Counting House is a major improvement on just Golem/Counting House.
  • Scrying Pool: This card’s only weakness in an Action-heavy deck is that you might not  play it every turn.  Scheme solves that problem, and Scrying Pool returns the favor by drawing the Scheme back into hand.
  • Monument: Want free VP every turn?
  • Herbalist: Even the lowly Herbalist gets some use, because the Herbalist returns Treasure and the Scheme returns Actions.  Pair the two up: Gold/Remodel, Alchemist/Potion.
  • Trading Post: Trading Post is a uniquely nice early game trasher that benefits strongly from Scheme.  Ordinarily Trading Post drops precipitously in efficacy past the first few turns of the game, but Scheme can keep it relevant through the midgame.  And as you transition into another engine, the Schemes can be switched over to, say, Laboratories.

When Not to Buy

Scheme isn’t a card you always want to buy. It’s typically a great addition to any engine and can potentially boost a Big Money deck but there are some specific times when you might want to avoid them.

The one true counter: There is one card which absolutely destroys Scheme. I am referring of course to Minion. Not only does it force you discard the nice things you top-decked, but because you are discarding your good cards, the pool you have to draw your new 4 card hand is weaker. Double Ouch.

Discard attacks: While not enough to completely forgo scheme, discard attacks do discourage it a little. First, you don’t want to top-deck too many cards because you’ll just have to ditch them. This is in particular bad for KC/KC/Scheme/Scheme/X combos.  Second, you might want to hold on to Schemes when you get hit, but the blind draw on them could mean you end up discarding a better card from hand than what you draw, which creates a bit of a dilemma.

Already reliable engines: As I said before, Scheme sacrifices power for reliability. But when you have an already reliable engine, and particularly when you have engine components at the same price point, you can probably forgo Schemes altogether. Something like Wharf/Fishing Village is a good example.

Posted in Hinterlands | Tagged | 12 Comments

Annotated Game #10: Geronimoo vs WanderingWinder

The following article is written by Jeroen Aga.  Geronimoo is the author of the first Dominion simulator.

And the bane card (adding it to the board is not supported by dominiondeck.com):

Swindler

Dominion: Intrigue

The setup

This was a game between me (Geronimoo) and WanderingWinder. We’re both very active on the forum and I’m the guy who wrote the simulator (check it out if you haven’t yet). At the time of playing we were 1 and 2 on the leaderboard so this was going to be a tense battle.

After the exchange of pleasantries I ask for my usual minute to scan the board and determine my strategy. First and most important: is this a Colony game? No, so I’ll favor a  Big Money strategy unless there’s an engine that I know will beat it. Most good Big Money strategies can get 4 Provinces in 14 turns. If you’re building an engine it needs to be firing on all cylinders by that time to be able to catch up. I know WanderingWinder will not give me any extra turns to build an engine, so it needs to be a strong one and I need to be able to play it close to optimal.

Next thing I look for are the cursing attacks and this board has Young Witch. It’s a little underrated in my opinion because I often see people skipping it while they really only should if the bane card is very strong (like Scheme or Lighthouse). This time the bane card is a Swindler which is almost good enough to make it worth skipping the Witch. There’s also Masquerade which can work as a soft counter to the Witch.

The non-cursing attacks are next on my list and Swindler is pretty good, but if I had to choose between Swindler and Masquerade, the last one is an easy pick. Of course the fact that it’s the bane card complicates matters.

By now I was really confused what to do here: do I open Masquerade/Swindler, Young Witch/Silver, Young Witch/Masquerade, Masquerade/Masquerade, Swindler/Swindler, Masquerade/Silver. What my opponent opened would also have a huge impact: if he opens Young Witch, I’ll probably need to get a Swindler, if he opens Swindler, I probably shouldn’t open Young Witch,… After the game I played around a bit with the simulator and Masquerade/Masquerade was very good at countering the attacks but would get beaten by Masquerade/Silver, which would in turn lose to Young Witch/Silver which loses to Swindler/Swindler which loses to Masquerade/anything. So there’s a bit of Rock-Paper-Scissors going on.

Now we’ve only looked at the opening without taking into consideration the other cards on the board. I was still pondering all the intricacies of the opening when WW made his first purchase:

Opening statements

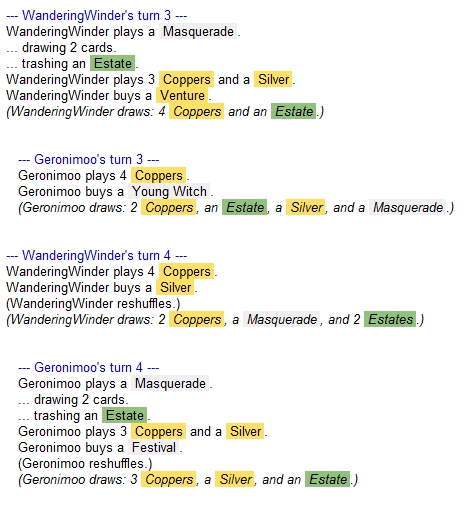
WW starts off with a Masquerade and I notice he’s paying $4. So he’s making a clear statement he’s NOT going for the Young Witch. This could have been a good time for me to go Silver/Young Witch, but I wasn’t sure at the time. Eventually I decided to simply follow his lead because he seemed to have a plan, while I didn’t and a borrowed plan is better than no plan at all. Moving on to turns 3 and 4…

Deciding a strategy

WW’s turn three clearly indicates his strategy for this game: Masquerade Big Money (with Ventures). This strategy is very strong and easy to play. And WW is sure not going to make any mistakes with it, greening very soon and not giving me any opportunities to catch up. I could follow his lead here with a Silver, but most likely I’ll lose due to 1st player advantage. Another option is to go for the Witch and hope to pile on the curses. Now I’ll need another Witch if I really want to hurt him, so I’ll have at least 3 terminals in my deck that all draw cards. I buy a Festival to manage that. I don’t buy the second Witch yet because that would very likely hurt my chances to get to $5 in the next few turns.

The mid game

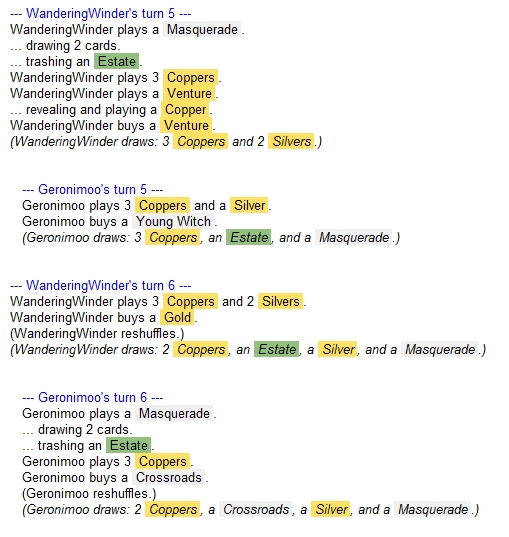
As planned I buy my second Witch (unfortunately with $5) and WW continues to build his economy. By now I’ve figured out how I want to plan my future turns: I’m going to go for a Festival/Watchtower engine building to a mega turn with Highways to buy out the remaining Provinces and Duchies in one swoop. Turn 6 I think I make a mistake by buying the Crossroads as super-village instead of a Native Village. The contents of the Native Village mat would allow me to salvage turns where I draw a bunch of Festivals, but no Watchtower and vice versa while Crossroads just gives me an extra action to work with.

Province gained, Curses dealt

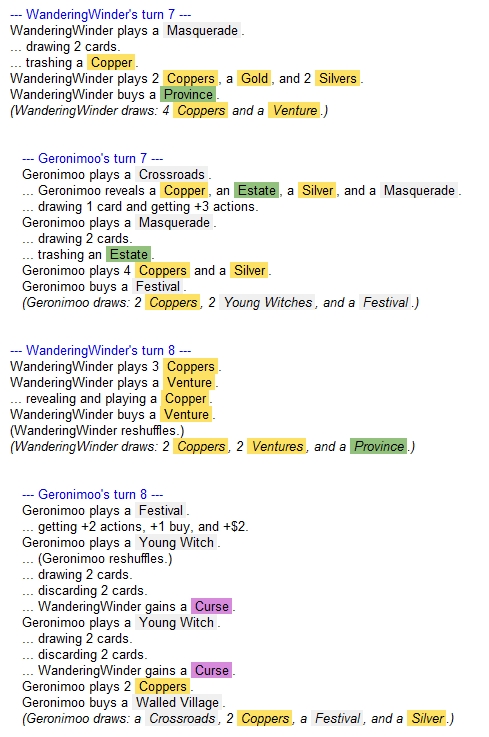
Both our strategies are now doing what we intended them to do: WW buys his first Province while I double Curse him. Notice I buy another Festival over a Gold (which I really don’t want). I have $4 turn 8 and I go for a Walled Village. Double Native Village might have been better here. It’s too soon for Watchtower. WW aquires another Venture which will unfortunately be skipping Curses as well as green cards so I don’t really like my chances at this point.

Business as usual

We’re deep into the mid game here and it’s time for me to add a key component to my engine: the Watchtower. This will in combination with Festivals draw huge amounts of cards. The Young Witch also helps because it reduces the hand size which is desired in this type of deck. I also get my first Native Village which is a good addition to this strategy.In the meantime WW does nothing unexpected: he buys Provinces and big treasures. He’s got a good lead, but I hope my curses will start to slow him down a little.

Cursed Pawn

My curses start to hurt and WW is stuck with $2 and buys a Pawn. This won’t help his deck much so I’m happy. One of my Witches is enjoying a little vacation in a native village, but not for long, I need her back at work to deal out 2 more Curses while I collect four more parts for my engine.

Click, Click, End Turn… Click Click Click Click Click Click Click…

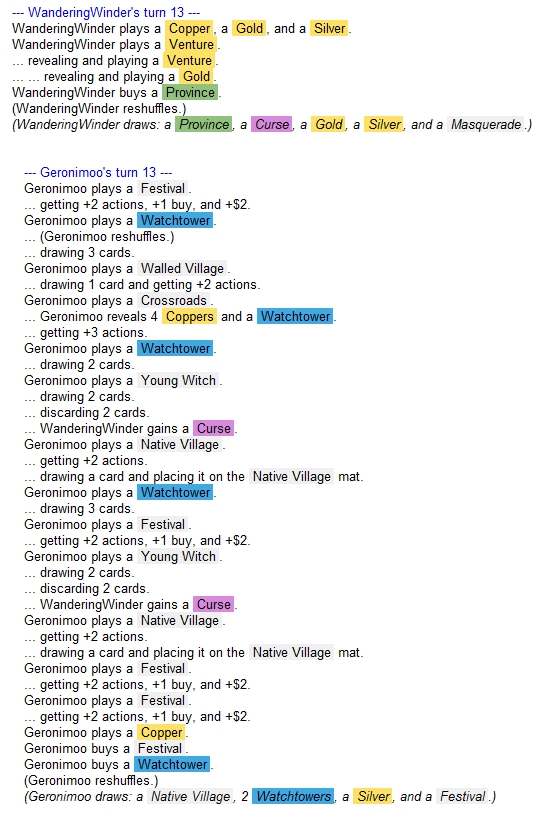
My engine is warming up nicely and I’m already drawing a good portion of my deck while pumping WW full of Curses. Unfortunately his deck doesn’t seem to care and he’s already got three Provinces to my zero.

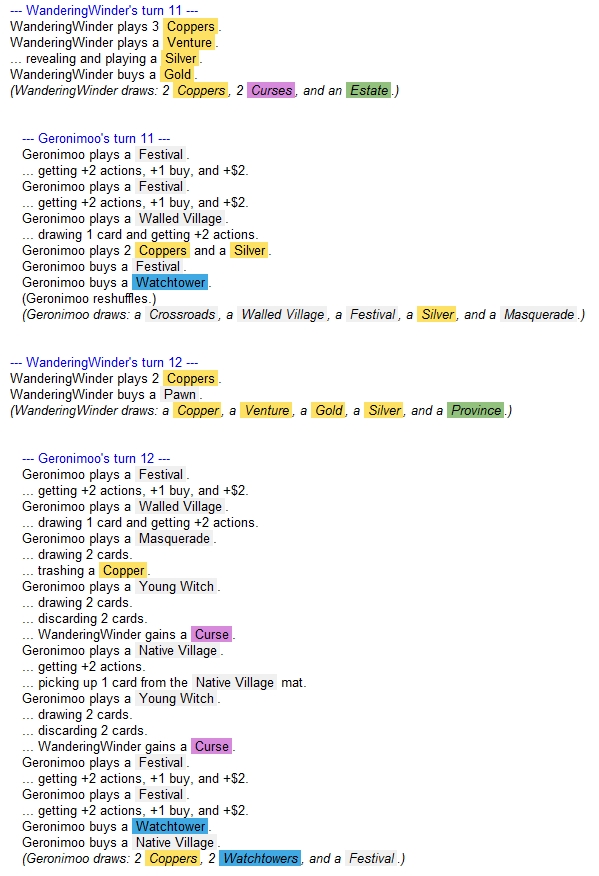
Forehead slapped

(Notice what I drew at the end of my turn 13)

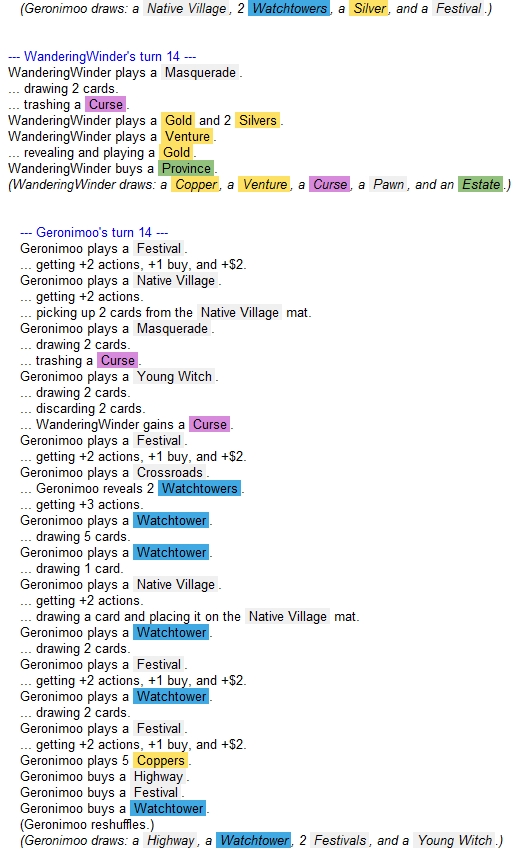
WW Masqueraded and I decided I was going to give him a Silver because I didn’t need it. As soon as I did that, I cussed realizing my opponent was going to LOVE that Silver. It didn’t matter because he was always going to be able to buy a Province that turn, but I was still annoyed. This is also the turn I get my first Highway which I will need to get the mega turn in the future. With half the Provinces gone the future will need to be very close to the present or the board won’t have enough green left to catch up. I can however always go Back to the Future… You don’t have to be superinventive here to find the required 2.1 GigaWatts…

I’ll let you think about that for a while. In the meantime here’s the next turn:

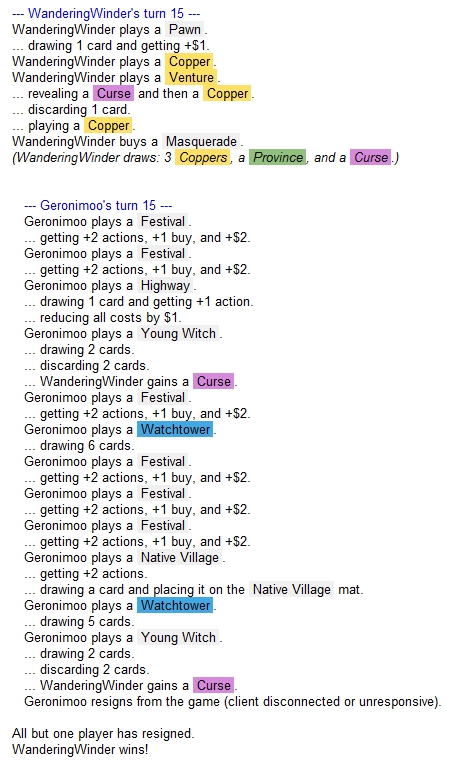
Huh? What? Yup, I got a blue screen and couldn’t get my cheap-ass laptop to start up quickly enough. Yes, you’re disappointed, but imagine how I felt.

Anyway, I was probably going to get more Highways, Festivals and Watchtowers this turn and the next and go off the turn after. This means WW could potentially grab 2 more Provinces which I can still make up for by buying all the Duchies. And if my deck should stall for a turn and not enough VP left on the board, there’s always this:

(play 8 Highways first)

See you on Isotropic!

Posted in Annotated Games | 15 Comments

Intrigue: Duke

This is a revised version of a guest article by WanderingWinder, originally posted in the forum. WanderingWinder was a semifinalist in the 2011 DominionStrategy.com Championships.
Duke

Dominion: Intrigue

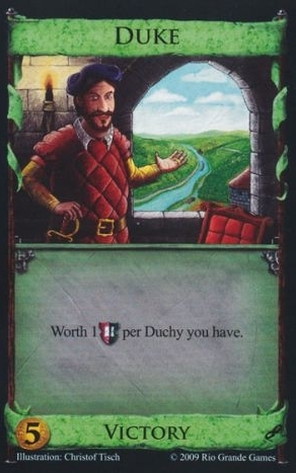
For most of Intrigue’s existence, the Duke has led a quiet life. Recently, however, his true power has been thrust into the spotlight, as people realize how game-warping his VP can be. Playing the Duke deck requires a very different approach than playing a standard Province deck, and is often counterintuitive (you mean I want to BUY Copper?!). But played correctly, a properly-designed Duke deck will outlast and eventually beat most Province decks.

Timing

Part of the problem with evaluating Duke, as is the case with basically all your alternate VP strategies, is that your clocks get all messed up. Lots of top players have a good feel for how long the game is going to be, given the kind of deck they’re building. Oh, it takes BM/Smithy about 15 turns to complete the game. Well, that’s based on rushing to half of the Provinces, then slowing down a little for Duchies toward the end.

But in a game which your opponent isn’t helping you end the game by buying Provinces himself, you tend to choke a bit harder on green cards, and it can go significantly longer.
So that’s the first lesson of Duke: in non-mirrors, you’re in for a very long game. Prepare accordingly.

How many Dukes?

Okay, next thing to notice is the math on Dukes specifically. How many of them are you going to need? When do you want to buy Duchies, and when do you go for Dukes? Well, after a little thought, you’ll see that the first three should definitely be Duchies, and then with 3 Duchies and 0 Dukes, a Duchy is worth as much as a Duke, and thereafter, if you want to maximize your immediate points, you should alternate the purchases. (For the mathematically-inclined, a derivation of this principle.)

However, if you’re playing to have Duchies/Dukes as your main victory points, you’re eventually going to want at least 6 Duchies, right? Because in order to beat 8 Provinces, you need at least 11 Duchy/Dukes, and that’s optimal if you’ve got 7 Duchies and 4 Dukes, but 6 and 5 will get you a tie.

In other words, if you’re going for Duchy/Duke, the real principle is just to buy Duchies non-stop until the Duchies are gone. You should only start on the Dukes after grabbing 7 Duchies, You might want to consider going Duke before grabbing the last Duchy, but if your opponent isn’t going for Dukes as well, getting the Duchies denies them a lot more points than getting the Dukes does. And even if they are mirroring you, the Duchies are what give the Dukes their potency anyway, so they’re what you need to focus on.

Multiplayer

Let’s stop briefly to discuss Duke in a multiplayer game. The math is different, because with 12 Provinces and 12 Duchies/Dukes, and assuming Province opponents, in a 3p game you’re up against 6 Provinces and in a 4p game you’re up against 4 Provinces. That’s a lot fewer points, only 6 Duchies and 3 Dukes, but since most pretty bland, standard decks can get to 6 Provinces without that much trouble, you’re not going to have much time. Also, it’s very likely you’ll get a 7/5 split on the provinces, and you need to overcome that 7 to win. So you end up often needing almost just as many Duchy/Dukes as in 2-player, but you’ve got less time. Anyway, still possible with support (you need support now though), but green a touch sooner and Duke>Duchy a little sooner.

If you have 2 players going for the Duke deck, then the Province player getting even a single Duchy is a pretty big deal. He also has access to a lot more Provinces overall. And because there are only 12 Duchies for the 2 players, they’re going to be stunted a bit more. So this looks really good for Province player on most boards.

There are a couple of boons with 3-player to the Duchy/Duke player, though they generally aren’t enough to make up the deficit. Namely, other piles are going to run out faster. So paradoxically, you might want the game to actually end faster, because if Duchy/Duke can get a lead, Province doesn’t have as much time to catch up if you 3-pile him. Also if the two Province players get slowed down dancing with each other, you get time to catch up. And finally, lots of those single-card engines where you need a lot, your opponent can’t get so many. So you’re less likely to get pummeled by a player with a huge Minion or Hunting Party or Conspirator engine, ’cause they can’t get as many.

4-player makes things even crazier. So, everything from above gets even further compounded. Your opponents have 4 Provinces each, which isn’t that much at all. You should flip to buying Dukes after like 5 Duchies probably. Certainly not more than 6. The game’s going to be so short, you might actually hold up OK, if you can get a quick 3-pile; it’s not so rare for racing to Duchies to be good in 4-player anyway. But likely, in 4-player, the game is so short that you really really need to listen to your shuffle luck. By that I mean, if you’re getting 6s early, go for Gold and Provinces. But if you get 5s, then roll with the Duchies and Dukes. Okay, more complicated than that, but the idea is to have a strategy flexible to whatever you draw.

The general idea is that the Duke deck is a lot weaker in 3p and 4p. The big reason for this is goes back to one of the first things I say in the article, that the game is a lot longer in non-mirrors, because you’ve got one person going for Provinces, the other going for Colonies, and so neither end condition gets met very soon. This gives you the time to get the 12-13 $5’s that you need. That’s sorta true in multiplayer too, but not nearly as much, since multiple Province players will drain the pile much faster. Your best bet then is to hope to end the game faster, via three-piling with Dukes/Duchies.

Duke strategy on the macro level

So, you want to get all this stuff – how do you do it? There are actually a lot of ways to do it. Because there’s a higher ceiling on points from Duchy/Duke than from Provinces (technically higher even than Colonies, but you need like ALL of them), I’ve actually seen some engine or combo kind of decks that go for Duchy and Duke. It’s pretty interesting, and it’s something you need to keep aware of. But if you’re going that route, you need to make sure that your deck is capable of getting lots and lots of $5 buys without the engine gumming up too much with the green and the big deck. Most engines do gum up like that, and so aren’t so good at dealing with the mass green that Duchy/Duke presents. Tactician is one way around it, as is something like Highway/Ironworks. But in general your usual +Actions/+Cards-esque engine is going to choke badly on all that green.

Money goes very nicely with Dukes, on the other hand – even Copper. Because all your key cards cost $5, Copper brings your $ average closer to being there. And because you can actually get above that $1 per card you want, the extra Coppers smoothing out your money distribution is important. Moreover, the Coppers stop each successive green card from hurting as much. Okay, Copper isn’t something you should really be buying that often anyway – you should be getting something better most of the time. But if you have an extra buy, and you’re playing a money-based deck focusing on Dukes, grab those Coppers, even from Turn 1. This suggests you actually want those buys. And you do; +Buy cards help BM for Duke a lot more than traditional BM precisely because those Coppers are very nice to have. Of course, cards that can get you lots of Silvers or Golds are magnificent as well.

Sifters (e.g., Warehouse) are also going to be pretty nice for a Duke deck. No matter what, you’re going to have pretty high variation in money production from card to card, as such a high proportion of your cards produce $0. I want to pay special attention to Oasis here. It produces a little money for you as well as sifting, and in these kinds of decks will most often be better than Silver, as it tends to drive you to that magical $5 that you want. Ultimately you’ll probably want a mix between Oases and silver, but lots of Oases are going to be your friend here.

In addition to sifters, you’ve got similar cards which help you manipulate your shuffles. I’m looking squarely at Mandarin and Courtyard here: Mandarin is pretty weak at going Provinces (though, I’m convinced, quite underrated), while Courtyard is really strong with Provinces, but both are even stronger for Duke strategies. The idea’s simple – you need exactly $5, and you save the rest of your money (as much as possible) to hit $5 again next turn.

And of course, all the cards that help with green cards are nice here: Hoard, Crossroads, and Scout. Okay, I’m only half-joking on Scout. No, seriously, it can help.

Tactics: Countering Duchy/Duke with Provinces

First, playing against a Duchy/Duke opponent. You want to know that Duchy/Duke is a little better than going for Provinces on a straight-up Big Money board. So if you’re not going for the Dukes yourself, you must have a reason (this is very often the case).
Usually that reason is because you think there’s a deck to be built that will get you ALL the Provinces before your opponent gets to 11 Duchy/Dukes. If that’s the case, you should NOT, I repeat NOT try to contest Duchies until very late (assuming that you’ve identified that your opponent is going Duchy/Duke, hold off on Duchies yourself until later than you normally would), when you’ve got the vast majority of your points, as they’ll only clog you up, probably much more so than your opponent.

Editor’s note: As DG says, “This section hints at how many games are lost on Duchy/Duke boards. If you buy a Duchy you’re going to score at least 3 for yourself but deny your opponent the same Duchy to score 3 + the number of Dukes they own. This is a big swing. So if you’re on a province strategy it’s very tempting to buy some Duchies as a spoiler, but one isn’t going to make much difference so you buy two or three, and then you’re inevitably sucked into a Duchy and Duke race that you haven’t prepared for and then can’t escape. The solutions are clearly to trust your initial judgement and just buy provinces or (more often) to prepare for Duchy/Duke from the start. On the other hand if you’re on a Duchy/Duke strategy then buying a province is is nearly always worse than buying a Duchy.”

Sometimes, though, you think you can get to a large number of Provinces pretty quickly in some kind of deck that can handle a couple Duchies that you steal from your opponent. Here, you want to contest early, sniping 2-3 Duchies, and then leaving the rest alone. (Of course, if you can get 4+ Duchies, then why not go Duke yourself.) The thing here is, if you can get that 3rd Duchy, your opponent needs ALL of the other Duchies AND ALL the Dukes to have more points than you do, if you can get all the Provinces. And then she’ll have 1 more point than you. With 2 Duchies, she’ll need the rest of the Duchies plus 6 of the Dukes to equal you. But if she can sneak a Province, you can be in trouble, not to mention that 2-3 extra early green cards will probably seriously hinder your chances of getting all 8 Provinces fast enough. There just aren’t many I’m-going-Provinces-and-have-time-to-contest-Duchies decks out there. And if you can’t get 2 Duchies, it’s really not worth it (until the game is on the verge of ending).

Tactics: Playing Duchy/Duke against Provinces

On the flip side, if you are playing your Duchy/Duke strategy against a Province-seeking opponent, it is critically important to stick to your strategy. You’re in it for the long haul. You’re in it for a long game. You need the game to go long, so assume it will (and make it happen, if you can). Don’t buy your first Duchies as soon as you can, and find yourself having to rebuild your economy halfway through the game. It’s better to build a bit of an economy first. Simulations show that around $15 total money in your deck is where you want to be, which is only a few coin less than when you’re playing straight Big Money for Provinces. Support cards will change that a bit, of course. But stay your course, gobble up all those Duchies, resist the temptation for the quick points of going Dukes early – don’t switch until the Duchies are out, or at least until you’ve got your 7.

Do you go for a Province on a lucky $8? Well, generally, you don’t want to. Your Dukes will end up being worth as much by the end of the game, and, more importantly, you’re speeding up the end of the game for your Provincing opponent, which gives them real chances. After a certain point, though, once you’re into your Duke run, and you have a lead, particularly if your opponent is going for a big mega-turn, but basically any time you’re in the Duke stretch with a lead, you can go for it. Just do the math to make sure that it’s more Province denial on your opponent than it is speeding up the end of a game they have a good chance to win.

Tactics: Playing Duchy/Duke against Duchy/Duke

Finally, the mirror matchup. The mirror is probably going to be determined by who gets more Duchies. Obviously, there are a lot of different ways to go for Duke, so you could both be going for Dukes while playing totally different decks, and ultimately, you want to follow your strategy for that particular board. But in general, the only reason a player who wins a Duchy split in the mirror will lose is if they are totally out of economic gas, and being crippled, have to spend a lot of time rebuilding before they can get very many Duke at all. Because if you win the Duchy split 5-3, even if you lose the Duke split 5-3, you have a 6 point lead (heck, if you lose it 6-2 you’re only at a 2 point deficit). The upshot of this is that the mirror matchup often turns into a game of chicken. You’re both sitting there, building up your deck, and one of you makes the move to dive for the Duchies first. The other one probably has to follow pretty soon.

Take stock of how the Duchies split. In a 4-4 split, you keep the pedal to the metal on those Dukes. Same thing, more or less, if you win the split. But if you’ve lost the split, you may well want to give serious consideration to spending several turns re-tooling your economy to go for some Provinces, only contesting Dukes later on. This mixed strategy will often hold a better chance of success for you in the long run, as you can still pick up a couple Dukes later on. 3 Duchies and 2 Dukes with 5 Provinces matches up against the rest of the Dukes, and it’s probably easier than trying to stick with the full mirror, because once those Dukes run, the Duchy/Duke player needs to find a 3rd pile.

Specific Combos

Finally, there are two specific combos that I’ve got to mention here. The first is pretty well known, Horse Traders/Duke. There have been a few articles about this combo already, I suggest reading them if you aren’t familiar.

The second is even stronger – Feast/Duke. This is actually a rush strategy, as you can start basically right away pounding out those greens. Silver on 3, Feast on 4, Duchy (later Duke) on 5 is pretty fast, and because getting to 4 is actually a heckuvalot easier than getting to 5, especially in these decks, you can do it much sooner. Is it still gonna be a long game? Yup. But not much longer, actually, than your average Province vs Province affair.

Works with:

  • Duchy, of course!
  • Money-based decks
  • +buy cards – your Woodcutters, Bridges, and especially Horse Traders
  • Cost reducers: these tend to work better when you’re buying cheap cards instead of expensive cards. Highway drops Province from $8 to $7, but two Duchies from $10 to $8.
  • Filterers or sifters, especially Warehouse/Oasis
  • Gainers, particularly of Silver – even Workshop!
  • Duchess (which can be the third pile you run out)
  • Cache (which is preferable to Gold)
  • Hoard
  • Feast

Conflicts with:

  • Colonies (usually)
  • Particularly fast engines
  • A Province engine resilient to greening that can handle a long game (e.g., Chancellor/Stash, a nightmare matchup for this deck)
  • Opponents’ Bishops (you actually want those coppers!)
  • Trash-for-benefit cards (most normal trashers, too)
  • Embargo – sort of: getting your Duchies/Dukes Embargoed hurts more, since you need to buy more of them, but Embargoing the Provinces in reply can be very strong as well, and it totally changes the complexion of the game.
  • Swindler: unlike Provinces, which are unique at $8, your Dukes/Duchies can actually be trashed into a no-VP $5
  • Saboteur: Provinces can degrade into Duchies, but Duchies degrade into Estates and no longer score for Dukes!
Posted in Intrigue | 22 Comments

Winner of the Kingdom Design Challenge

2011 DominionStrategy.com Kingdom Design Challenge

Wingnut has won the Kingdom Design Challenge (and will be receiving a copy of the Dominion base game) with the following Kingdom:

2011 DominionStrategy.com Kingdom Design Challenge WinnerWe selected this Kingdom for the final because it offered a number of intriguing choices, most of which the actual championship game brushed on.  (If you want to try the set out yourself, and don’t want it spoiled, don’t read the next paragraph!)

As with many such decks, Goons can be a dominating card because of the sheer number of VP tokens it gives.  One way to set it up is with Governor/Goons, a monster drawing chain that can shut your opponent down like a Village/Council Room/Militia, and Worker’s Village can give you the +Actions and +Buys to fully exploit your Goons. But it had to compete with Inn/Menagerie/Goons, where Inn can play three roles: the on-buy power, the sifting to trigger Menageries, and the actions to play more Goons.  Tunnel throws a huge wrench into everything: a careless engine builder can easily find himself overwhelmed by a money-based deck focusing on Tunnel, some VP from Monument, and possibly Adventurer.  Maybe you can integrate Tunnel directly into your engine, but Ghost Ship can be a way around the Tunnels.  Grand Market is a fantastic addition to Goons, but when do you have the time to get it? And you must be careful not to let the piles run out on you!

Of course, all of the nine finalists were wonderfully designed.  One particular favorite of ours was Set #8, which had a hidden counter to Ambassador involving Secret Chamber/Crossroads that could explode for $30+ turns.  Set #9, which didn’t get played, has an intriguing Chapel-into-Gardens approach.  Set #3 was the famous King’s Court/Goons/Masquerade combo, the strongest combo Dominion has to offer, up against pretty much all of its nemeses.

So we would highly recommend all of them if you’re looking to try a custom set game.  Each offers enough depth to be played multiple times without identifying any obviously optimal approach.  You can see all the finalists here, or on DominionDeck.com.


We also have a complete spreadsheet of all submissions, with designer comments, including the 16 candidates we considered for the finalists.  The nine that we selected happened to work especially well together, but all 16 of these candidates were worthy of being included in the final.

And of course, statistics on the submissions: turns out that when you ask the community for custom sets, chances are, you’re going to see Gardens, Hamlet, or Tunnel.

The nine finalists, once more:

Game 1: Moat, Tunnel, Bishop, Gardens, Ironworks, Young Witch, Tournament, Council Room, Torturer, Border Village
Bane: Hamlet
Colony: No
Designer: Insomniac

Game 2: Crossroads, Loan, Silk Road, Baron, Bureaucrat, Apprentice, Duke, Farmland, Harem, Nobles
Colony: Yes
Designer: Razzishi

Game 3: Haven, Great Hall, Workshop, Masquerade, Ironworks, Island, Throne Room, Tactician, Goons, King’s Court
Colony: No
Designer: WanderingWinder

Game 4: Lookout, Masquerade, Oracle, Smithy, Worker’s Village, Festival, Ghost Ship, Margrave, Mountebank, Treasury
Colony: No
Designer:  Thisisnotasmile

Game 5: Embargo, University, Scrying Pool, Worker’s Village, Remodel, Wharf, Rabble, Grand Market, Forge, Peddler
Colony: Yes
Designer: Qvist

Game 6: Menagerie, Tunnel, Ghost Ship, Governor, Inn, Monument, Worker’s Village, Grand Market, Goons, Adventurer
Colony: No
Designer: Wingnut

Game 7: Embargo, Scheme, Menagerie, Watchtower, Fishing Village, Remake, Haggler, Vault, Grand Market, Expand
Colony: Yes
Designer: papaHav

Game 8: Crossroads, Secret Chamber, Warehouse, Loan, Ambassador, Caravan, Worker’s Village, Bureaucrat, Merchant Ship, Grand Market
Colony: Yes
Designer: Geronimoo

Game 9*: Chapel, Fishing Village, Watchtower, Ironworks, Gardens, Bridge, Highway, Mountebank, Ill-gotten Gains, Goons
Colony: Yes
Designer: 16hp


Thank you all for your participation!  This has been a great experience, and we hope to do it again next year!

Posted in DominionStrategy Championships | 2 Comments

Hinterlands: Ill-Gotten Gains

This is a revised version of an article by Thisisnotasmile, originally posted on the forum

Ill-Gotten Gains

Dominion: Hinterlands

Ill-Gotten Gains is a good illustration of how bad a card has to be in order to be an on-gain Curser.  $5 for a Silver that gains you a Copper is an absolutely miserable deal, and yet the Curse-on-gain is so powerful that IGG is still one of the strongest cards in the game.  It is first (and currently only) card which can put a Curse into your opponent’s deck before their first reshuffle. The longer the Curse is in a deck, the more disruption it will cause, and the more damage it will do.

Similarly, the curse is “unblockable” by conventional means. Everybody knows that cursing is the strongest type of attack in Dominion, but IGG is not an Attack card and the distribution of Curses is not triggered by playing the card. Because of this, Moat and Lighthouse can do nothing to block the Curse, and you can’t even reveal a Horse Traders or Secret Chamber to “make up” a little bit for taking a Curse. Trader and Watchtower, however, can still be used to mitigate the effects of the IGG as they react to (would) gaining the Curse, rather than an Attack being played.

The real reason IGG is such a power card, however, is what happens after the IGGs are gone: now there are not one but TWO empty piles: IGGs and Curses. The game will now end not when Provinces are depleted, but when ANY single pile is depleted.

At this point, your deck is ideally full of Coppers and IGG’s.  Your opponent is stacked full of Curses.  And as we know, in a Duchy rush, Coppers are important.  What better card for a Duchy rush than a card that simultaneously lets you end the game after exhausting Duchies while fueling your deck with the treasures it needs to buy the Duchies?  Of course, if you draw Copper/Copper/IGG/IGG/IGG and feel you need the points, grab the Province.  But if you’re ahead after the IGG race, you can usually end it pretty easily just by buying Duchies and gaining Copper at every opportunity.

If you like to do something ‘fun’ and not-necessarily optimal every now and then, there are a LOT of interesting things you can do with IGG other than rushing three piles with Duchy. Just check out the Game Reports subforum on Dominion Strategy and you will see plenty of examples of people using trash-for-benefit with IGG (who cares about losing a sub-Silver when you get $5 worth of benefit for it!), or even using IGG to facilitate a Coppersmith and/or Counting House strategy which are usually too weak to play at a competitive level.

IGG isn’t always the dominant strategy though. There are cards which can cause enough disruption to the IGG Duchy rush that make it a losing proposition. Essentially, any card which can cause the IGG and Curse piles to deplete at different rates will upset the rush. If the Curses run out first, you’ve got to spend $5 turns buying cards worth less than Silver and not even hurting your opponent in the process before you can start on the Duchies. If the IGGs run out first, well, you’re in trouble.

Other strong cursers are the first of these card that come to mind (they empty Curses quicker than IGGs).  So when Witch and Mountebank are out, you should invest in them first before switching over to IGG. Less common, but equally impactful on IGG are cards that affect the Curse/IGG balance: Ambassador, Watchtower, Trader, Embargo.  And as always, Masquerade and Jack of All Trades throw a wrench into any cursing strategy.  Jack in particular refocuses the IGG game onto Provinces rather than a Duchy rush.

Works with:

  • Duchy
  • Trash-for-benefit.
  • 5/2 split to give your opponent a curse before they shuffle the first time.
  • Coppersmith/Counting House and other Copper-based strategies.
  • Can provide support for other Cursers.

Conflicts with:

  • Other fast cursers conflict with an IGG/Duchy rush.
  • Ambassador/Trader.
  • Opponent’s heavy trashing MIGHT be able to overcome an IGG rush, but then you should trash away your Copper too and carry on as of the IGG rush didn’t happen.
  • Embargo.
  • City. They’ll be powered up for both players, but if you’re focusing your $5 buys on IGG your opponent will have more Cities.
  • Masquerade/Jack of All Trades
Posted in Hinterlands | Tagged | 39 Comments

Seaside: Treasure Map

The following is a revised version of a guest article written by jotheonah, originally posted on the forum

Treasure Map

Dominion: Seaside

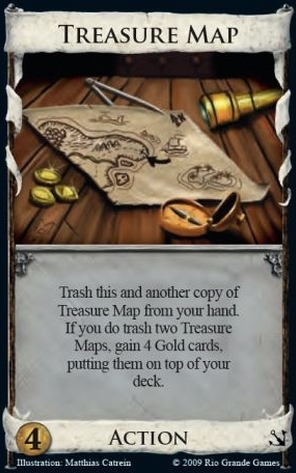
Treasure Map is, as Donald X. would say, a cute card. Gold is really good, right? And 4 Golds, that’s a lot of Gold. Right there, on top of your deck.

The problem is that Treasure Map costs $4.  Because you can’t open with a pair of Treasure Maps, at a minimum, it will take at least three turns to get 2 Maps, another 2 to hit a reshuffle, and at that point you have to rely on luck to get 2 of your 12 cards together in a hand (and that’s assuming you open Treasure Map/nothing). Here is a good graph of those probabilities:

Treasure Map Activation Probability Graph

X-axis: # of cards in deck; Y-axis: probability; Colored lines: # of TM's in deck

Your odds of hitting before the third reshuffle without help are a mere 29 percent. The odds get better if you buy more Maps, but that’s time your opponents could be spending building up an engine or just buying those Golds the easy way.  And the probabilities may not be relevant to you in a game where your opponent cashes in on Turn 5 and you’re still floundering on Turn 15. Treasure Map is a notoriously luck-dependent card, and simulators prove that no Treasure Map-only strategy consistently beats Big Money.

Now, 29% is pretty bad in a 2-player game.  But Treasure Map is one of those cards that subtly gets better with more players: you don’t want to be winning just 29% in a two-player game, but 29% looks pretty darn good when you’re sitting in fourth position in a 4-player game against three people who are all better than you.

So you don’t buy Treasure Map if you don’t have help in 2-player, or if you think you’re better at Dominion than your opponents.  What help should you be looking for?  Note that you have to play one Treasure Map and have the other in hand to get the Golds, so, promising as they might sound at first, Scheme, Golem, and Throne Room are of no help to you (well, Scheme actually can be helpful, but not in such an obvious way).

The single best help you can find is Warehouse.  Cellar is an OK substitute, but Warehouse is just ridiculously tailor-made for Treasure Map.  Even better, it’s the ideal card for your post-Treasure Map deck, since your deck’s power will be distilled into a few cards amidst a sea of green.  Warehouse likes concentrated power.

Trashers are also a big help, especially mass-trashers like Chapel. Get your deck down to 5 cards and your Treasure Maps are guaranteed to hit, plus once they do, your deck will be more than half Gold. This takes slightly longer than Warehouse, however, since you have to balance trashing with making sure you still have enough money left in your deck to get the second Treasure Map.

Haven is a natural fit with Treasure Maps – save that Map until next turn. Courtyard is a decent substitute: it’s better for your deck in the long-term, but you might draw two Treasure Maps together with no Actions to play them.

When trying to set up Maps without a trasher, be careful how much else you buy. Cantrips are best as they don’t really take up space in your deck. One Silver might be helpful to get the Maps quickly, but too many will be a liability.  Terminal cyclers and drawers are no good – there’s nothing worse than drawing two Treasure Maps together, with no Actions left to activate them.

These are mostly early-game approaches to Treasure Map.  The key to all of these approaches is that they are fast, and they rely on self-replacing cards that cost less than Treasure Map.

It is also possible to quickly build a small engine that draws your deck, and then use Treasure Maps to get all the money you’ve missed out on while building that engine.  The most obvious way is Tactician, which also gives you some +Buy for those Golds.  Talisman can let you get two Maps at once, which isn’t all that helpful until you throw in Royal Seal or Watchtower.  Scrying Pool decks in the midgame can often take advantage of a pair of Treasure Maps to stock up on Gold.

Midgame Treasure Map strategy is more vulnerable to counters by your opponent.  Warehouse/Treasure Map is fast enough so that you can’t really counter it effectively (except maybe with Sea Hag or Young Witch), but if you wait for the midgame then you run into Minions, Possession, and the $5 cursers.

So I’ve managed to get four Gold onto my deck, what do I do with it? Well, the obvious answer is “buy a Province.”  And a lot of the time that is the right buy. In particular the Province buy. But four Golds and seven Copper is not going to power you through 5 Colonies, and your second set of Maps is going to be a lot harder to activate than your first. (Trying for a second set is almost certainly going to fail, unless you have a very specific plan for it.) So in a Colony game, a Platinum is usually the right choice. You’ll have to judge based on the efficiency of your opponent’s deck.

If you can do it without a lot of extra trouble, and without making it harder for your Maps to hit, it’s nice to be able to exert some control over what the fifth card will be on our Gold x4 hand.  Scheme is a good way to do this, stocking up on Schemes and Pawns (or another cantrip +Buy, so as not to hurt the chances of hitting the Maps in the first place).  Return your +Buy card to the top of your deck after you activate your Maps and you’ll find yourself with 13 and 2 buys, much more helpful than 12 and one buy.

Wharf is even better than a Schemed Pawn (though you have to love the thematic synergy there), giving you the +Buy and another 2 cards, but Wharf is a terminal drawer, so getting it set up might not be worth it. On the other hand, it’s a non-terminal draw on your next turn, so it could help you set up the Maps if played carefully.

By far the easiest to set up is Nomad Camp, since it goes to your top-deck when you buy it, assuming you can muster $4 after trashing your Maps. This means at least having one Silver floating around.

Remember, of course, that your primary goal is colliding your Maps!  Time is of the essence with Treasure Maps, and every non-drawing card that you add to your deck is another card in the way between your Maps.  So as nice as it is to get an extra 5th card into that Gold x4 hand, you shouldn’t do it at the cost of ruining your Treasure Map collision.

If you don’t see an enabler for Treasure Maps on the board, just say no. Treasure Maps are a shiny trap. Even if there are good enablers, think seriously about whether Maps are going to be faster than the next best alternative. Playing Treasure Maps does tend to involve committing to them, at least until you get them activated. Trying to pursue another strategy with Treasure Maps on the side is a losing proposition.  Plan on the worst luck scenario, not the best one.

When you actually get those Maps to hit, it’s a nice feeling, and it can certainly decide the game.  But be smart with them – they’re not nearly as cute as they look.

Combos with:

  • Early game:
    • Warehouse, Cellar
    • Haven
    • Early trashing
  • Midgame:
    • Tactician
    • Watchtower/Talisman

Conflicts with:

  • Lack of the above
  • Cursing attacks
  • Possession
  • Deck-inspection attacks like Bureaucrat, Spy, Fortune Teller, Rabble, Minion.
Posted in Seaside | Tagged | 13 Comments

Finalists for the 2011 DominionStrategy.com Kingdom Design Challenge

2011 DominionStrategy.com Kingdom Design Challenge

A tremendous shout-out to everyone who submitted a Kingdom to the Kingdom Design Challenge.  These are the nine Kingdoms that we selected to use in the Final of the 2011 DominionStrategy.com Championships.  These are outstanding Kingdoms that I would highly recommend to anyone looking for a custom set game.

After you’ve had a chance to think through the sets or try them out, don’t forget to vote for your favorite!  Remember, the winner of your vote will receive a Dominion expansion of his or her choice, so go and support the creator of your favorite Kingdom!

This slideshow requires JavaScript.

All of these sets are also available on dominiondeck.com

Game 1: Moat, Tunnel, Bishop, Gardens, Ironworks, Young Witch, Tournament, Council Room, Torturer, Border Village
Bane: Hamlet
Colony: No

Game 2: Crossroads, Loan, Silk Road, Baron, Bureaucrat, Apprentice, Duke, Farmland, Harem, Nobles
Colony: Yes

Game 3: Haven, Great Hall, Workshop, Masquerade, Ironworks, Island, Throne Room, Tactician, Goons, King’s Court
Colony: No

Game 4: Lookout, Masquerade, Oracle, Smithy, Worker’s Village, Festival, Ghost Ship, Margrave, Mountebank, Treasury
Colony: No

Game 5: Embargo, University, Scrying Pool, Worker’s Village, Remodel, Wharf, Rabble, Grand Market, Forge, Peddler
Colony: Yes

Game 6: Menagerie, Tunnel, Ghost Ship, Governor, Inn, Monument, Worker’s Village, Grand Market, Goons, Adventurer
Colony: No

Game 7: Embargo, Scheme, Menagerie, Watchtower, Fishing Village, Remake, Haggler, Vault, Grand Market, Expand
Colony: Yes

Game 8: Crossroads, Secret Chamber, Warehouse, Loan, Ambassador, Caravan, Worker’s Village, Bureaucrat, Merchant Ship, Grand Market
Colony: Yes

Game 9*: Chapel, Fishing Village, Watchtower, Ironworks, Gardens, Bridge, Highway, Mountebank, Ill-Gotten Gains, Goons
Colony: Yes

Vote for your favorite!

*As the final only lasted eight games, the ninth set was unused.  It is, however, still eligible for voting.

Posted in DominionStrategy Championships | 2 Comments